7. Client Tools – Clients
The Clients section of your Client Tools is where you can manage all activities of your clients in The Hub. Billing clients for services with the built-in Billing tool or giving them controlled access to your client portal are entirely optional, and can be configured separately.
Before clients can access your client portal, they must click a link in an invitation email that you send to them, and create their account in your client portal. This means that you can add as many clients as you need or want, get things all set up nicely for them, and send them invitations at a later time if you wish.
To create a completely white-labeled experience for your clients, be sure to set up the Hub Client plugin on one of your sites, and choose that site as their Primary Client Portal. See How to White-Label the Client Experience below for details.
For details about managing clients, see the Managing All Clients chapter below.
7.1 Getting Started
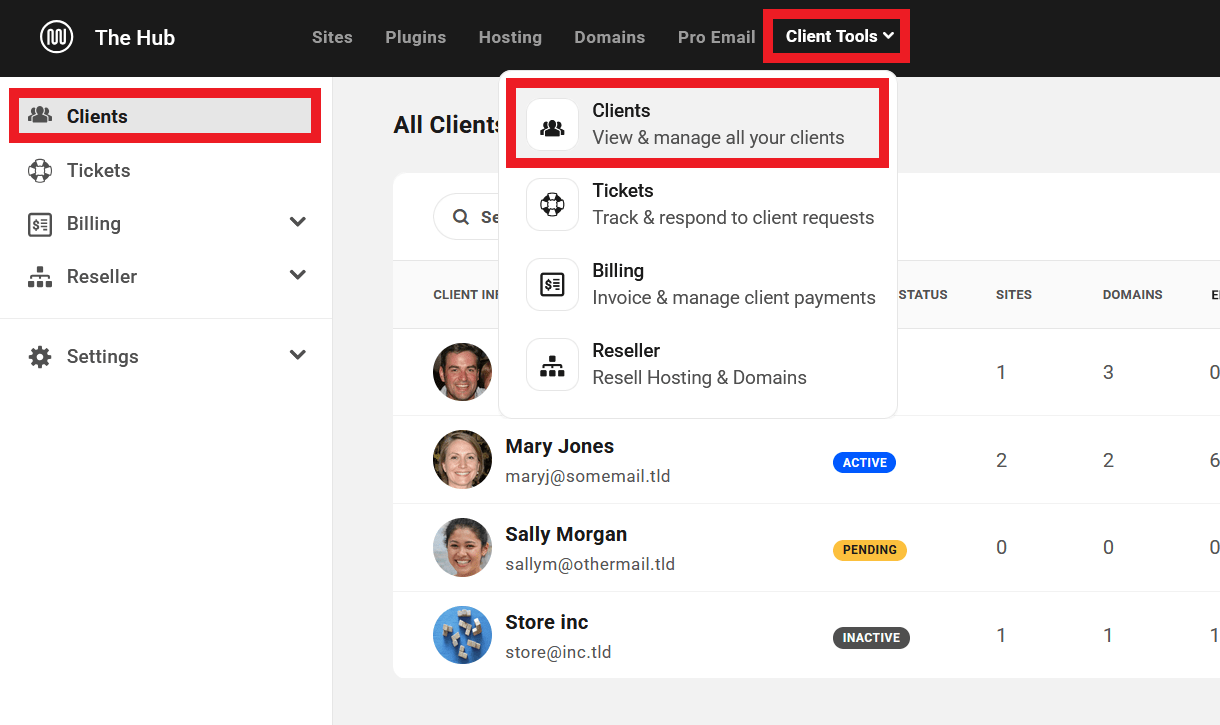
Copy chapter anchor to clipboardTo get started, click the Client Tools menu item in The Hub main navigation. Then click Clients.
If you can’t see or access this feature in your Hub, please be sure the Client Tools option is set to Visible under your Hub Preferences menu. See My Sites Overview > Getting Started for more information.
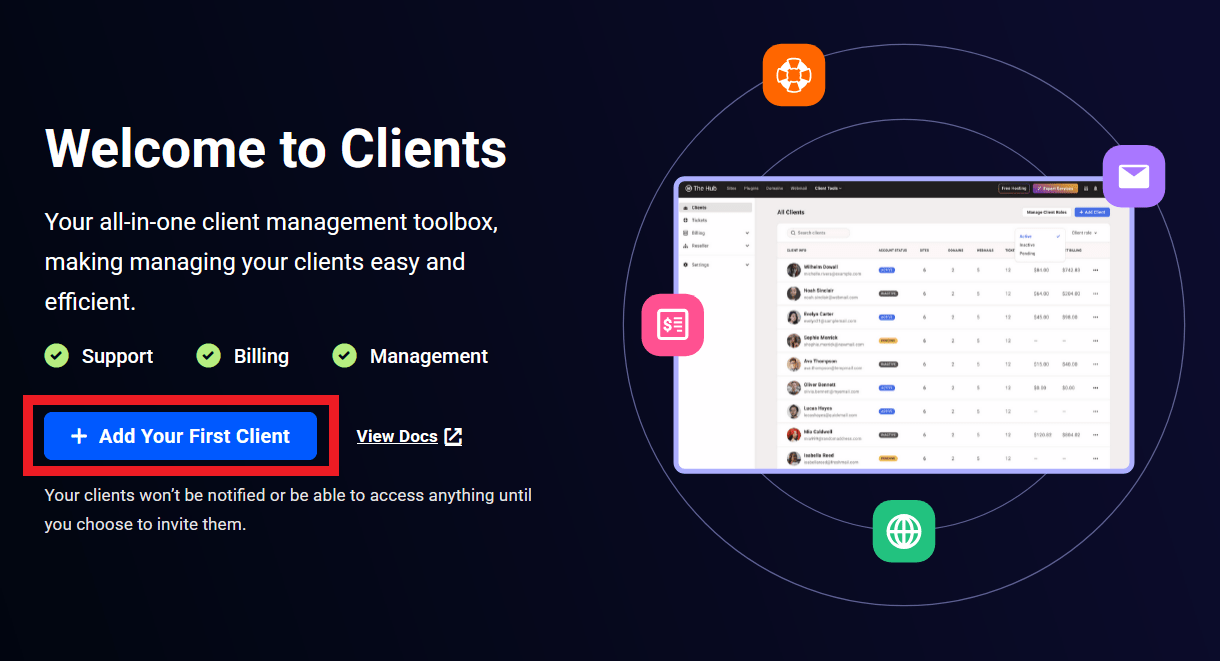
If you haven’t already imported clients from your Stripe account in the Billing Settings of your Client Tools, you’ll be initially prompted to add your first client here. Click the + Add Your First Client button.
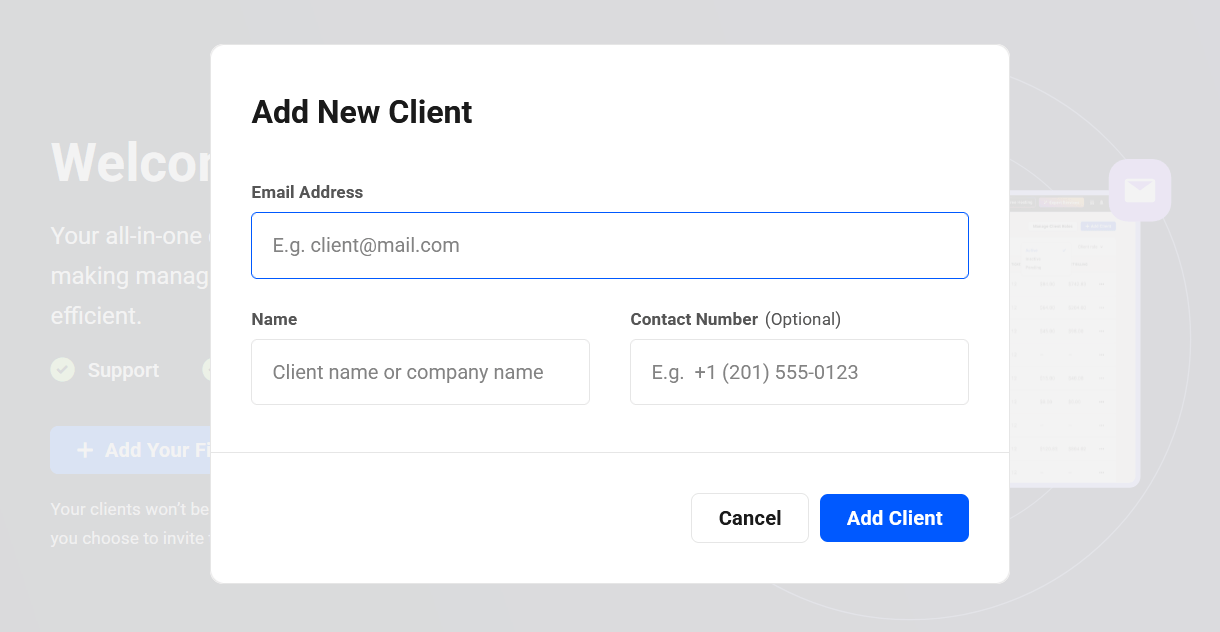
That will pop open a modal window where you’ll enter the Email Address, Name and optional Contact Number of the client. Then click Add Client.
The screen will refresh and you’ll see the current details of the newly added client under the Client Profile tab. For more information about managing individual client details, see the Client Profile chapter below.
7.2 Managing All Clients
Copy chapter anchor to clipboardOnce you’ve added one or more clients to your Hub, you’ll see them all listed under the Clients tab.
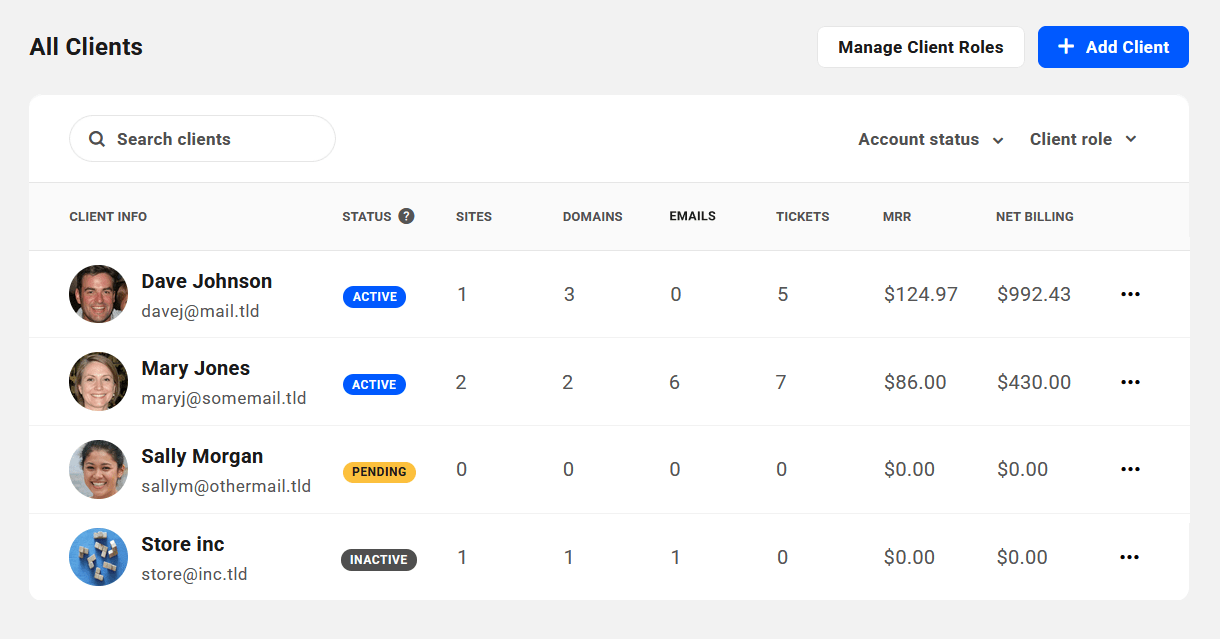
Click the + Add Client button at the top to add a new client. This will pop open the same modal window as when you added your first client as above.
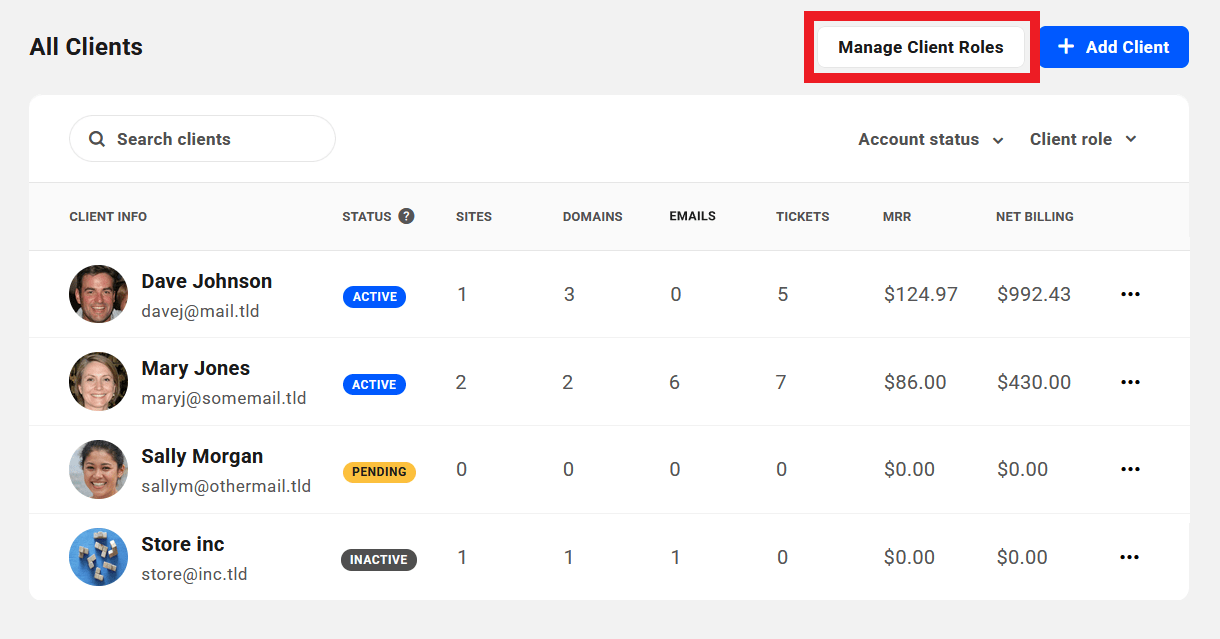
The All Clients list contains summary information for each client, as follows:
- Client Info – This column displays the client’s email address, as well as their name and Hub account Gravatar if available.
- Account Status – Indicates whether the client has accepted the invitation to join your client portal or not (Active or Pending), or if the invitation has not yet been sent (Inactive).
- Sites – Displays the total number of sites linked to this client.
- Domains – Displays the total number of domains linked to this client.
- Emails – The number of Pro Email domains linked to this client.
- Tickets – The number of support Tickets for this client.
- MRR (Monthly Recurring Revenue) – The average monthly revenue for all subscriptions of this client. This amount does not include any taxes you may have added to your invoices. This only shows data if you have enabled Billing in your client tools.
- Net Billing – The total amount billed to date to this client. This amount includes any taxes you may have added to your invoices. This only shows data if you have enabled Billing in your client tools.
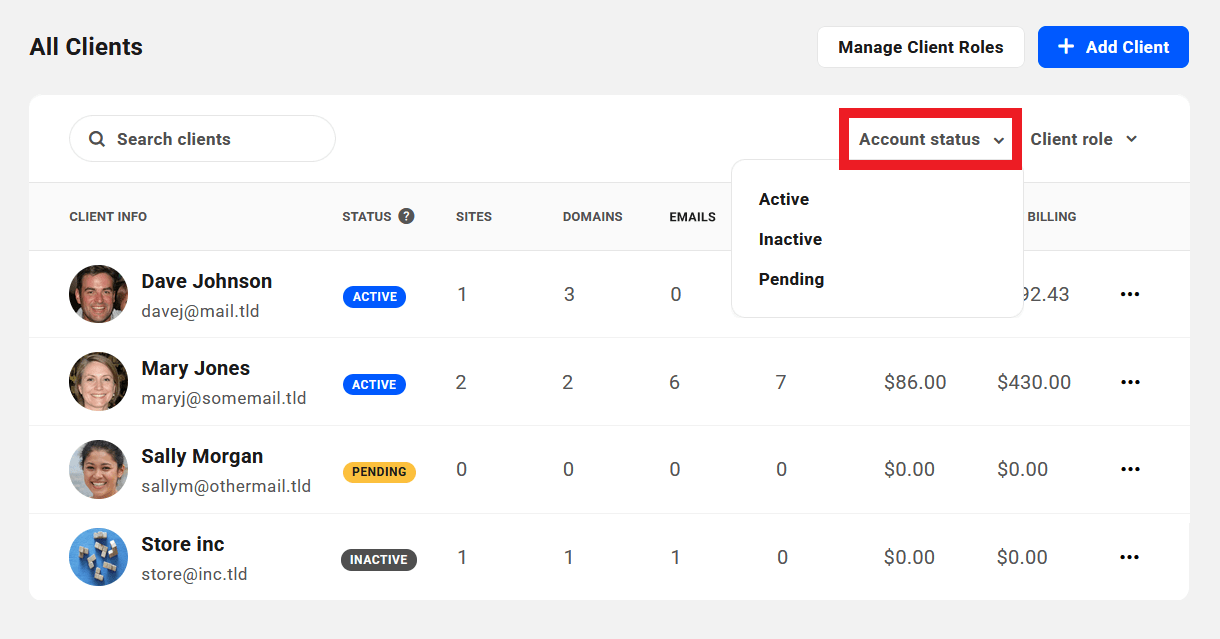
Click the Account Status dropdown to filter the list of clients to display only those with the selected status:
- Active – Clients who have accepted the invitation to join your client portal and have the access granted by the capabilities you have enabled in their assigned client role.
- Pending – Clients to whom the invitation to join has been sent but who have not yet accepted it.
- Inactive – Clients who have not been invited and have no access to your client portal.
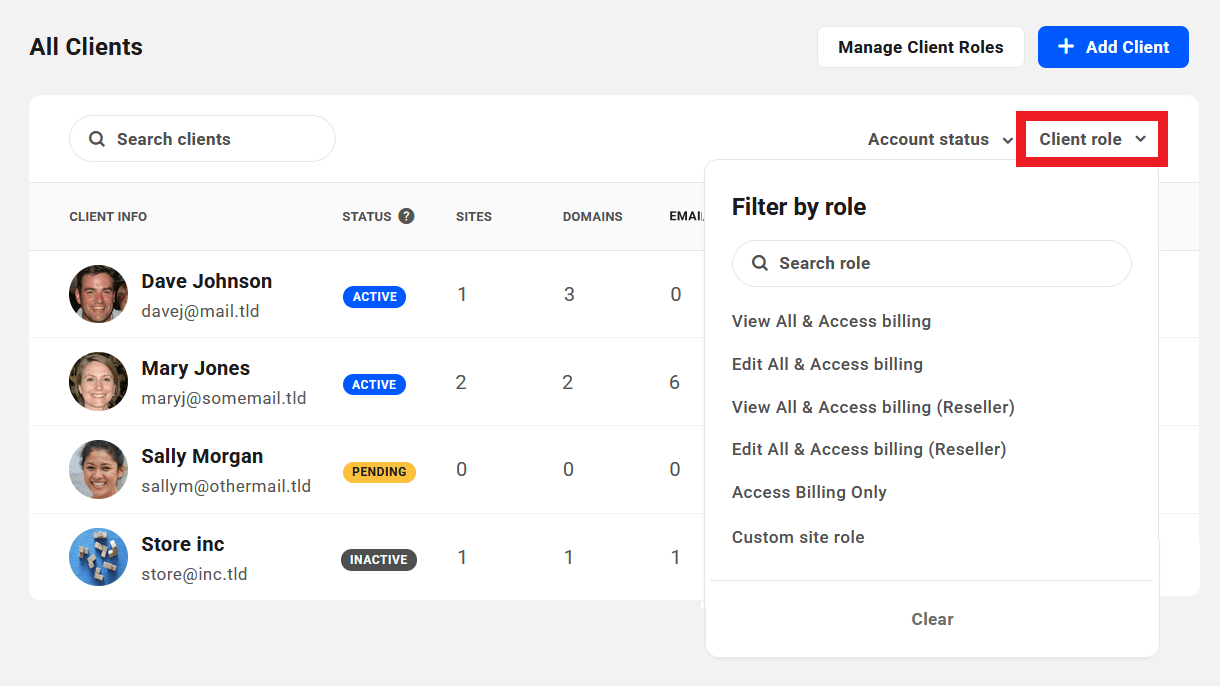
Click the Client Role dropdown to filter the list of clients to display only those with the selected role. See the Client Profile chapter to learn how to assign a role to a client, and the Client Roles chapter in the Client Tools doc for details about default roles and how to create custom ones.
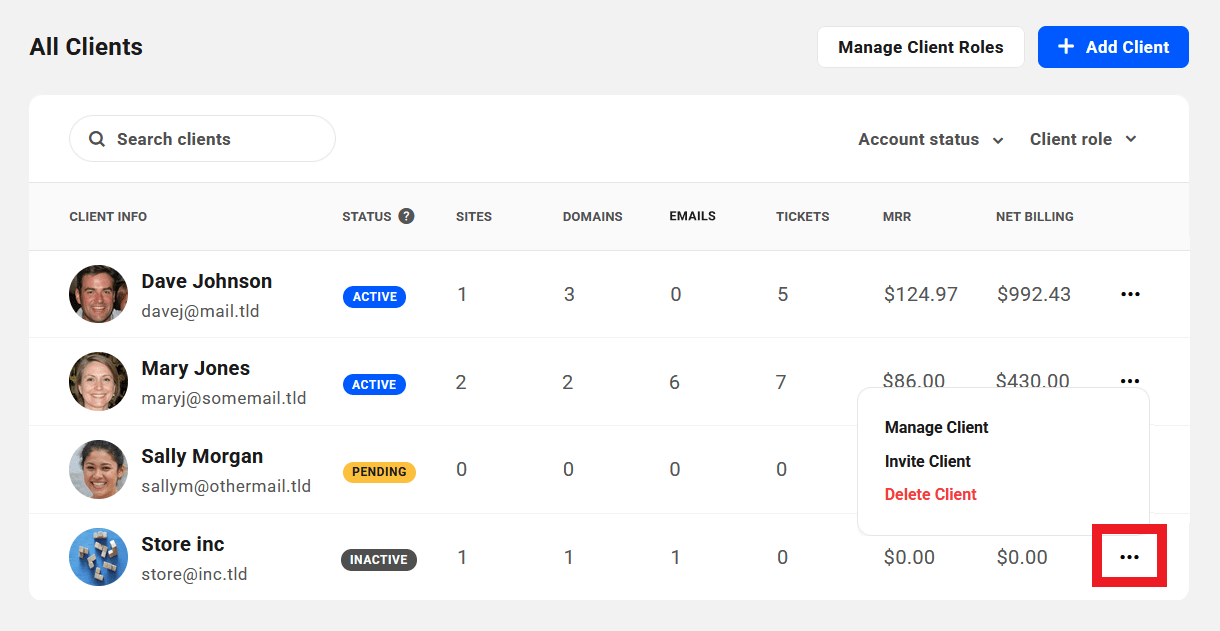
Click the ellipsis icon at the far right of any client row to reveal management options for that client.
- Manage Client – Click to be redirected to the Client Profile page of the client.
- Invite Client – This appears for clients whose status is Inactive. Click to send the client an invitation to join your client portal. See The Client’s Account for more information.
- Resend Invitation – This appears for clients whose status is Pending. Click to resend the invitation if needed. To avoid spamming, invitations can be sent only once per 24-hour period.
- Delete Client – Click to delete the client.
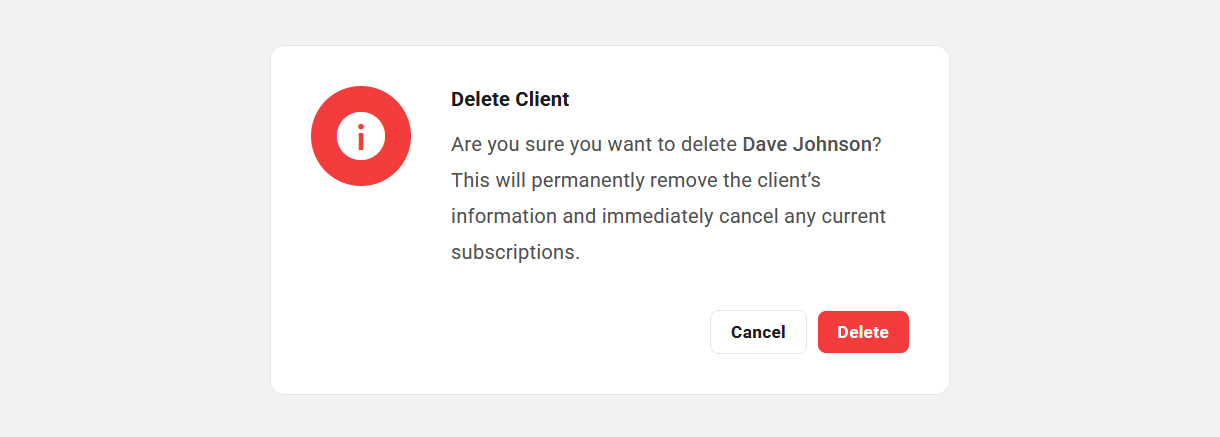
If you select the Delete Client option as above, a modal window will pop open prompting you to confirm the action to help prevent accidental deletion. This action will also delete the same data from your Stripe account.
Click the Manage Client Roles button at the top to be directed to the Client Roles tab in the General Settings where you can set the default role, as well as create, edit or delete custom roles.
7.3 Managing Individual Clients
Copy chapter anchor to clipboardClicking on the Manage Client option for any client on the All Clients screen, or clicking anywhere on the client’s row, will direct you to the Client Profile screen in the details area for that client. This is where you can view and manage all aspects of the client’s account, as well as invoices and subscriptions if you have set up Billing.
7.3.1 Client Profile
Link to chapter 3Clicking on the Manage Client option for any client on the All Clients screen, or clicking anywhere on the client’s row there, will direct you to the Client Profile screen in the details area for that client. This is where you can view and manage all aspects of the client’s account as well as their subscriptions.
Client Details
This module of the client profile displays the Name, Email Address and optional Contact Number of the client. Click the Edit button in the module to edit any client information shown here. Click the copy icon next to the email address to copy it if needed.
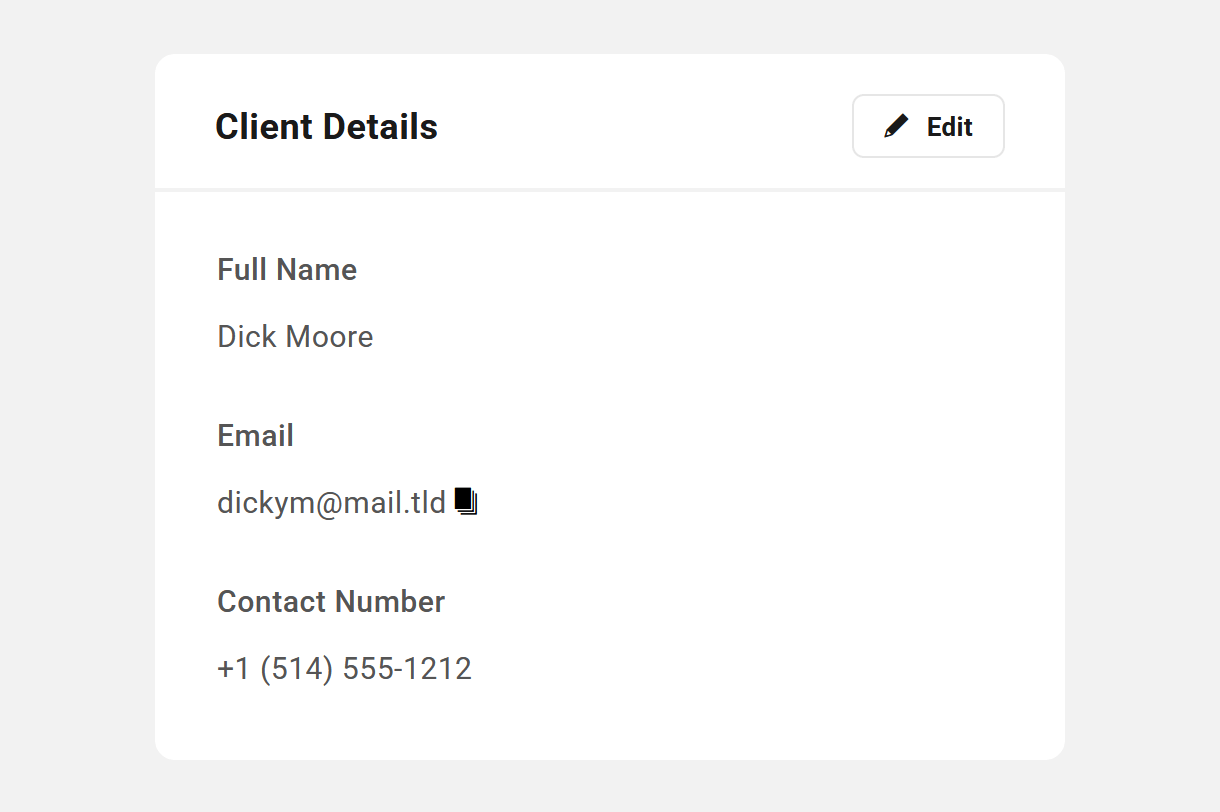
Only the client can edit their Email Address in your client portal once their account has been activated. This can only be done in their own profile; see The Client’s Account below for details. You can of course edit anything in a client account that is in Pending or Inactive status, including the email address.
Client Access
This module displays information about the level and type of access that you have given to the client in your portal, if any. For example, the image below illustrates how this module would look for a client whose status is Active.
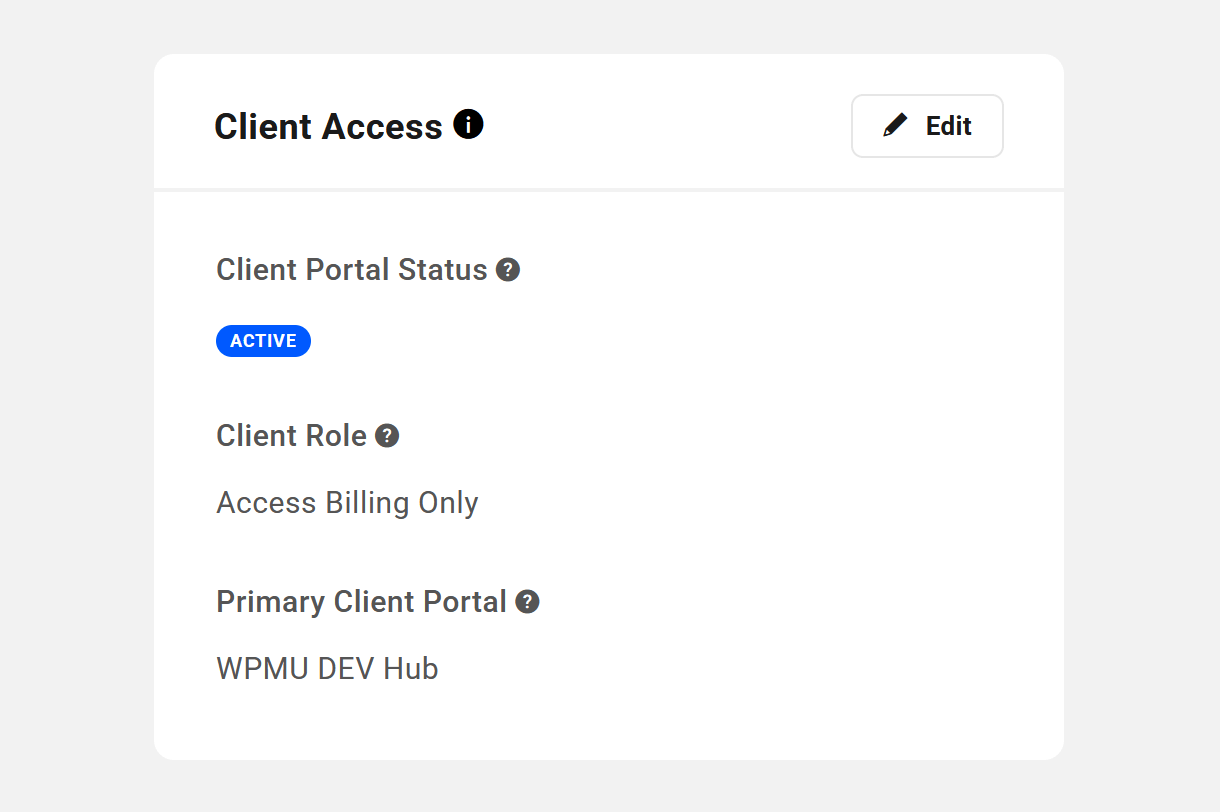
Client Portal Status
This indicates whether the client has accepted the invitation to join your client portal or not.
- Inactive – Clients that you’ve added but who have not yet been invited and have no access to your client portal.
- Pending – Clients to whom the invitation to join has been sent but who have not yet accepted it.
- Active – Clients who have accepted the invitation to join your client portal and have the access granted by the capabilities you have enabled in their assigned client role.
See The Client’s Account chapter below for details about the client’s experience when you invite them.
If you have no intention of granting the client any access to your client portal, simply do not invite the client and leave everything here at their default values.
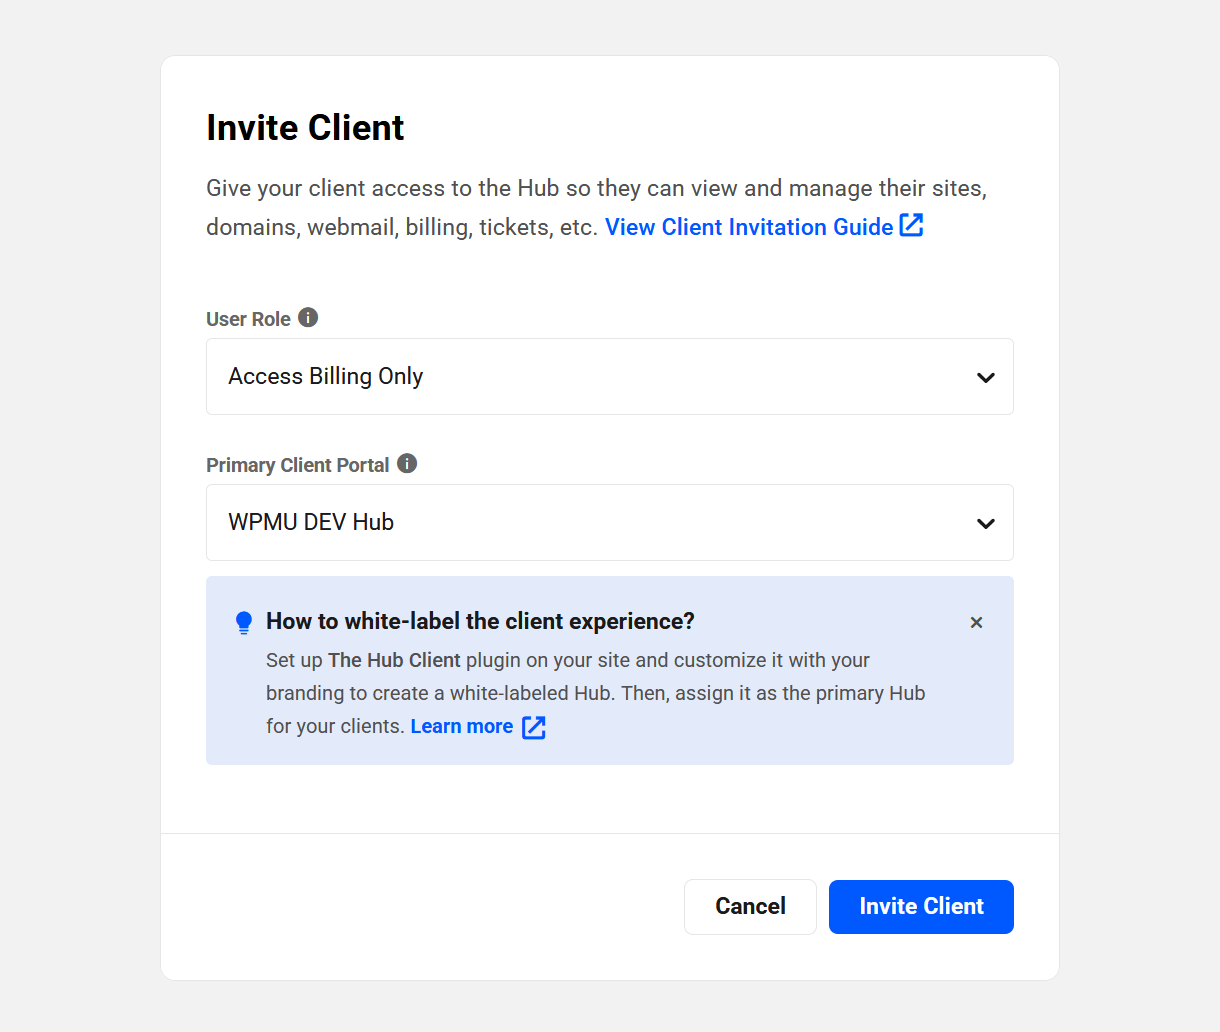
For a client who has not yet been invited to join your client portal and whose status is Inactive, an Invite button will appear here.
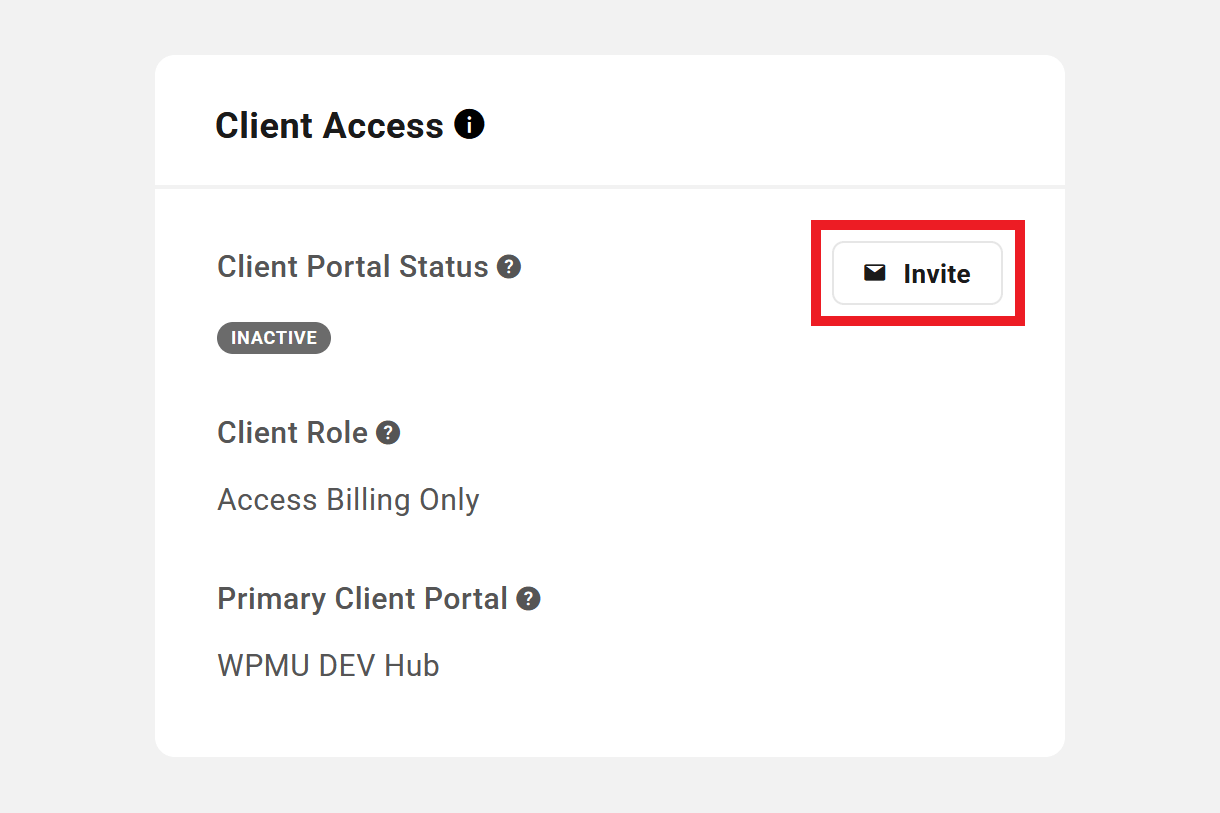
Clicking that button will pop open a modal window where you can select the Client Role and the Primary Client Portal to assign to the client before clicking the Invite Client button.
For a client who has been invited to join your client portal and whose status is Pending, a Resend Invitation button will appear here. To avoid spamming new clients, the invitation can be sent only once per 24-hour period.

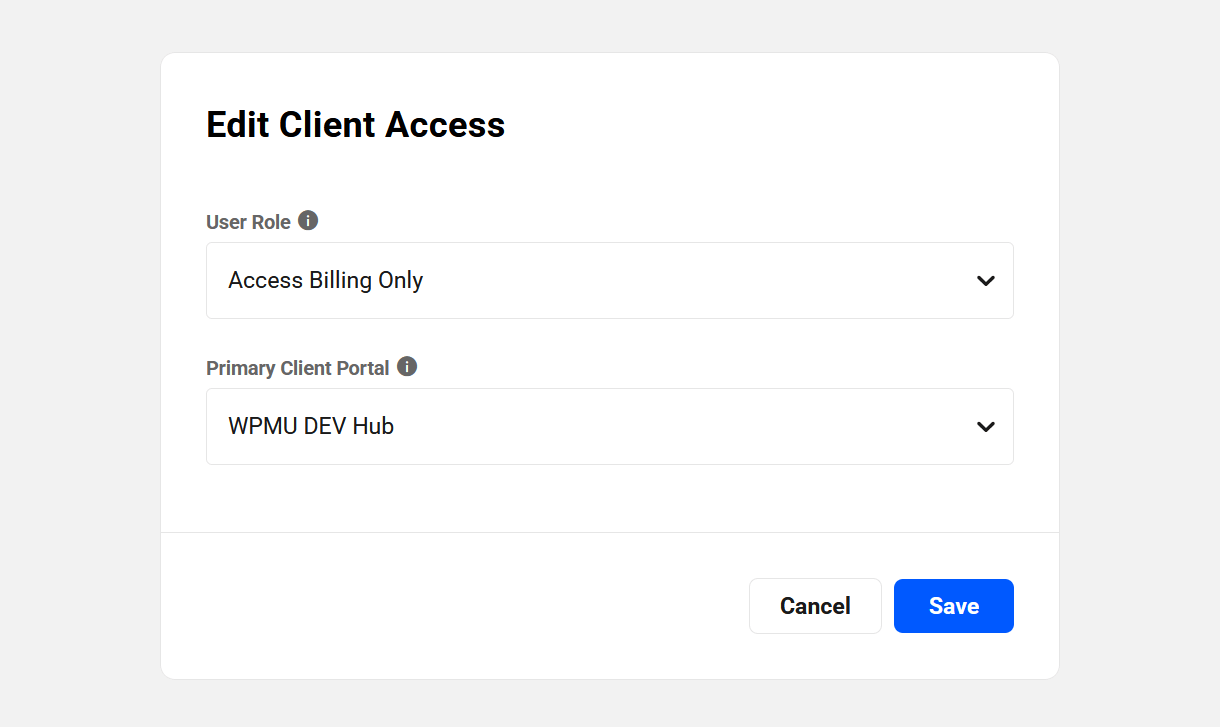
For a client whose status is either Pending or Active, an Edit button will also appear at the top of the module.
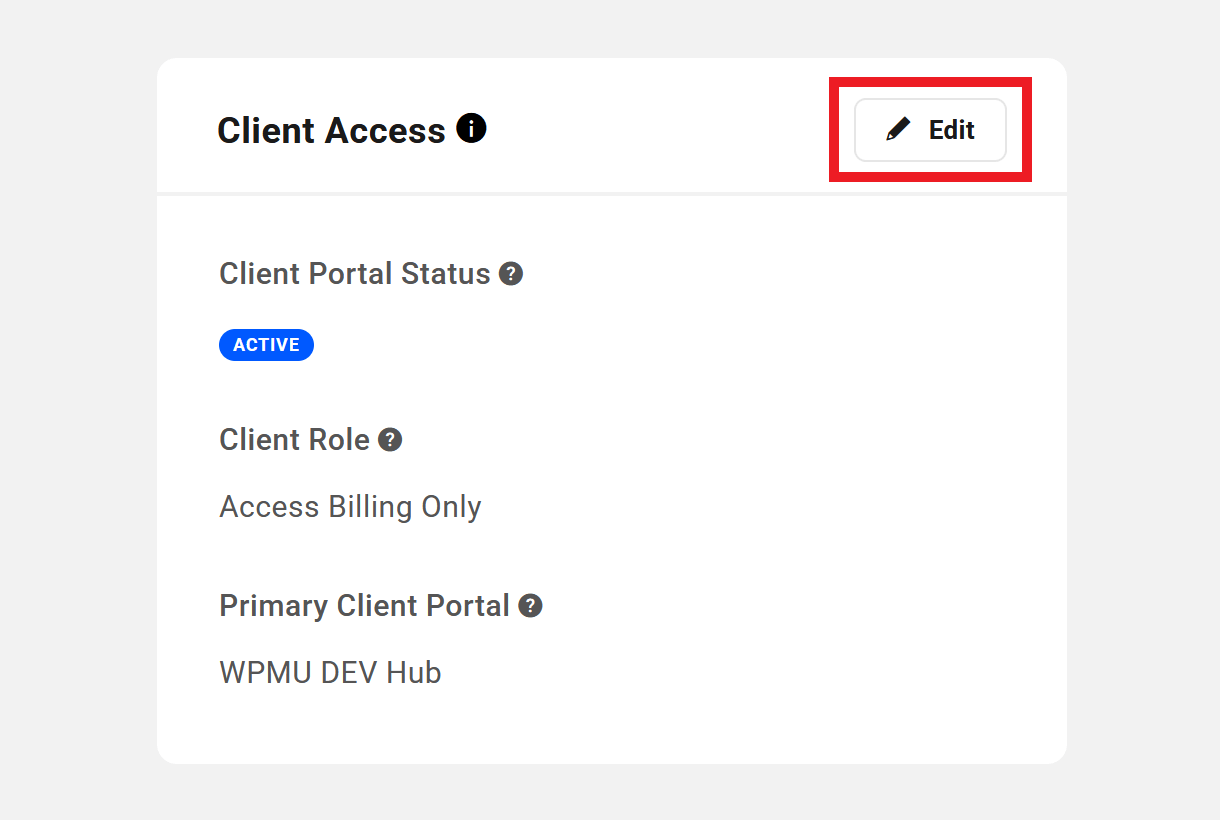
Clicking that button will pop open a modal window where you can update the Client role and/or the Primary Client Portal for that client.
Client Role
This indicates the role assigned to the client when you first invited them, or when their Client Access was edited as above
Primary Client Portal
This indicates the Client Portal assigned to the client when you first invited them, or when their Client Access was edited as above
If you have followed our recommendation and are using the Hub Client plugin on at least one of your own sites to white label the experience for your clients, you can adjust the Primary Client Portal that will be used for all communications with this client.
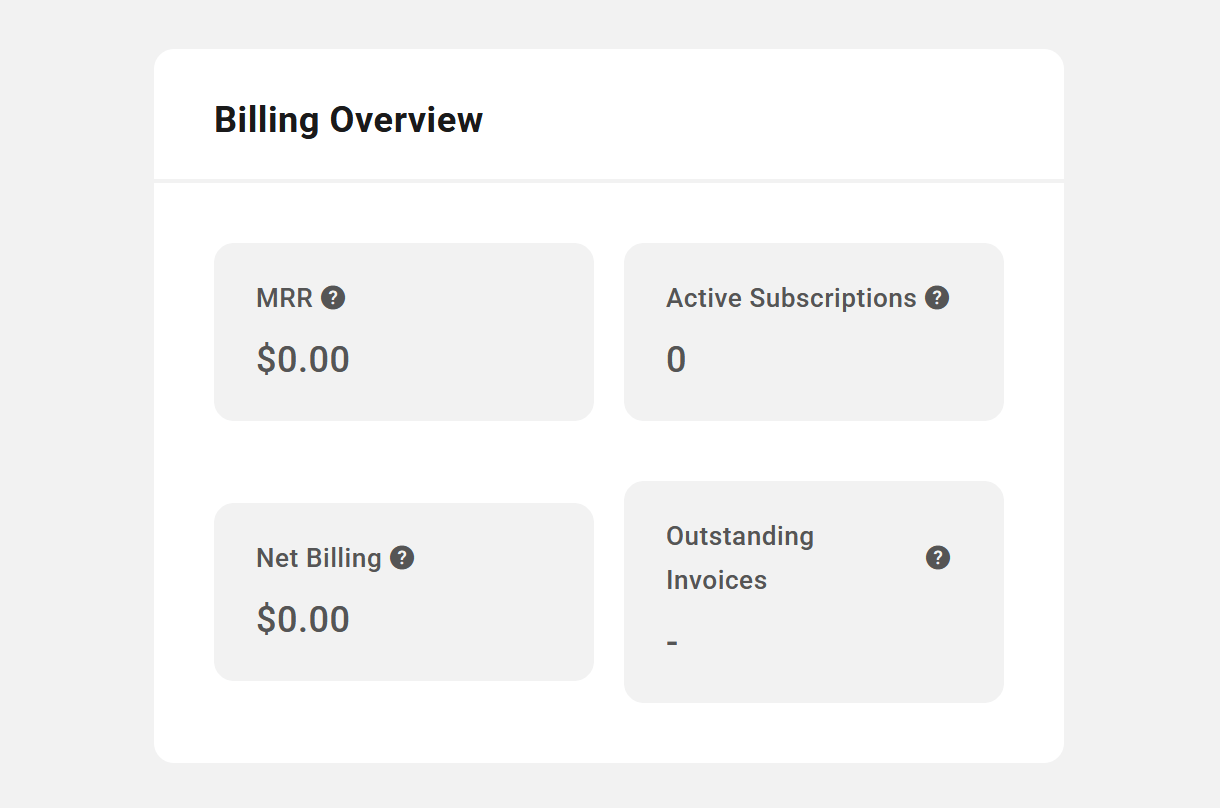
Billing Overview
If you have set up Billing in your Client Tools, this module will display a summary of all billing activity for this client.
- MRR (Monthly Recurring Revenue) – The normalized monthly revenue for all subscriptions of this client. This amount does not include any taxes you may have added to your invoices.
- Active Subscriptions – The total number of active subscriptions for this client.
- Net Billing – The total revenue to date from this client, minus any refunds issued. This amount includes any taxes you may have added to your invoices.
- Outstanding Invoices – The total number of unpaid invoices for this client.
Billing Info
This module displays the billing information for the client.
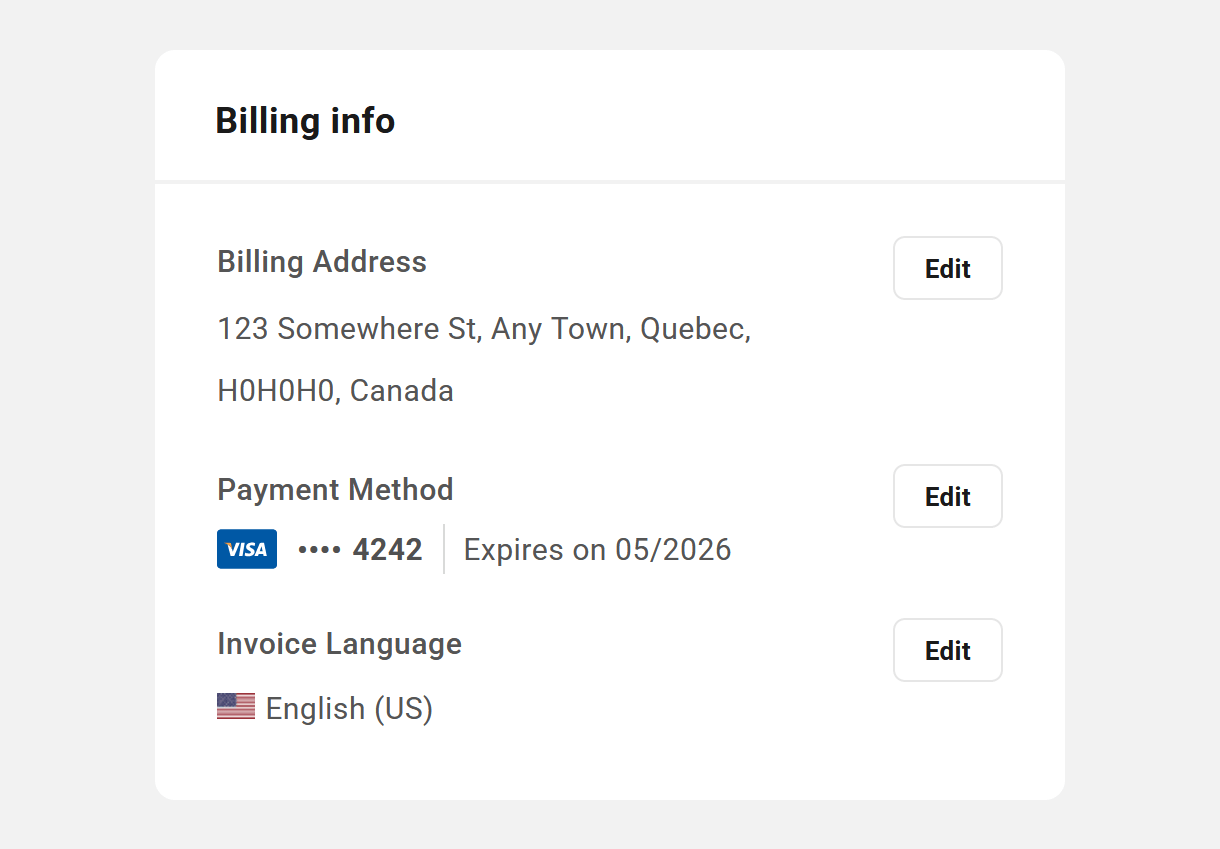
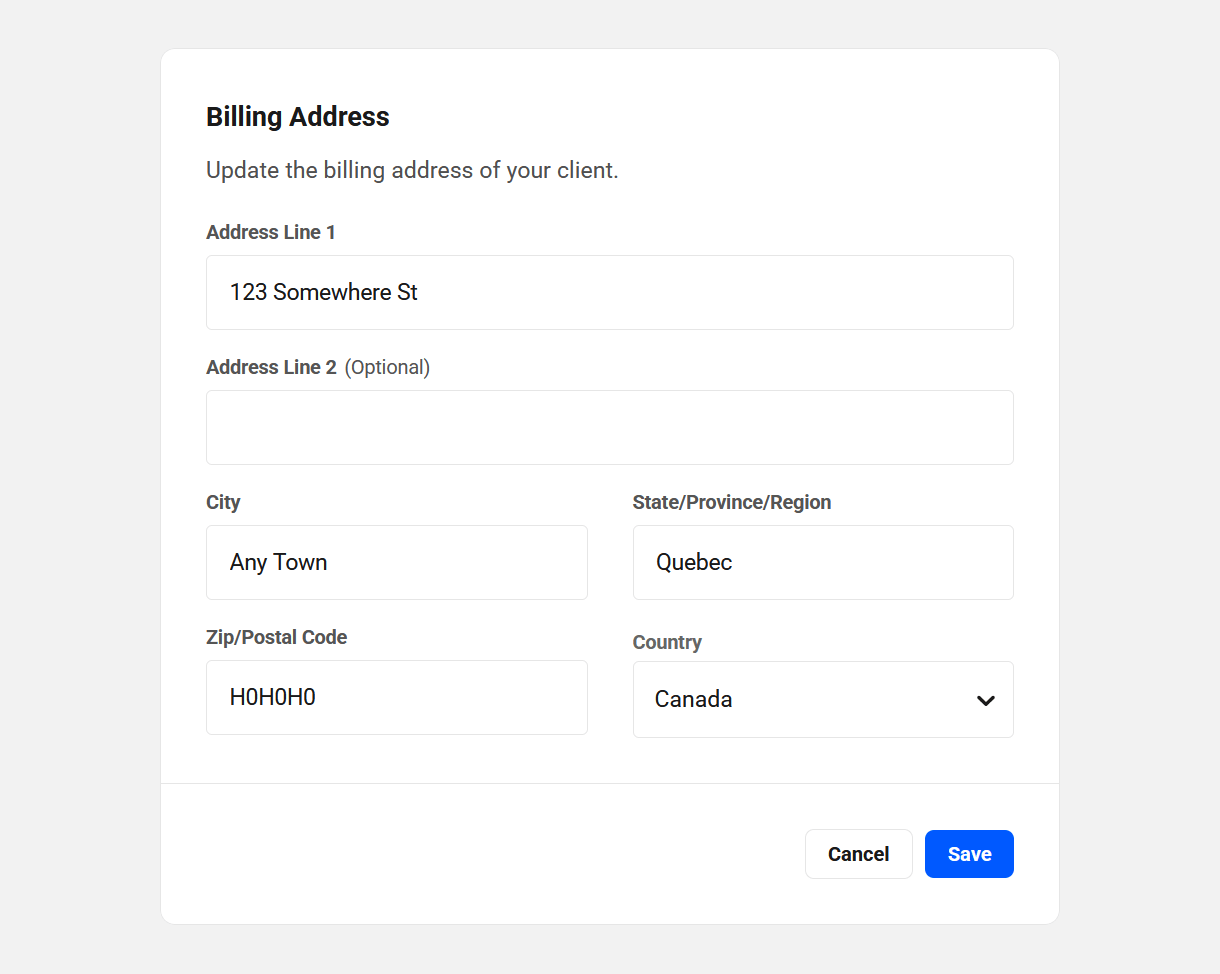
Click the Add or Edit button next to the Billing Address to pop open a modal window where you can add or update the client’s billing address if needed.
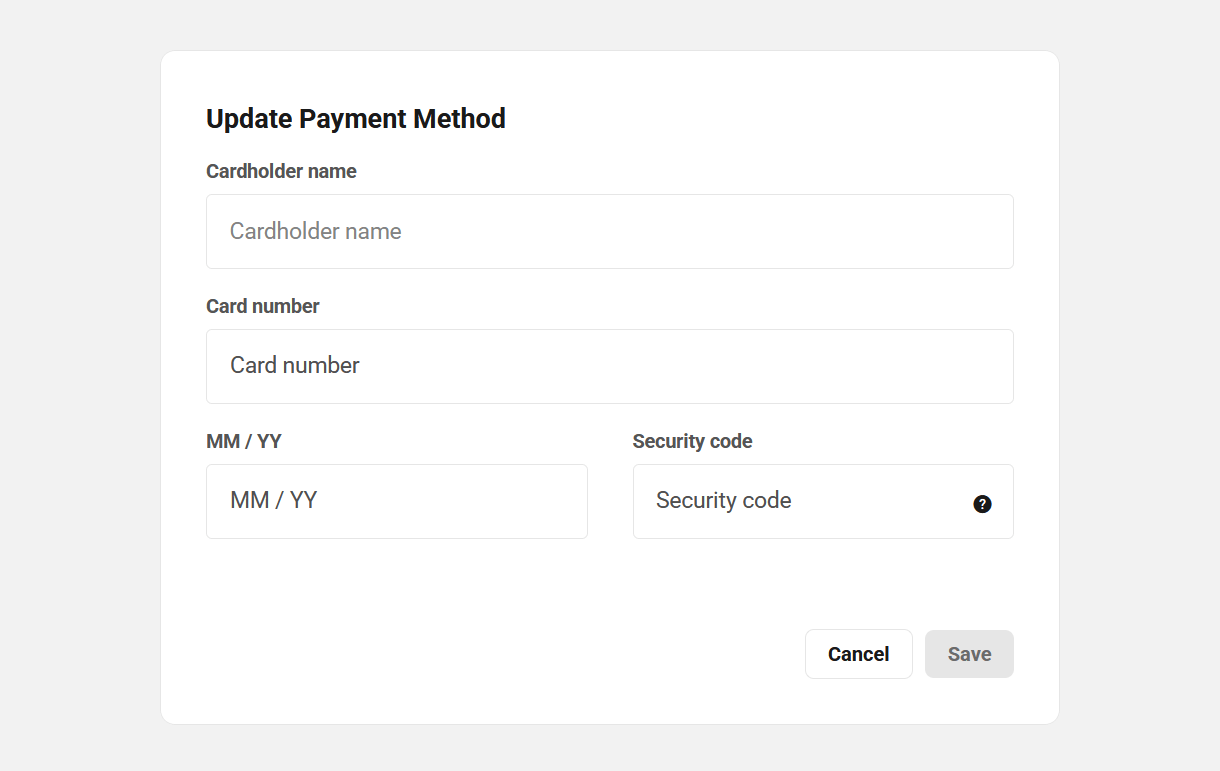
Click the Add or Edit button next to the Payment Method to pop open a modal window where you can add or update the client’s payment method if needed.
Note that when adding or updating the client’s Payment Method, the credit card data is sent securely to Stripe and is not stored on WPMU DEV servers. See our Privacy Policy for more info.
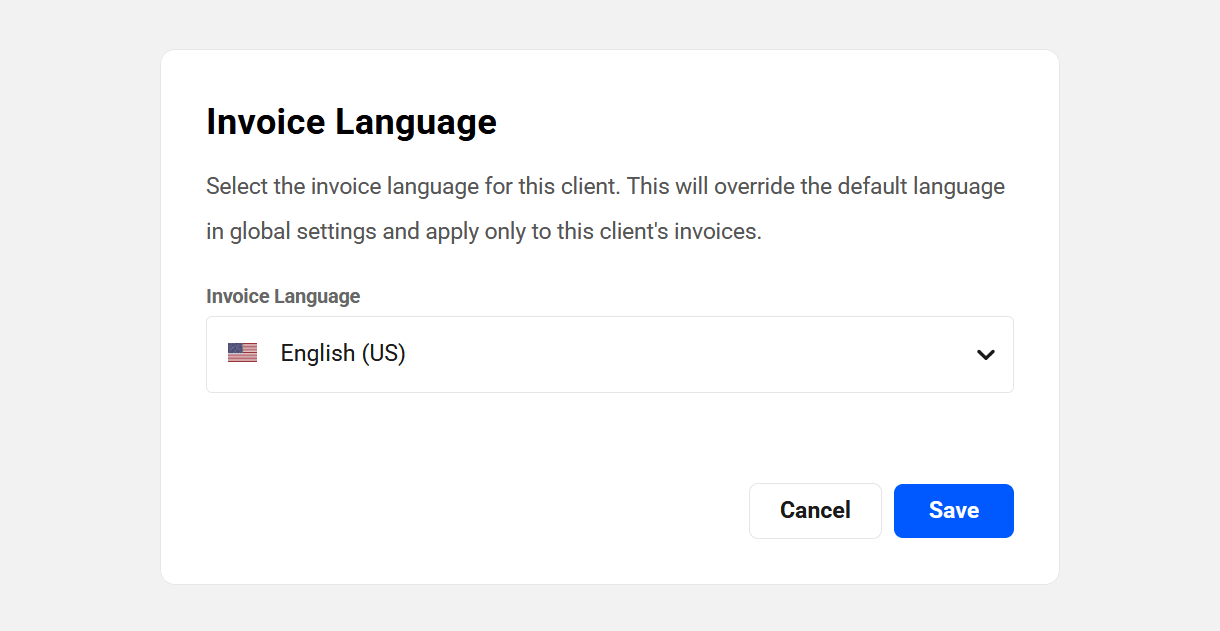
If you need to change the Invoice Language for a client to a language other than what you have set as the default invoice language in the Billing Settings, click the Edit button next to that label and select the language needed.
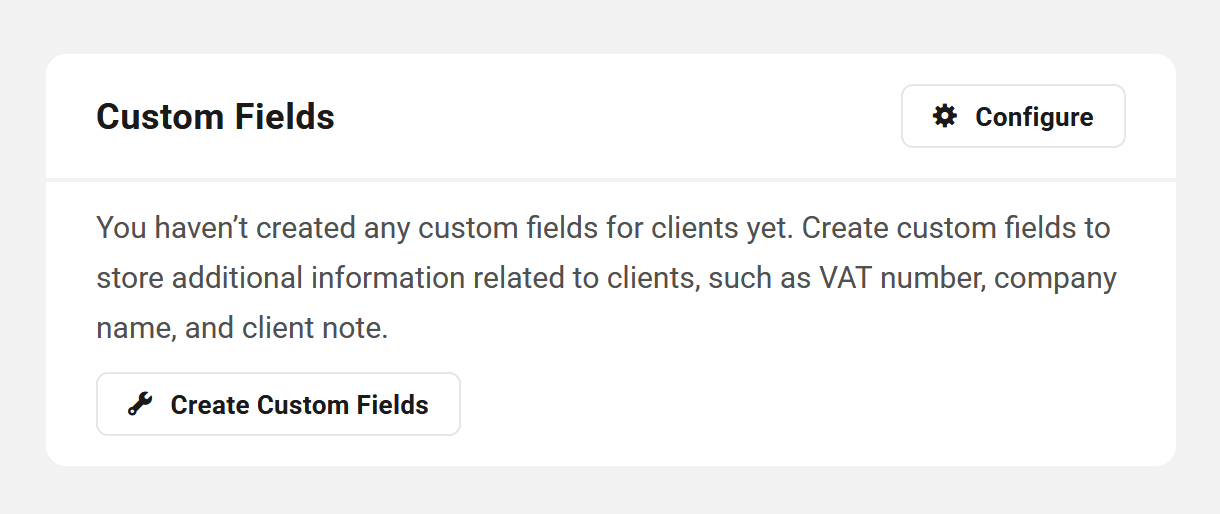
Custom Fields
This module will display any custom fields that you may have created for your Client Profiles under the Custom Fields tab in the General Settings. Client custom fields can be made visible to clients in your client portal, or set to hidden so only you can see them.
If you haven’t created any custom fields yet, click either the Configure or Create Custom Fields button to get started.
The example image below shows a client profile with custom fields created for Additional Contact Name and Number that are available for clients to fill in, and an Internal Notes field that is hidden from clients for your use only.
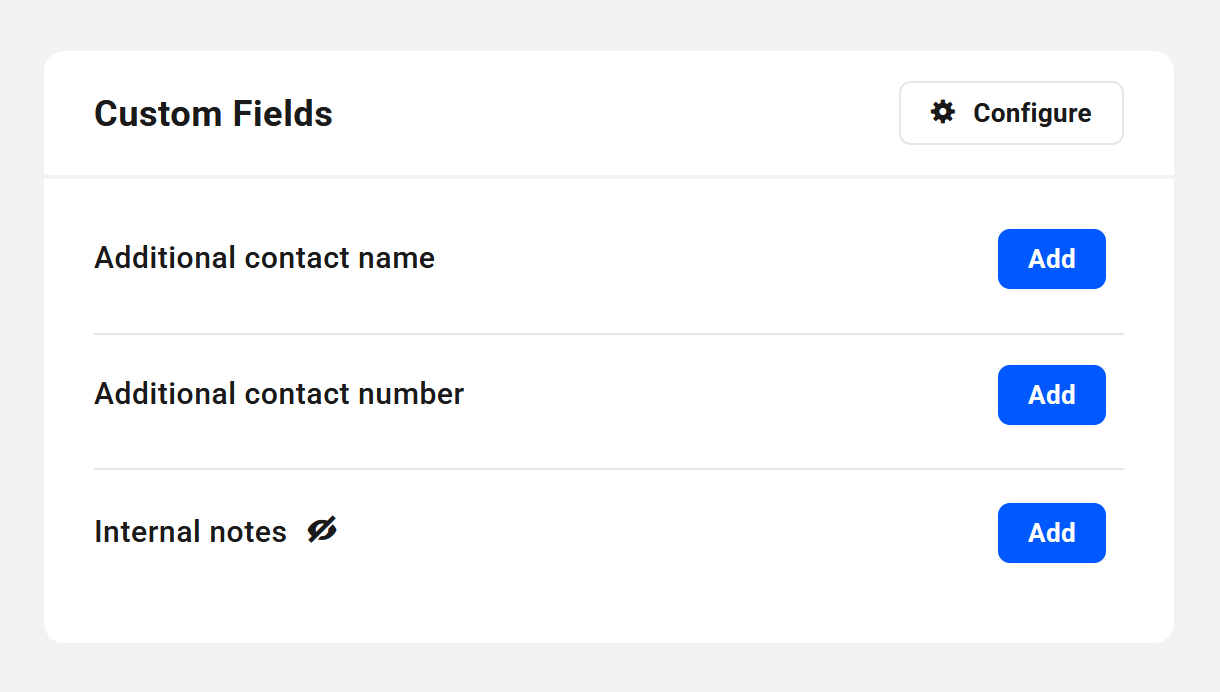
Click the Configure button to be directed to the Custom Fields page in your Client Tools where you can edit or delete existing fields, or create new ones.
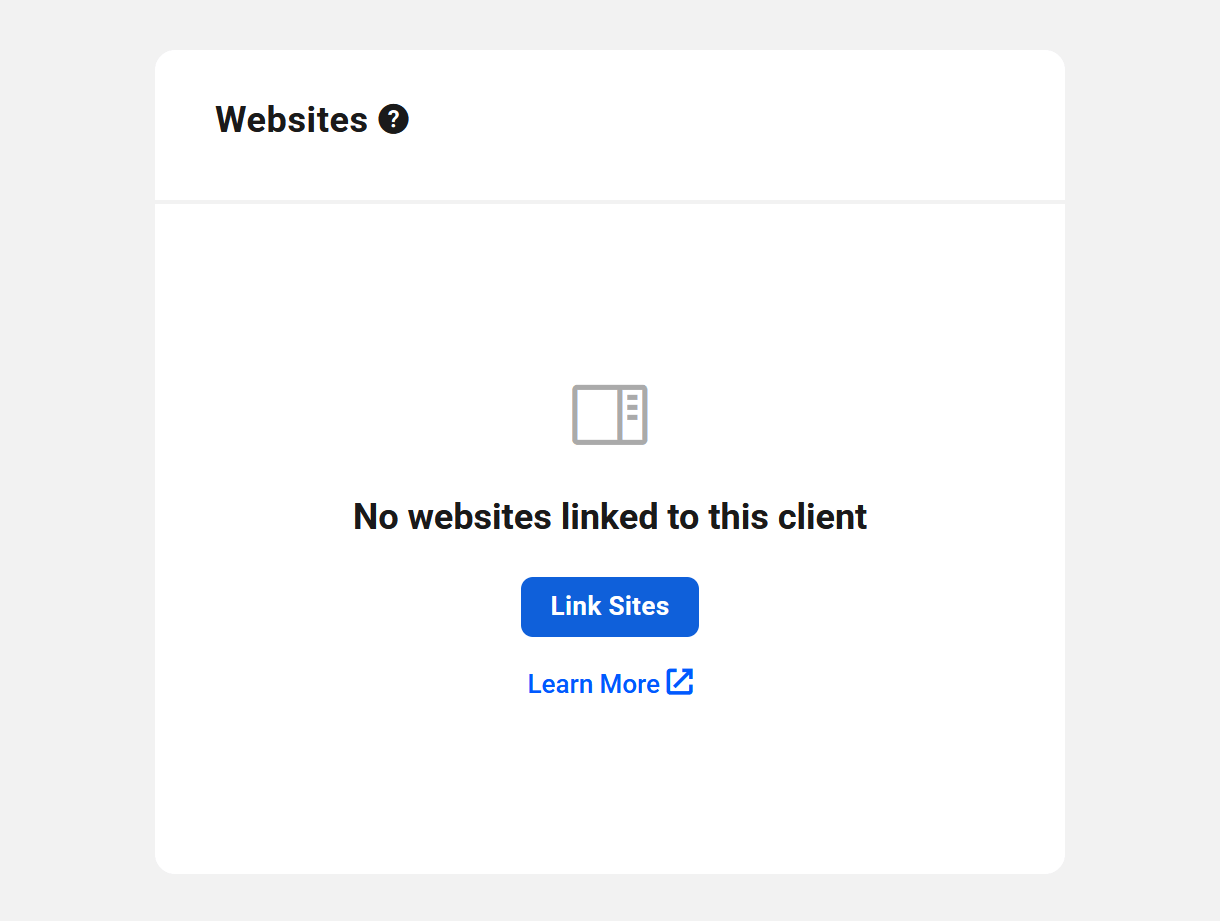
Websites
This module lists the websites that are linked to the client. If no sites have yet been linked to the client, you can manually link those you need by clicking the Link Sites button.
That will pop open a modal window where you can search for and select the site(s) you wish to link to the client.
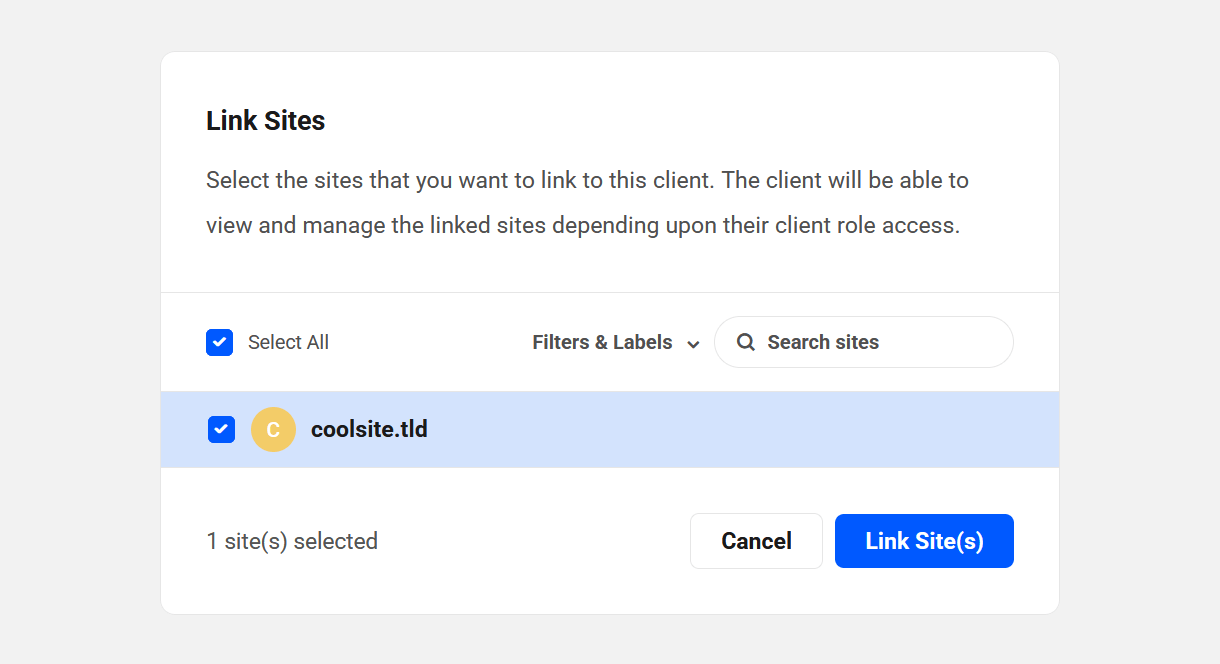
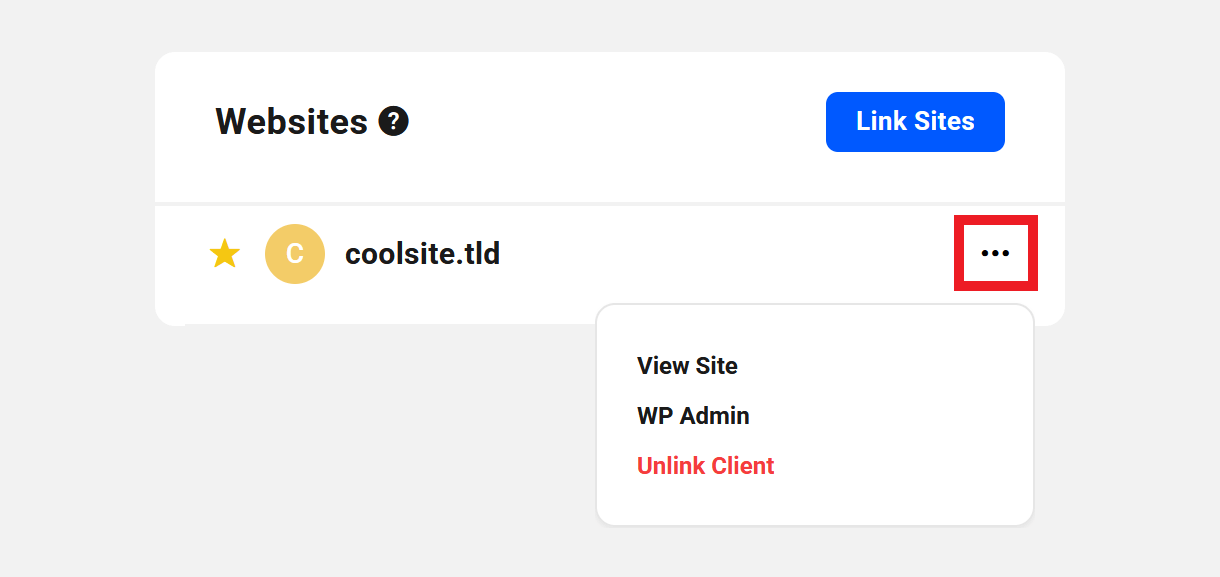
The widget will then be populated with the websites that you have linked to the client. Those that you have favorited will be indicated by the star icon next to the site name. Click the ellipsis icon in any site’s row to reveal management options for that site.
- View Site – Click to be directed to the Client tab of that site in your Hub.
- Wp Admin – Click to be logged into the site’s wp-admin via SSO if enabled.
- Unlink Client – Clicking this will remove the client from the website. All active subscriptions for the site will be automatically cancelled, and all pending invoices voided.
To manually link another site to a client, click the Link Sites button that appears here.
Sites can also be linked to a client in several additional ways:
- Link a client manually under the Client tab of a site, whether Billing is set up or not.
- Link a client manually to a site when you bill the client for a product or service.
- A client is automatically linked to their site when they purchase a hosting Reseller product from you.
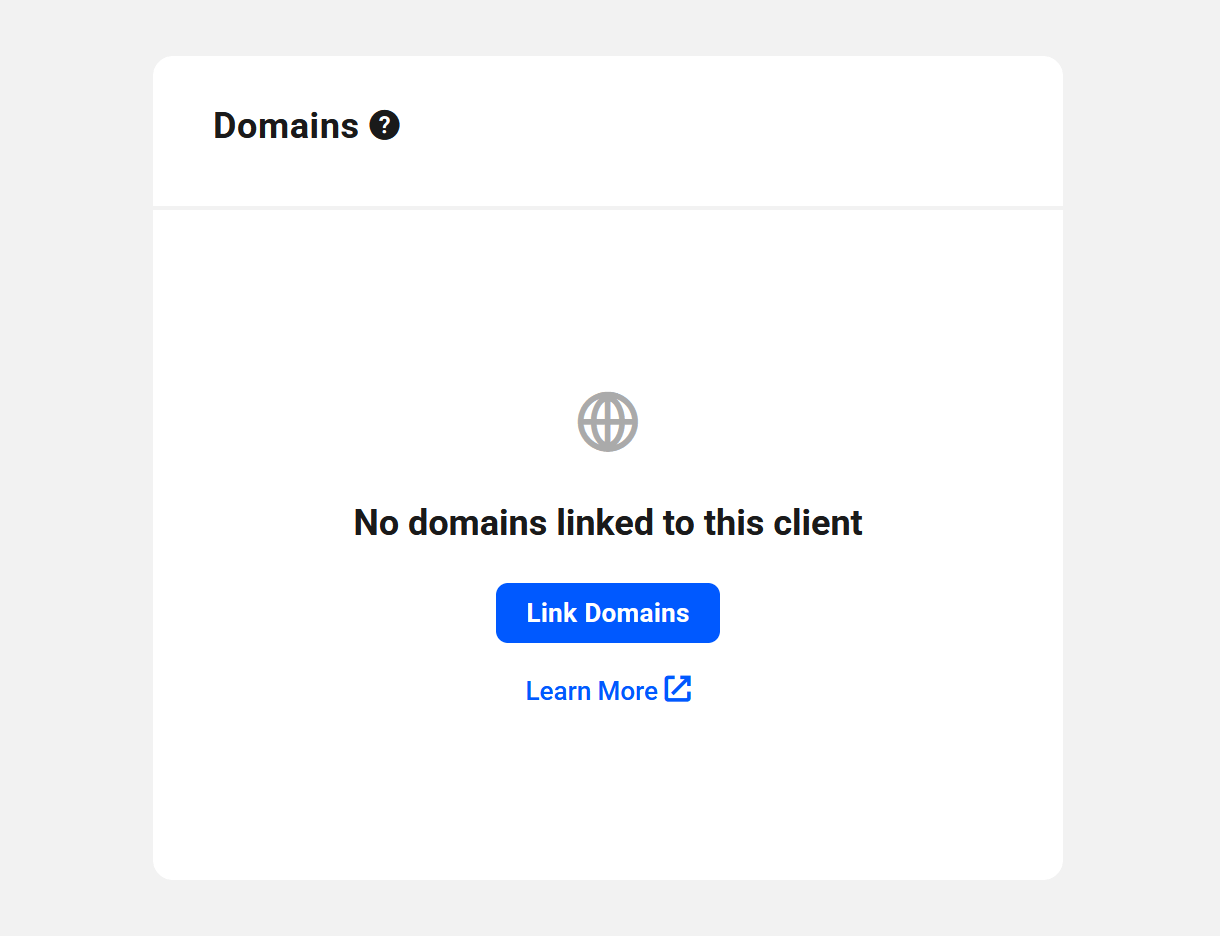
Domains
This module lists all the registered domains that are linked to the client. If no domains have yet been linked to the client, you can manually link those you need by clicking the Link Domains button.
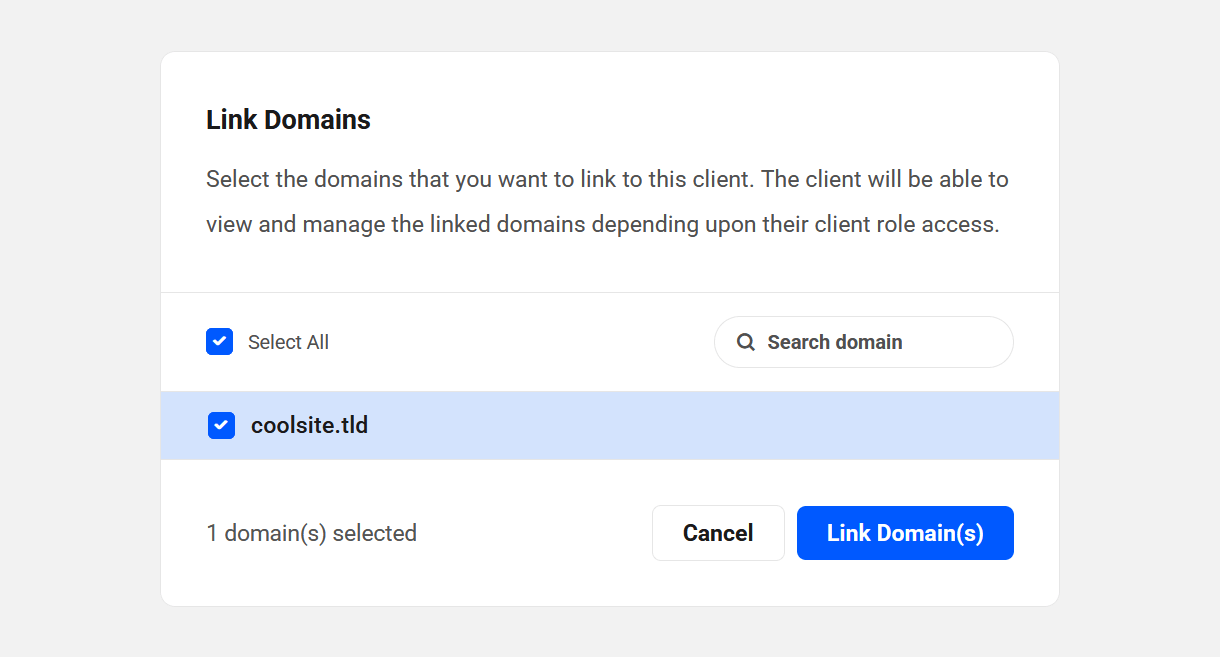
That will pop open a modal window where you can search for and select the domain(s) you wish to link to the client.
All domains linked to the client will be listed along with their current status.
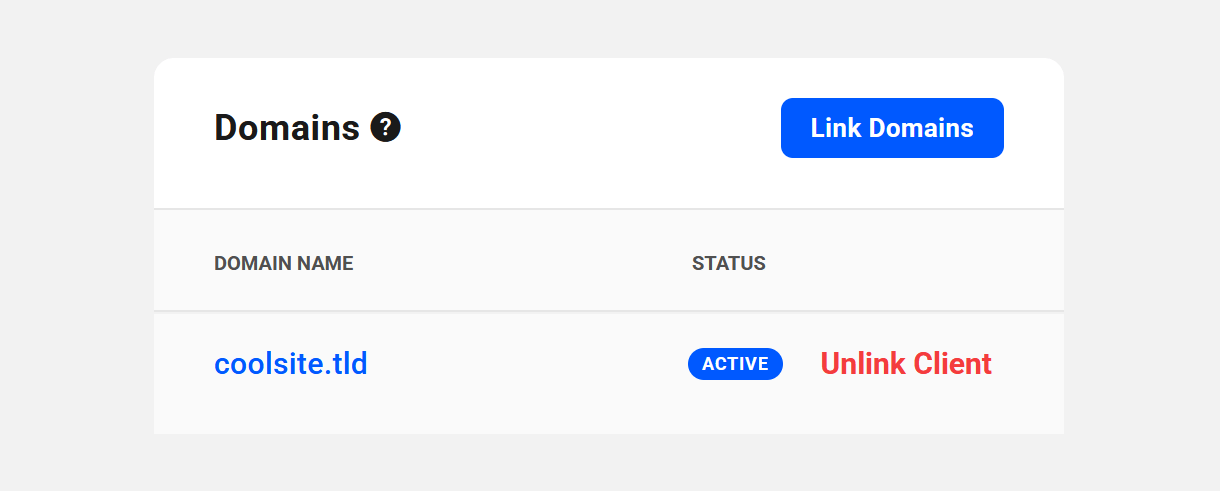
Click Unlink Client next to any domain name to remove the client from that domain. All active client subscriptions for the domain will be automatically cancelled, and all pending invoices voided.
To manually link another domain to a client, click the Link Domains button that appears here.
You can also link a client manually to a domain under the Client tab of the domain, whether Billing is set up or not.
Pro Email
This module lists all the Pro Email domains that are linked to the client. If no email domains have yet been linked to the client, you can manually link those you need by clicking the Link Emails button.

That will pop open a modal window where you can search for and select the email domain(s) you wish to link to the client.

All email domains linked to the client will be listed along with the number of email accounts using that domain..
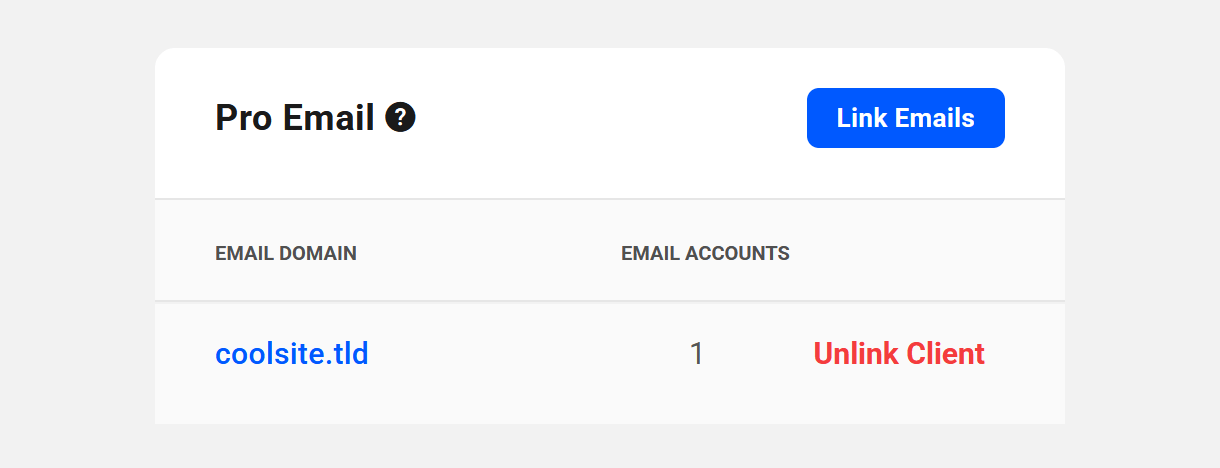
Click Unlink Client next to any email domain name to remove the client from that domain.
To manually link an email domain to a client from their client profile, click the Link Emails button that appears here.
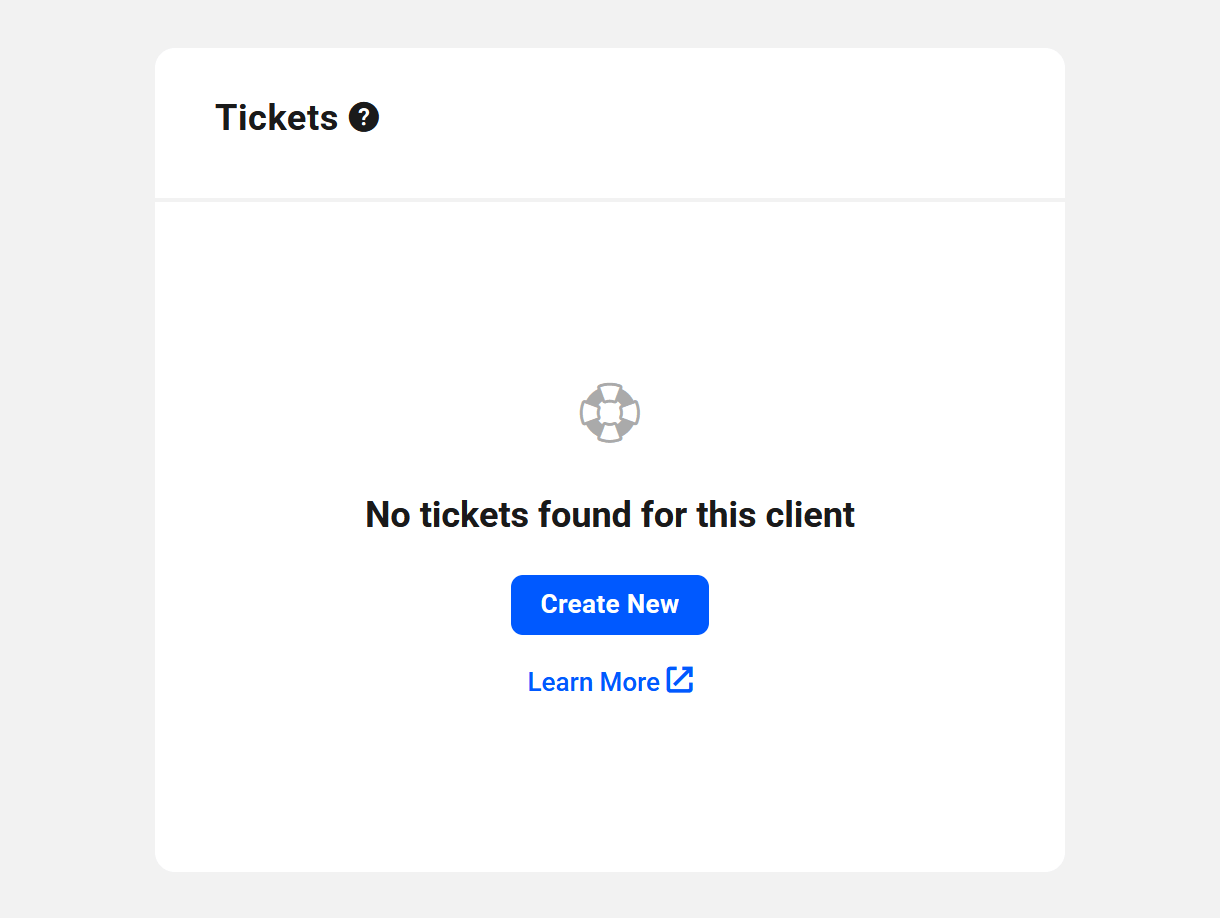
Tickets
This module lists all the tickets that have been created by the client, or on behalf of the client. If there are no tickets yet created for the client, you can click the Create New button here to create a new one on behalf of the client if needed.
All tickets associated with the client will be listed along with the number of replies and the date created or of the latest reply for each one.
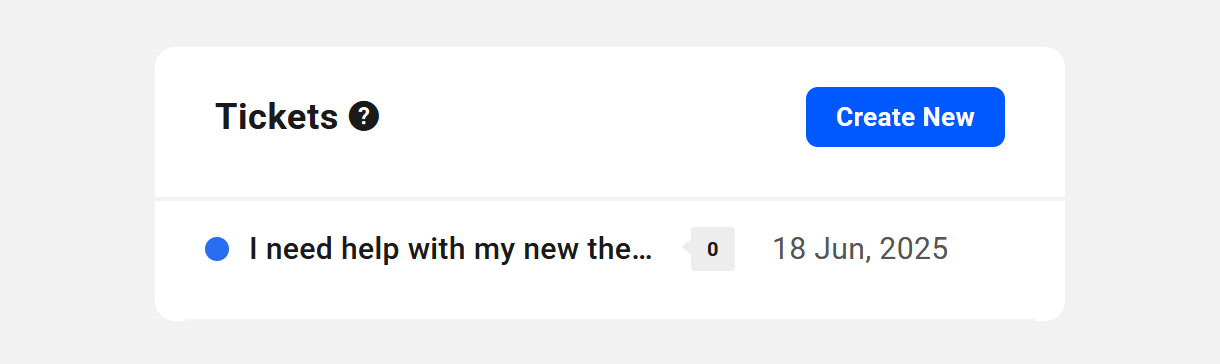
Click the title of any ticket to be directed to that ticket in the Tickets area of your Client Tools.
Clicking the Create New button here will redirect you to the Tickets area in your Client Tools where you can create a new ticket on behalf of the client if needed.
7.3.2 Products & Services
Link to chapter 3Under the Products & Services tab for a client, you’ll find all the information related to products and services that you have invoiced to that client.
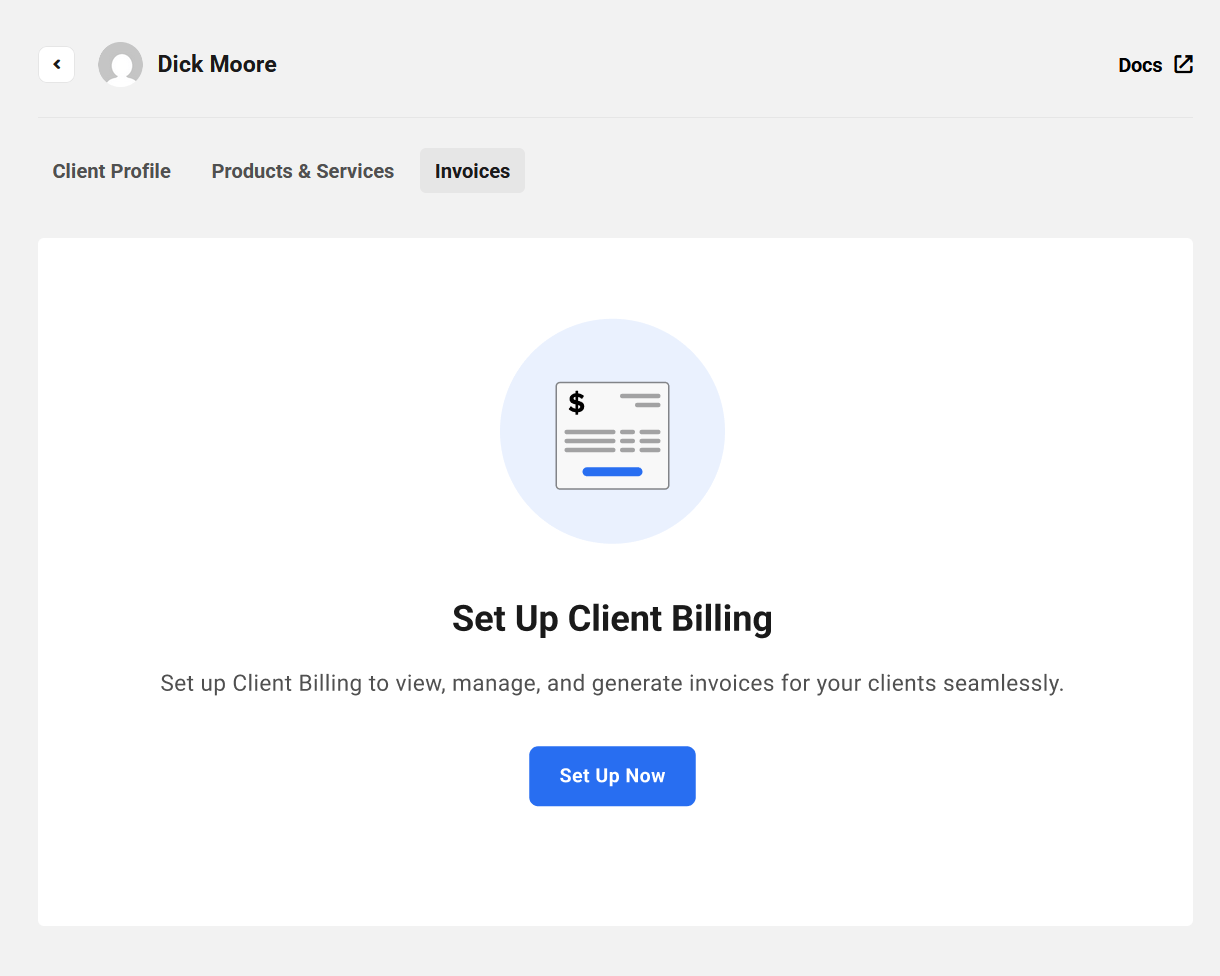
Note that if you have not yet set up Billing in your Client Tools, you’ll be prompted to do that first.
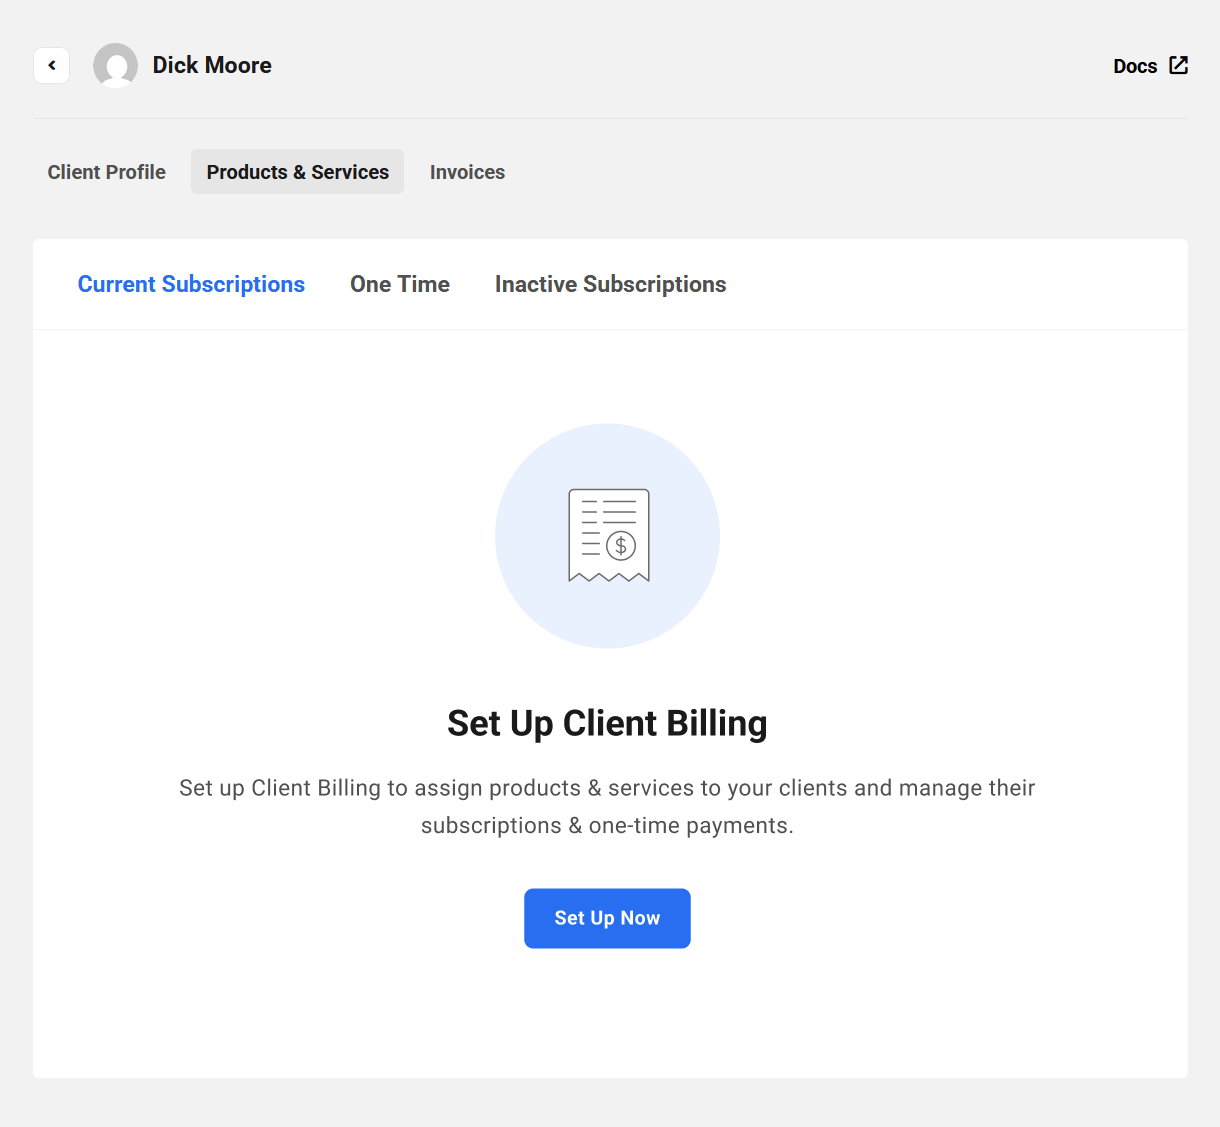
Current Subscriptions
Products under the Current Subscriptions tab are the client’s active subscriptions with recurring billing.
- Created On – This is the date the client first subscribed to this product or service.
- Status – The status here will be either Active, or Pending if the associated subscription invoice has not yet been paid.
- Amount – The amount billed per billing period, including any added taxes.
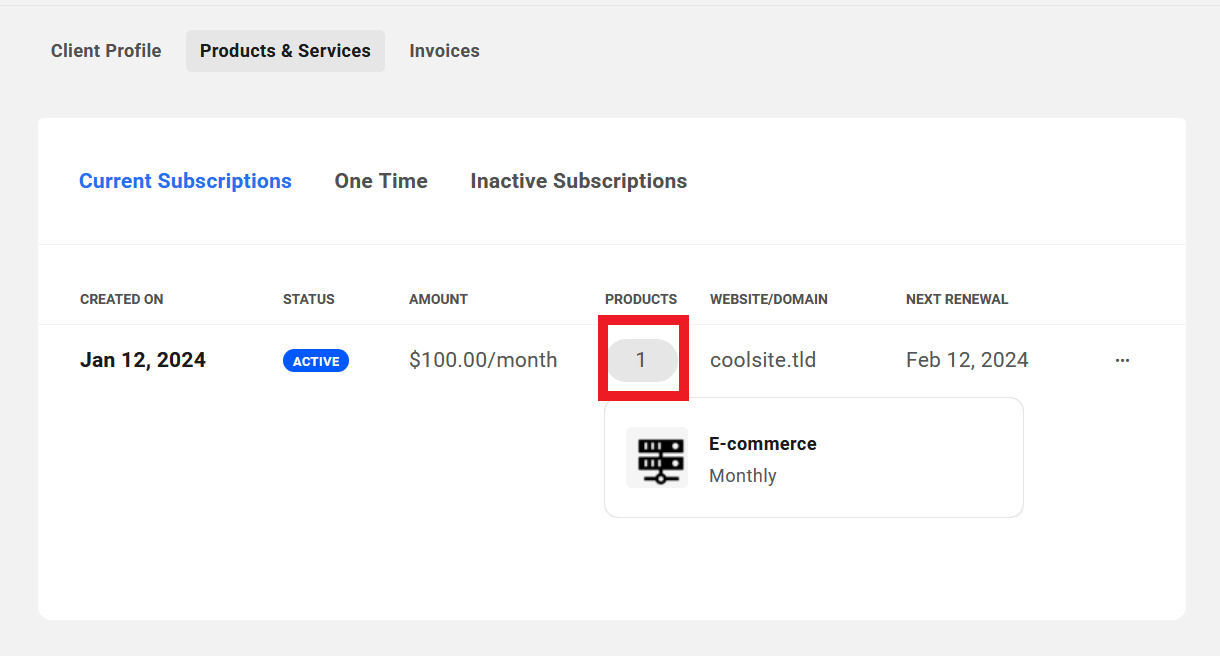
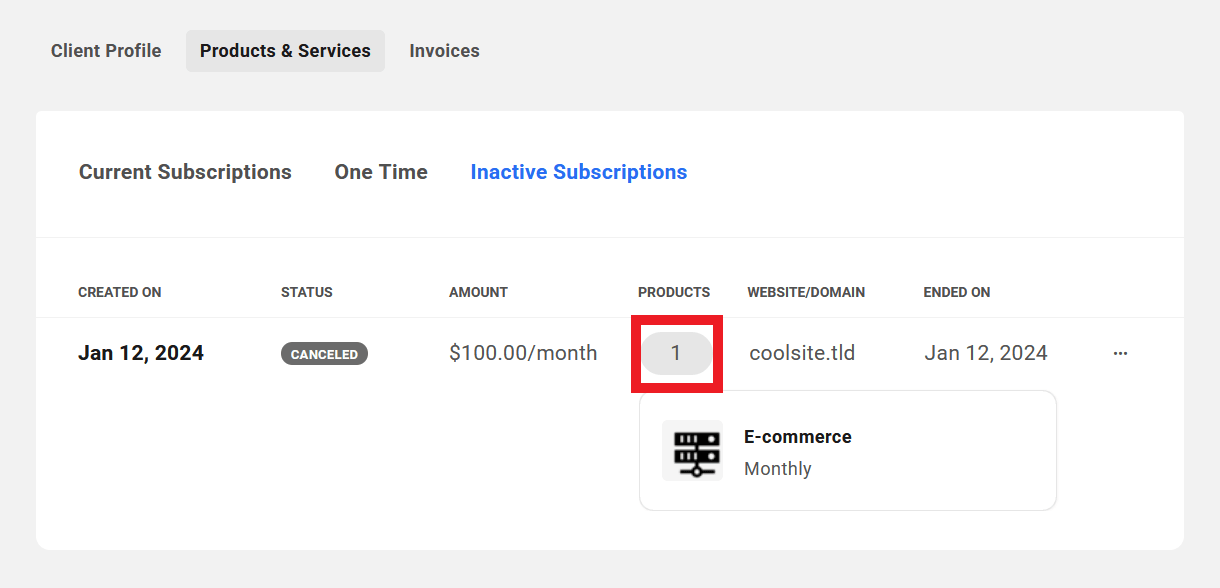
- Products – This number indicates how many products are included in the subscription.
- Website/Domain – If there is a website or domain associated with this subscription, its URL will appear here.
- Next Renewal – When the next scheduled subscription payment is due.
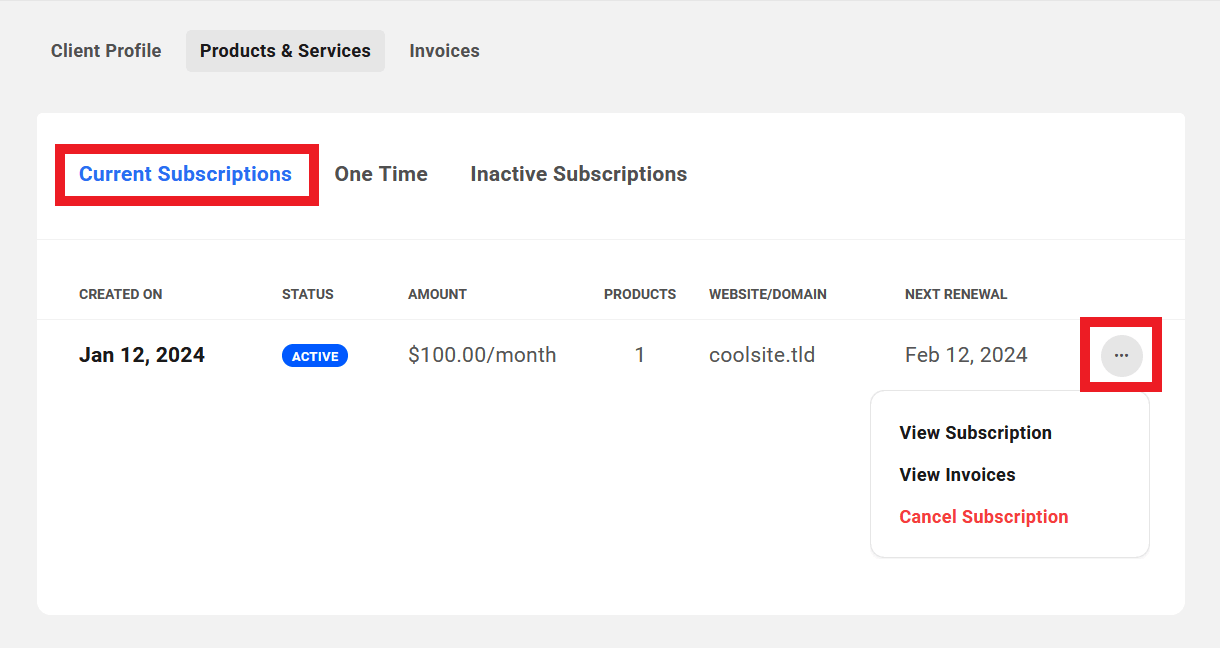
Click on the ellipsis icon at the far right of any row to reveal management options for that client subscription.
- View Subscription – Click to view all details of that client’s subscription in a modal window. See View Subscription below for details.
- View Invoices – Click to be directed to the main Invoices area where the list will be filtered automatically to show only invoices associated with this subscription.
- Cancel Subscription – Click to cancel the current active subscription.
If you had associated a website with a subscription invoice, and then cancelled the subscription here, that website would still be visible and accessible to the client in their client portal. If you wish to cancel the subscription and also revoke access to that website in their client portal, you would want to remove the client from the website itself. See the Linked Client section in the Managing Site Billing chapter of our Billing documentation for more information.
You can also hover your mouse over the number in the Products column to reveal a tooltip listing all products contained in that subscription.
One Time
Products listed under the One Time tab are any single payment products the client has purchased from you.
- Product/Plan – The name of the one-time billed product.
- Status – This indicates the invoice status of the product. See Managing Invoices below for more information about invoice status.
- Website/Domain – The website or domain this product is attached to, if any.
- Amount – The amount billed for the product.
- Billed On – The date the invoice was created
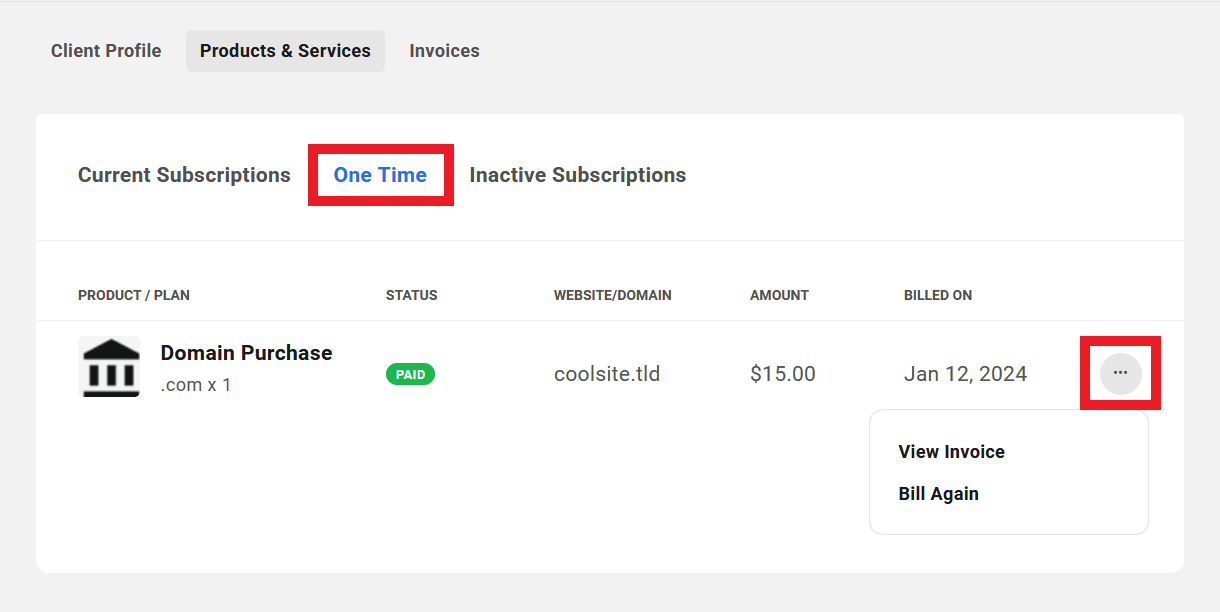
Click on the ellipsis icon at the far right of any row to reveal management options for that one-off product.
- View Invoice – Click to be directed to the main Invoices area where the list will be filtered automatically to show only the invoice associated with this product.
- Bill Again – Click this option to automatically bill the client again for the same one-time product. Note that if the one-time invoice is for a Domain Reseller product, and the invoice has been paid, this option will not be available.
Inactive Subscriptions
Products under the Inactive Subscriptions tab are the client’s subscriptions that have been cancelled or have expired.
- Created On – This is the date the client subscribed to this product or service.
- Status – This indicates whether the subscription was Cancelled or has Expired.
- Amount – The amount billed per billing period, including any added taxes.
- Products – This number indicates how many products were included in the subscription.
- Website/Domain – If there was a website or domain associated with this subscription, it will appear here.
- Ended On – The date on which the subscription expired or was cancelled.
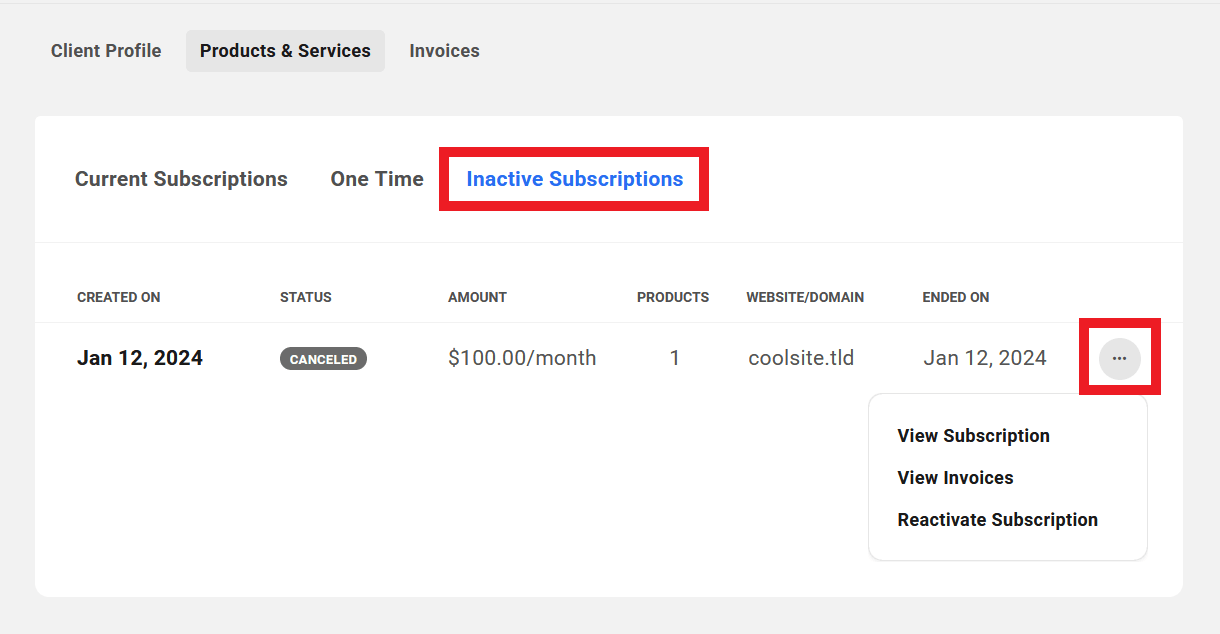
Click on the ellipsis icon at the far right of any row to reveal management options for that client subscription.
- View Subscription – Click to view all details of that client’s subscription in a modal window. See View Subscription below for details.
- View Invoices – Click to be directed to the main Invoices area where the list will be filtered automatically to show only invoices associated with this subscription.
- Reactivate Subscription – Click to reactivate the same subscription for this client. Note that reactivating an inactive subscription sends a new invoice to the client and creates a new subscription that is activated the moment the invoice is paid.
You can also hover your mouse over the number in the Products column to reveal a tooltip listing all products contained in that subscription.
View Subscription
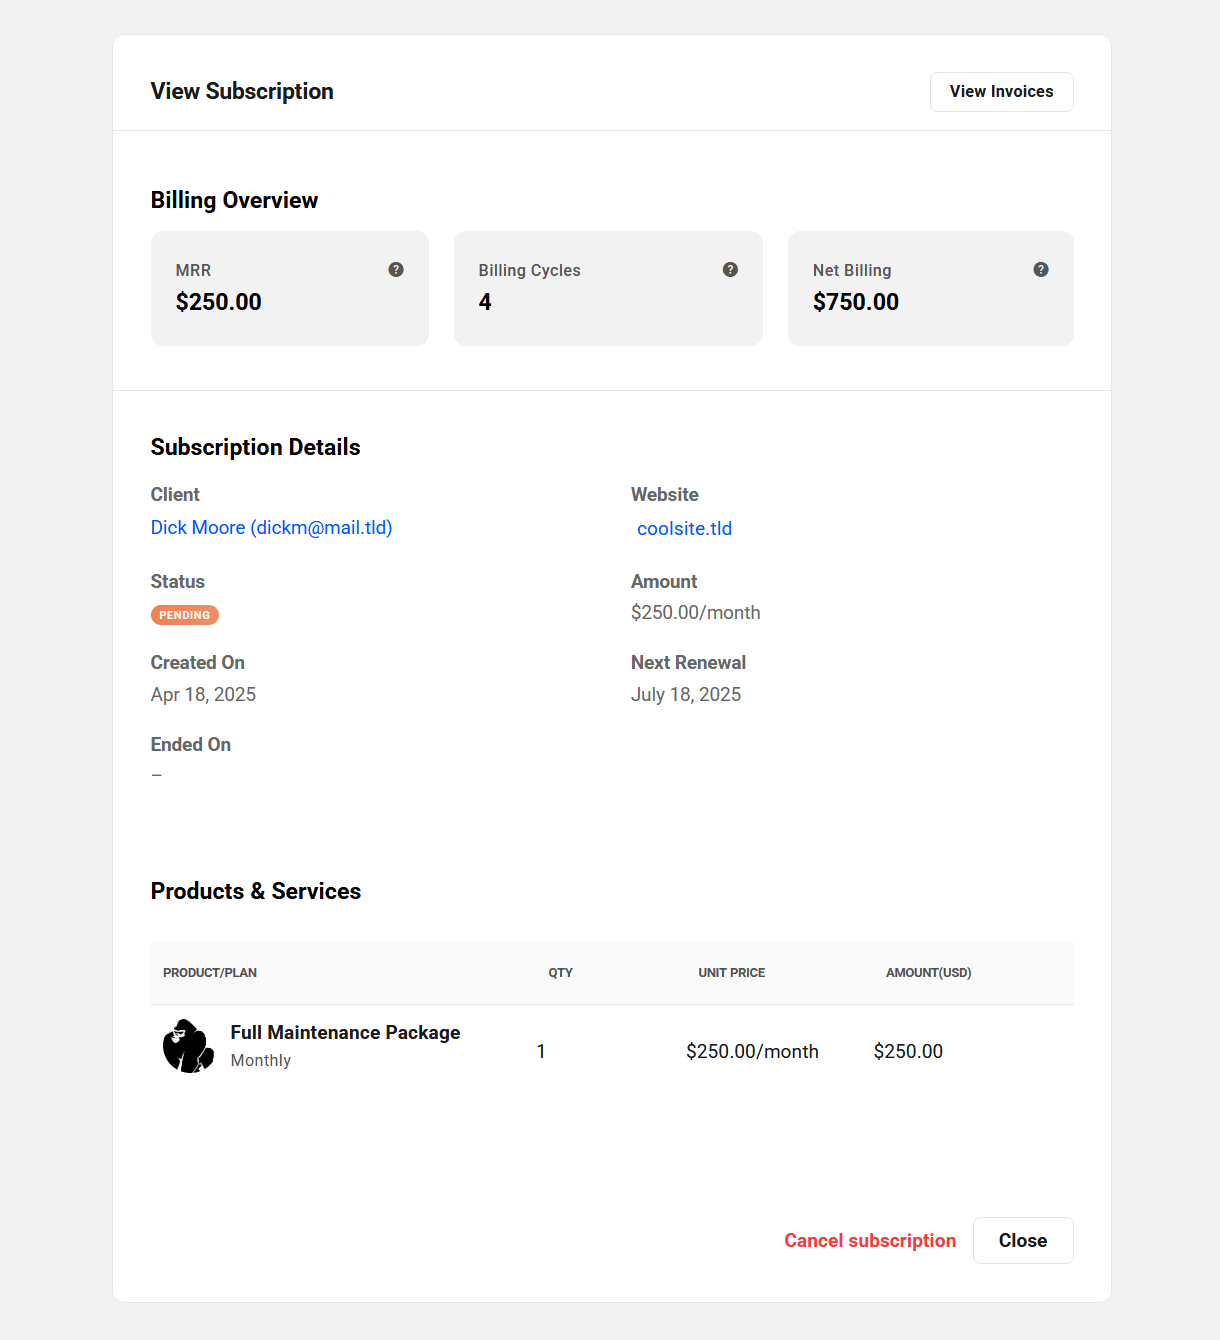
When you click on any Active or Inactive subscription’s row, or the View Subscription option under the ellipsis icon in any subscription’s row, a modal will pop open where you can view all the subscription details.
Billing Overview
This section of the subscription view presents the following information:
- MRR (Monthly Recurring Revenue) – The normalized monthly revenue for the subscription. For example, if the subscription is an annual one, this would indicate 1/12th of the annual amount. This amount does not include any taxes you may have added to your invoices.
- Billing Cycles – This indicates the current billing cycle. For example, if this displays 5, it means that this subscription has completed 4 billing cycles, and the 5th billing cycle is ongoing.
- Net Billing – The total revenue to date from this subscription, minus any refunds that you may have issued. This amount includes any taxes you may have added to your invoices.
Subscription Details
This section of the subscription view lists the following information:
- Client – Displays the client’s name and email address.
- Website – The website the subscription is attached to, if any.
- Created On – The date the first invoice for the subscription was paid and the subscription was activated.
- Status – The current status of the subscription: Active, Inactive, Pending, Expired or Canceled.
- Amount – The amount billed per billing period, including any added taxes.
- Next Renewal – The date of the next scheduled payment due for the subscription.
- Ends On – The date the subscription will end if there is a set number of billing cycles.
Products & Services
This section displays the products included in the subscription, with the following details:
- Product/Plan – The name of the product and associated pricing plan.
- Quantity – How many units of the product/plan in the subscription.
- Unit Price – The unit price of each product/plan, including any added taxes.
- Amount – The amount invoiced for the product, including any added taxes.
7.3.3 Invoices
Link to chapter 3Under the Invoices tab for a client, you’ll find the list of all invoices associated with that client.
Note that if you have not yet set up Billing in your Client Tools, you’ll be prompted to do that first.
The data displayed here for each invoice of an individual client is identical to the data displayed for all invoices in the main Invoices section of your Billing tool.
- Date – The date the invoice was created.
- Invoice Number – The invoice number including your custom prefix.
- Amount – The total amount of the invoice, including any added taxes.
- Client – The email address of the client whose invoices you are viewing.
- Website/Domain – If there is a website or domain associated with the invoice, it will be shown here.
- Status – This will indicate one of the following for each invoice: Payment Due, Paid, Failed, Refunded, Draft or Void.
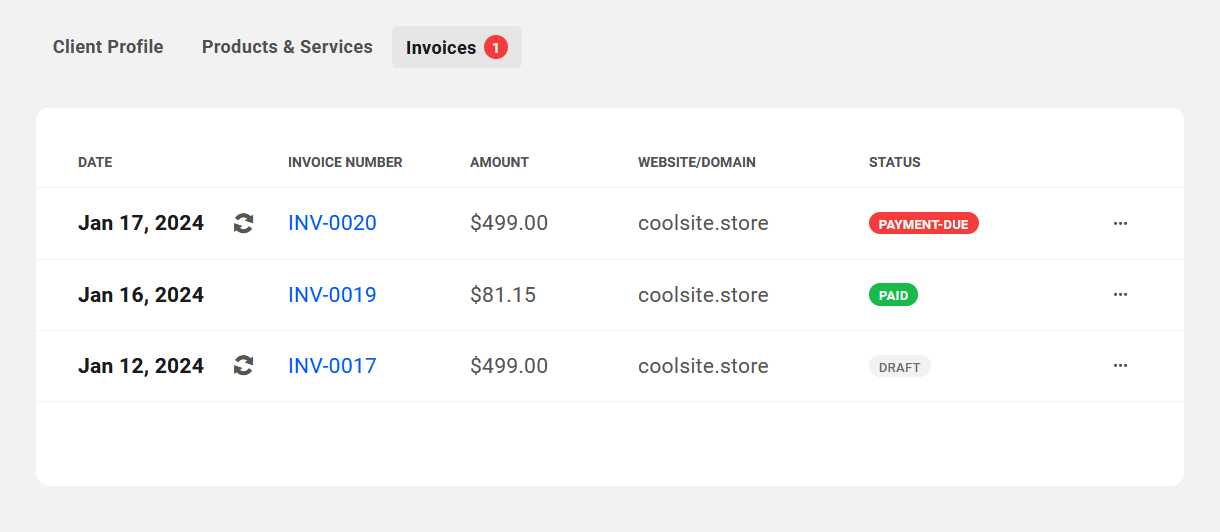
Click on any invoice to be directed to the Invoices section where the selected invoice details will be displayed.
Click on the ellipsis icon to the far right of any displayed invoice to reveal management options for that invoice. The options will differ depending on the invoice status.
A red icon next to the Invoices tab in the header indicates the number of outstanding unpaid invoices for that client.
For more information about invoice details, invoice status and management options available for each status, see the Invoices chapter in our Billing documentation.
7.4 The Client Experience
Copy chapter anchor to clipboardThis chapter deals exclusively with the client’s account creation and basic client portal access experience. It does not cover any billing activities or additional access capabilities that you may have granted to your clients via Client Roles.
See The Client Experience chapter in the Billing documentation for an overview of the client’s billing experience in your client portal. See the Client Roles chapter in the Client Tools documentation for more information on default client roles and how to create custom ones.
Also see How to White-Label the Client Experience below for details about creating a fully white-labeled experience for your clients.
7.4.1 The Client’s Account
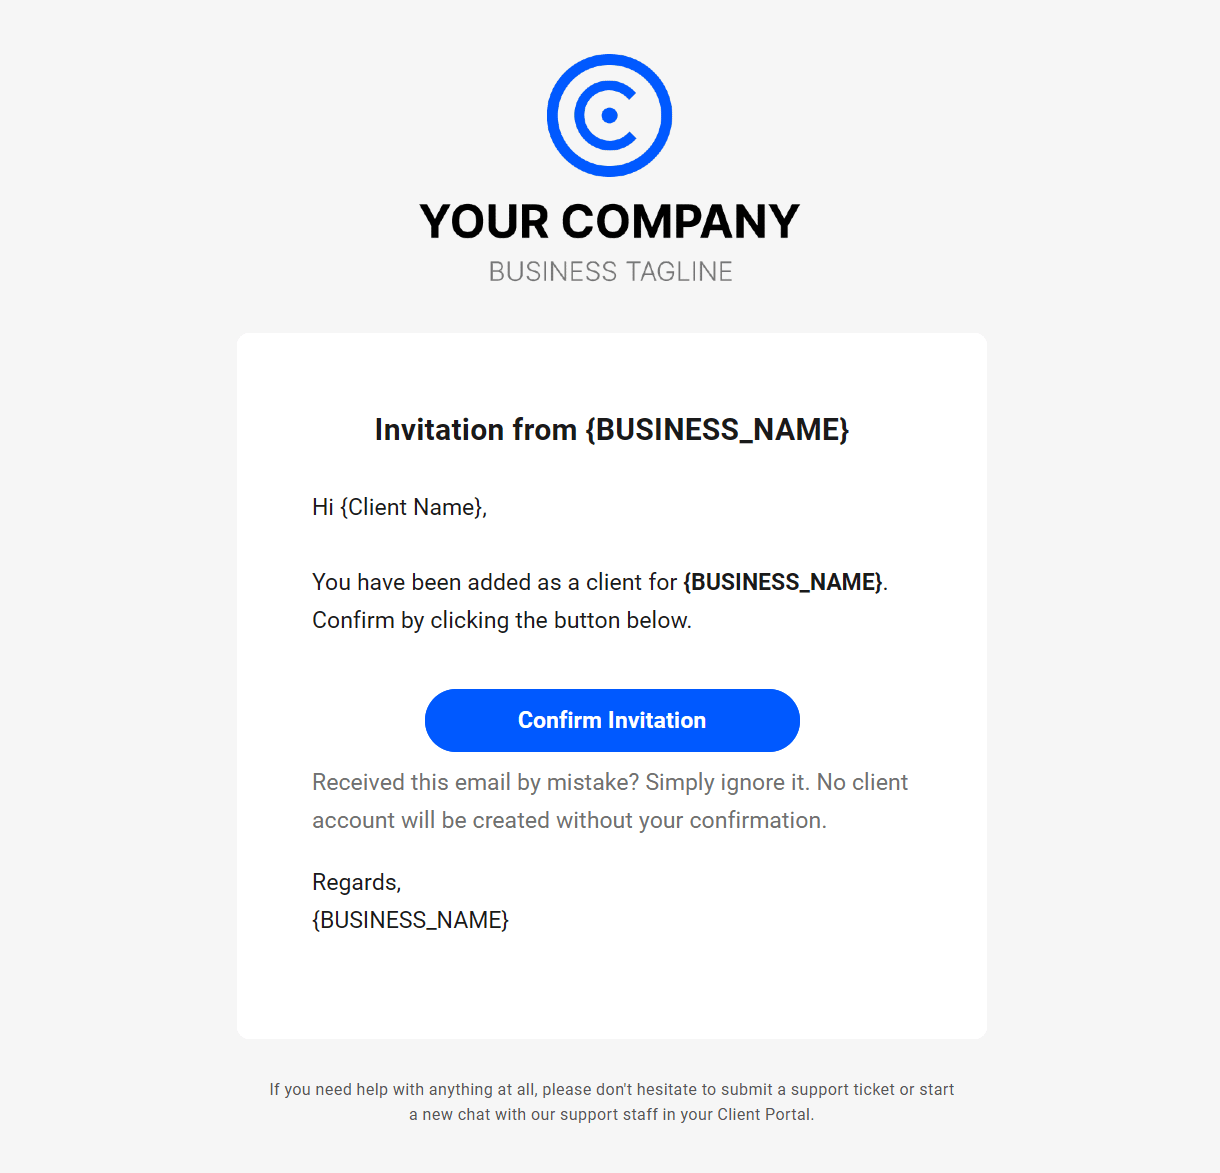
Link to chapter 4When you invite a client to join your client portal, they will receive an email that contains a Confirm Invitation button they must click to confirm the invitation.
Clicking this button will direct the client to the account creation page of the Primary Client Portal you have assigned to that client.
If the client already has an existing client portal account with you, clicking that button will direct them to the login page of whichever client portal you invited them from. If they do not already have an account with you, they would land on the account creation page of the client portal they were invited from.
To maintain brand consistency for your WordPress business, please be sure to use the Hub Client plugin installed on your own domain. Then set the Primary Client Portal for any invited client to that domain. This will ensure your clients never see the WPMU DEV Hub and won’t be confused by unneeded & irrelevant options in its interface.
On the account creation page, their email address would be pre-populated in the form and they would need only enter their desired password. Then click the Sign up button to create their client account.
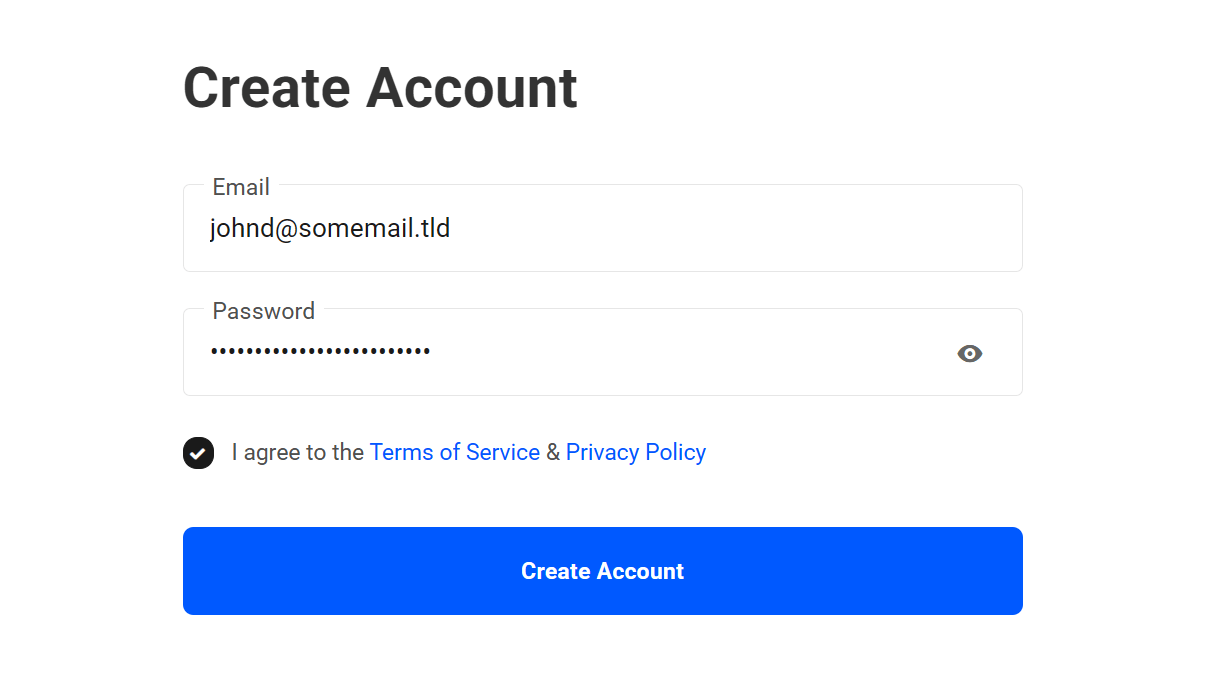
Once their client account is created, they can log into any client portal that you may have created with the same credentials, if that URL is known to them of course.
Client’s Portal Profile on Your Own Domain
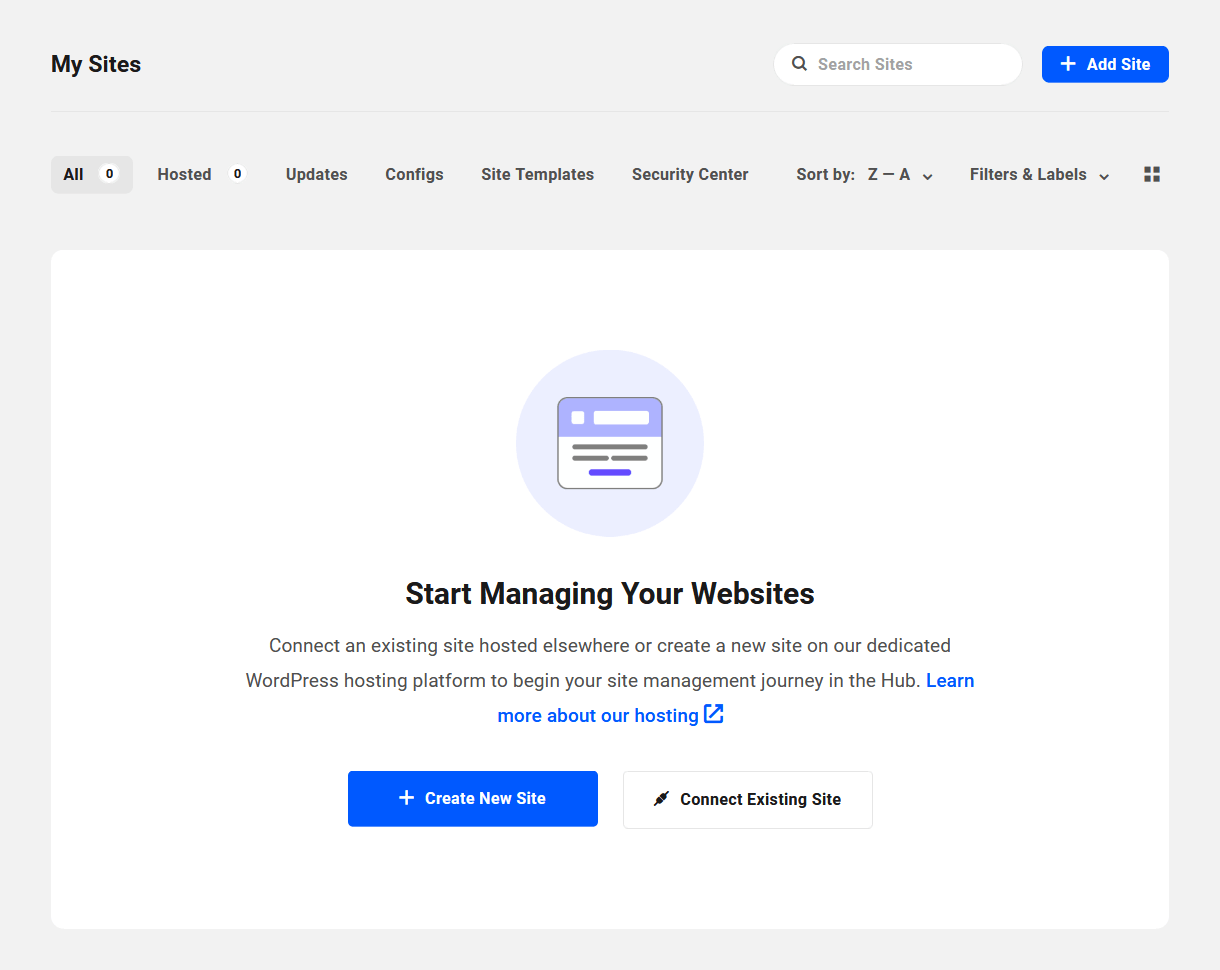
When the client logs into a client portal on your own domain, they will only see white-labeled links in their profile menu.

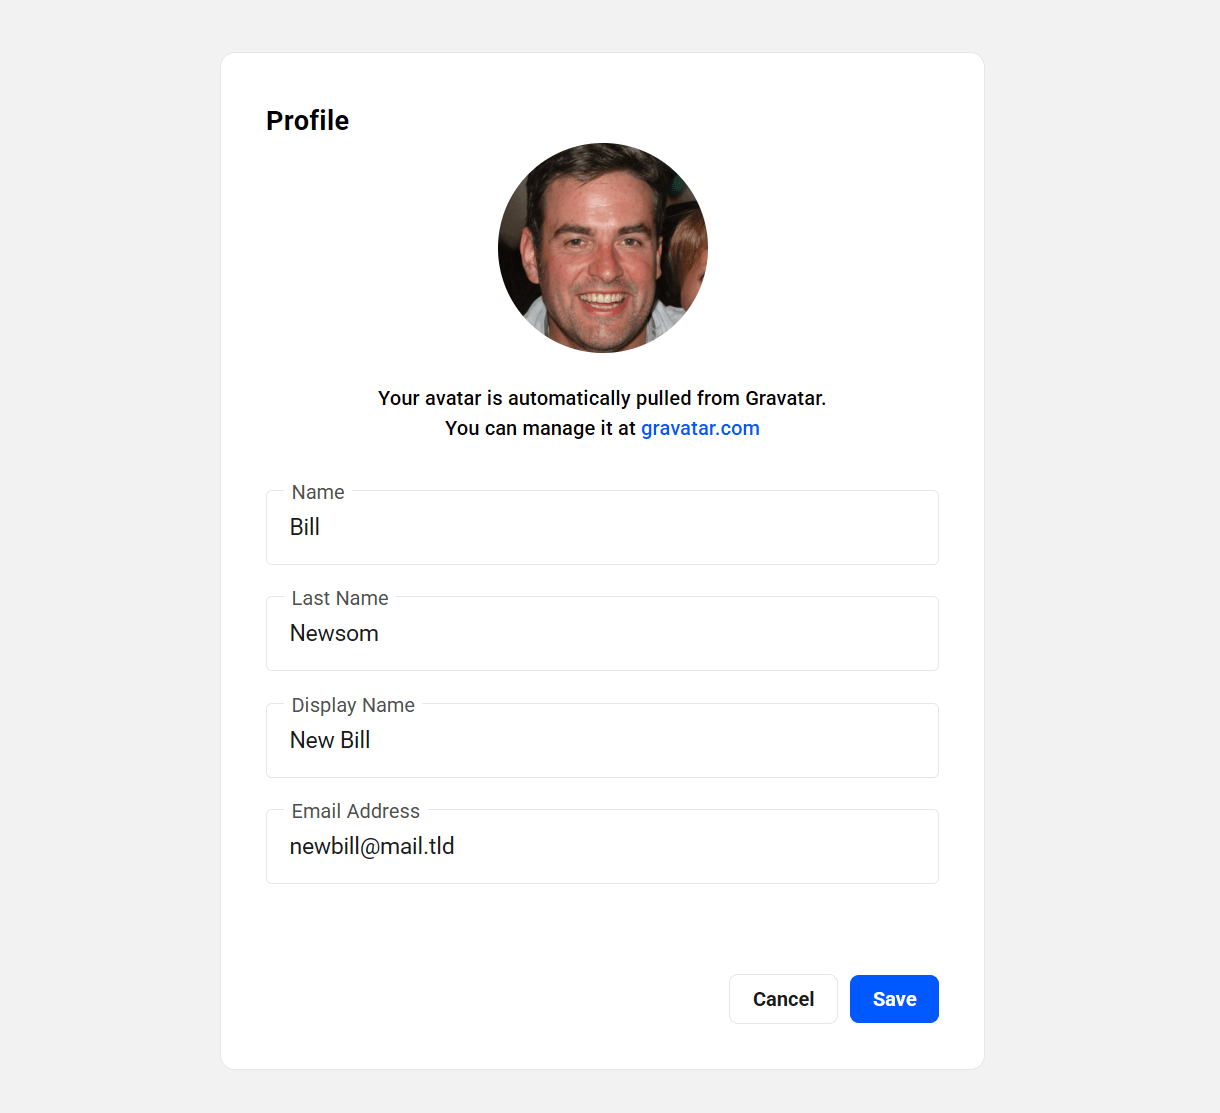
Profile
Clicking the Profile link in their profile menu will pop open a modal where they can edit the following profile information:
- Name
- Last Name
- Display Name
- Email Address
If a client edits the email address in their profile here, and you have enabled Billing in your Client Tools, that will also update their email address in their billing profile, as both their client portal account and Billing profile are synced. See Billing Info in The Client Experience chapter of the Billing documentation for more.
If they wish to have an avatar displayed in their client portal profile, they would need only have an account at Gravatar.com where the image will be pulled in automatically. That same profile image would also appear for the client on the All Clients screen in your Client Tools.
Change Password
Clicking the Change Password link will pop open a modal where they can change their client portal password if needed. This would affect their login to any instance of your Hub, including here at WPMU DEV.
The client must enter their current password in order to reset it to a new one. If they don’t remember that password, they can simply log out and use the Forgot password? option on the login page instead.

Two-Factor Authentication
Clicking the Two-Factor Authentication link will pop open a modal where they can enable the additional login security offered by two-factor authentication in their client portal account.
They would need to first download the authenticator app to their smartphone, from either the Apple App Store (for iPhones, iPads, etc) or from Google Play (for Android devices). Once installed, they would scan the QR code in that modal using their phone’s camera, enter the passcode that would display in the app on their phone, then click the Verify button.
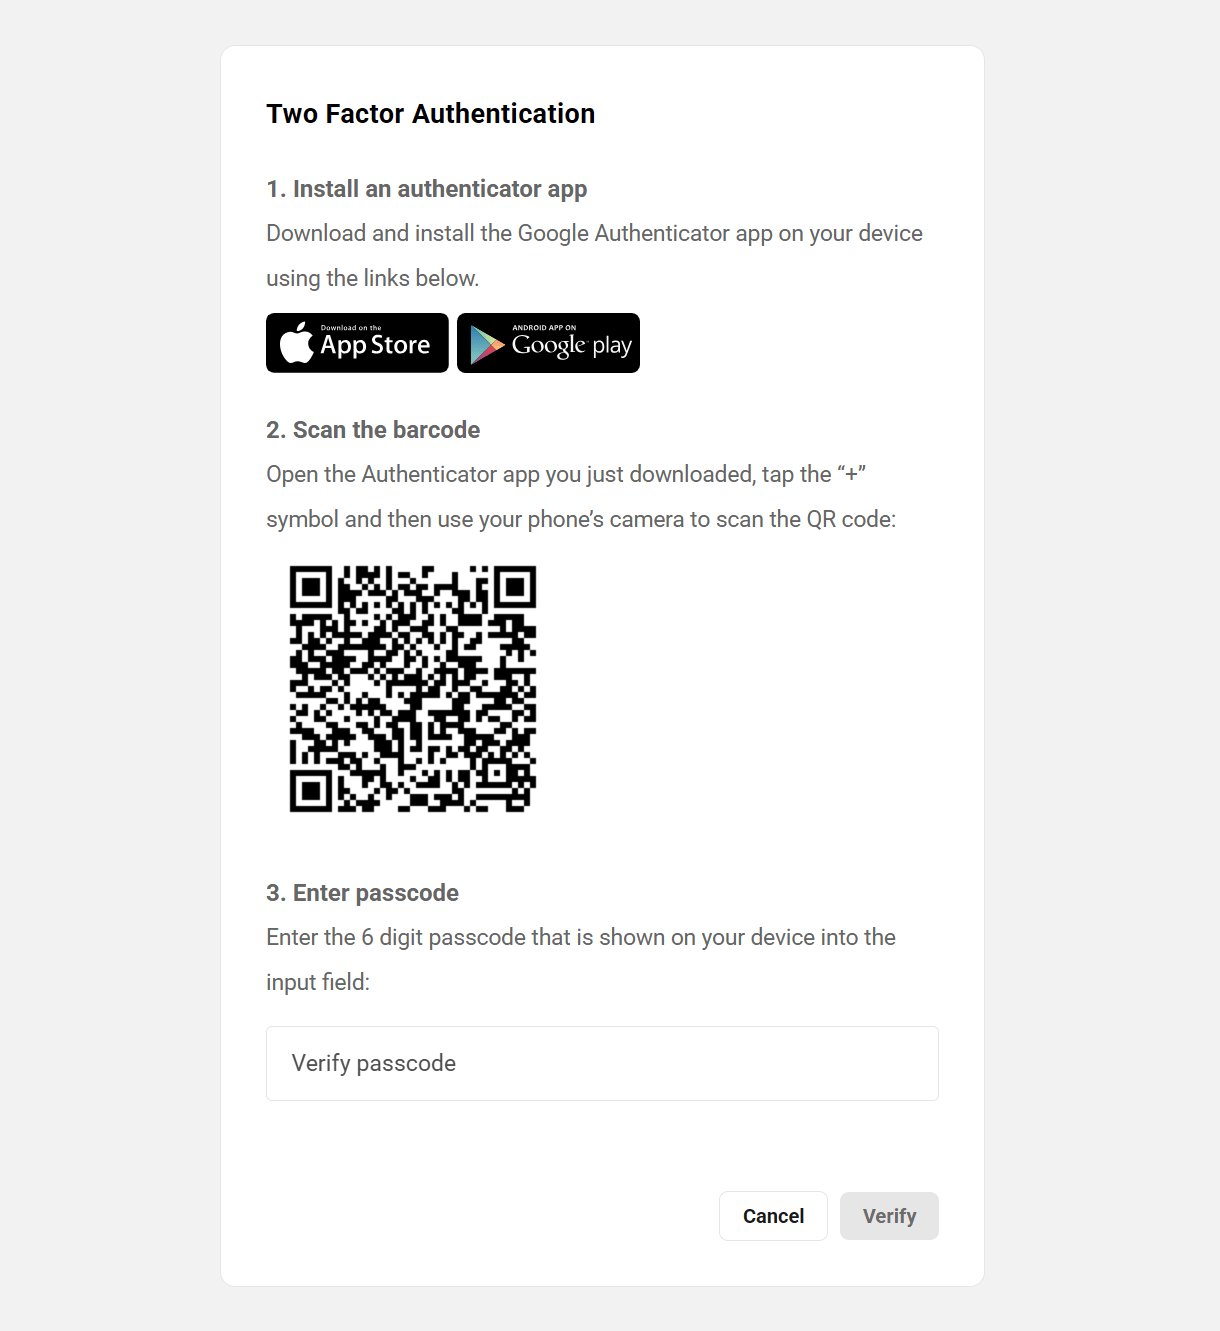
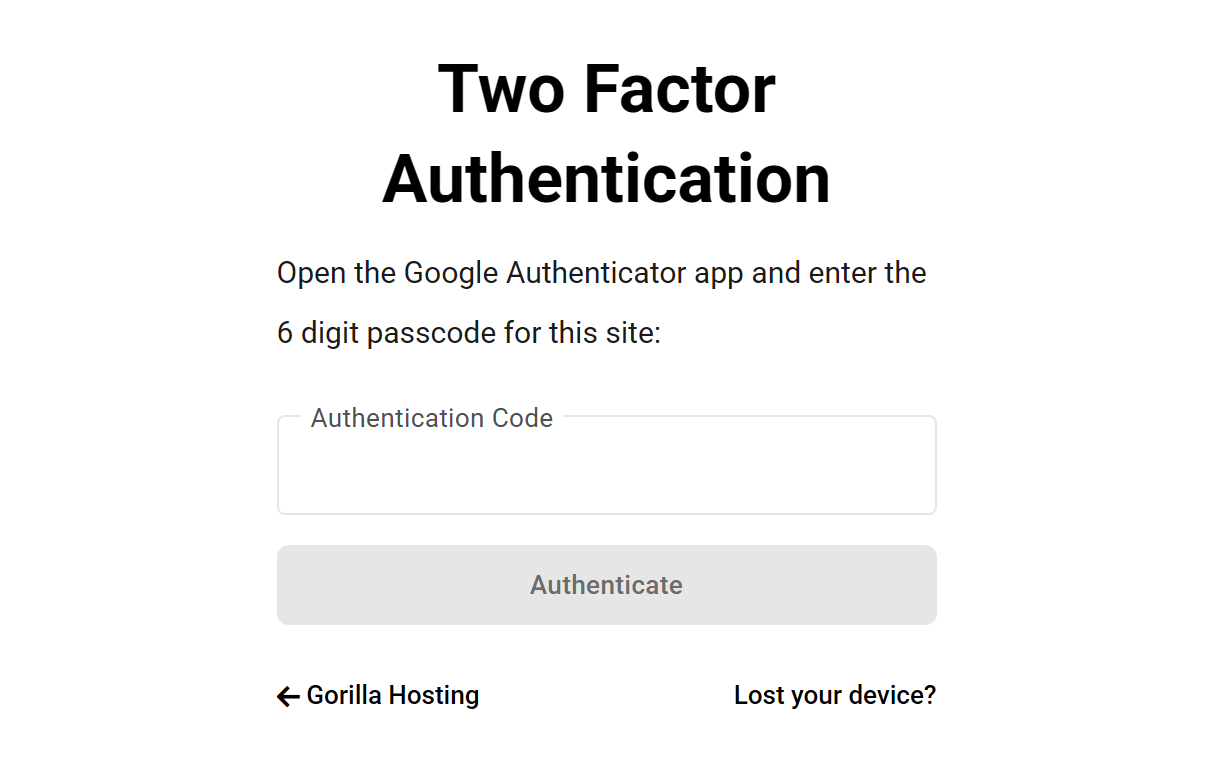
Once enabled, they would be prompted to get the 6-digit 2FA passcode from their phone and enter it in addition to their username and password every time they log into your client portal.
If they ever lose their phone, or don’t have access to it when they’re logging into your client portal, they can always click the Lost your device? link to have a one-time passcode sent to their account email address.
Client’s Portal Profile in the WPMU DEV Hub
If the client ever logs into your Hub here at WPMU DEV, the profile links they see will include links to WPMU DEV pages, just like you see in your own WPMU DEV Hub.
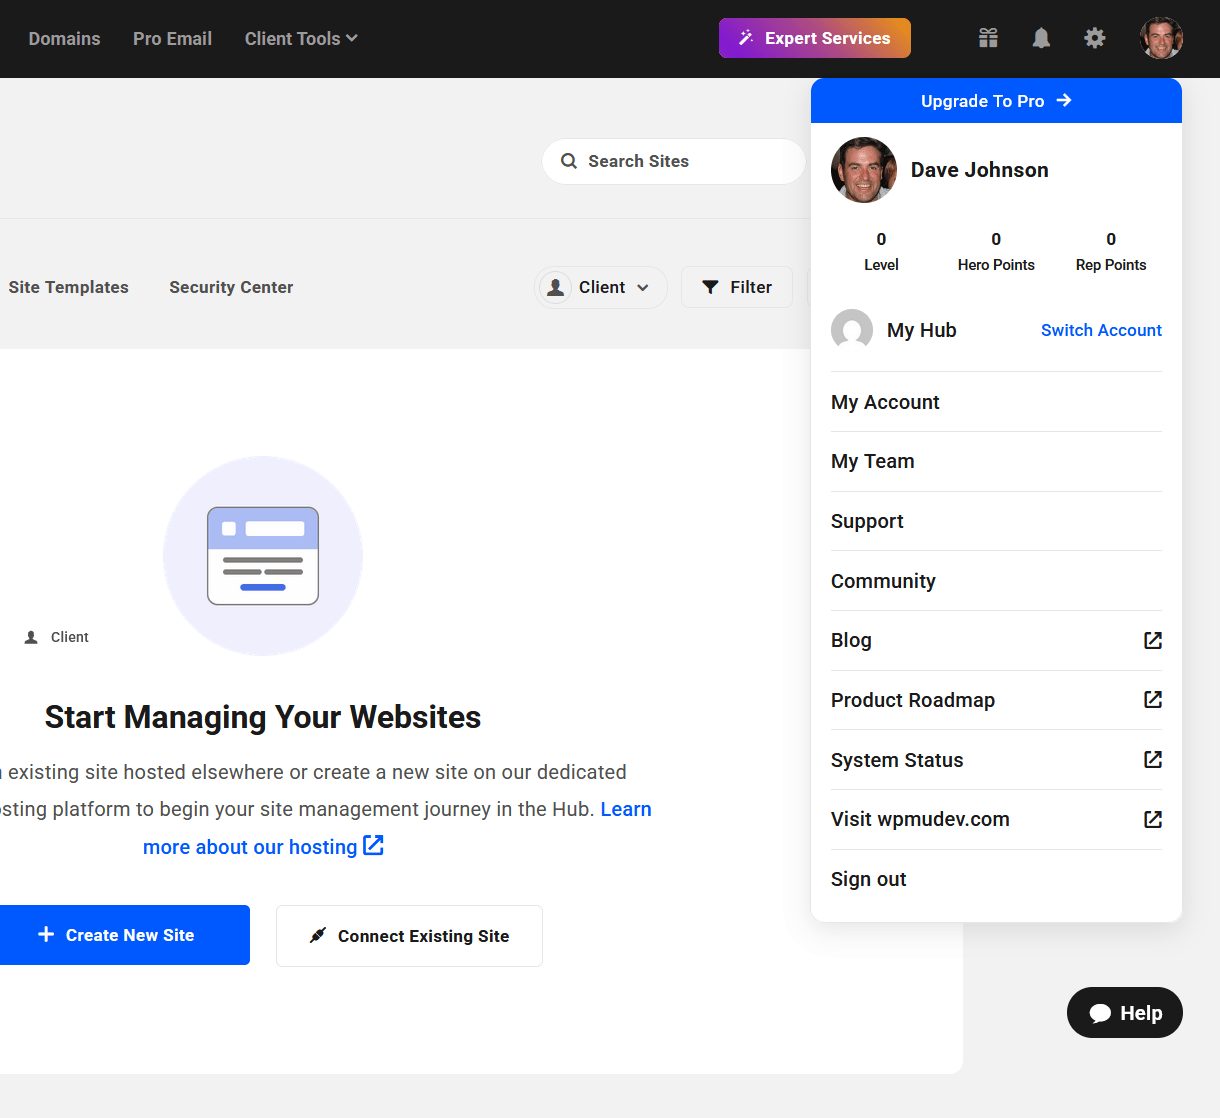
The profile menu also includes the Account Switcher which enables the client to switch to their own free WPMU DEV Hub account.
It is unlikely that you’d want your clients to login here, so we must stress again the importance of using the Hub Client plugin installed on your own domain to ensure your brand consistency.
7.4.2 How to White-Label the Client Experience
Link to chapter 4When inviting your clients to join your client portal, and optionally billing them for products & services, you’ll want to ensure that your brand is represented throughout the whole process. This chapter provides guidance on how to fully white-label the client experience so they never see the WPMU DEV brand.
Step 1 – Brand the Hub
The very first thing you want to do is install and configure the Hub Client plugin on your own site at your own domain so whatever your clients see when they login is your brand, not ours.
The Hub Client enables you to have an exact duplicate of the Hub, on any site page you like, branded with your brand colors & logo, your own custom menu, even your own live chat support instance if needed.
You can install it on either a single site instance of WordPress, or on any one site in a multisite.
You can even install the Hub Client on multiple single sites, and brand each instance differently if you have multiple product or service brands.
Once installed and activated, follow the setup steps detailed in the Hub Client plugin documentation if needed to help you get things configured.
Step 2 – Brand Your Emails
Next, you’ll want to ensure all email communications are branded with your own domain as well, not WPMU DEV or some generic domain.
By default, emails sent from the Hub Client will send from your domain where that plugin is installed, for example: [email protected]
However, if the site where you’ve installed the Hub Client is hosted by WPMU DEV, emails will send from our default noreply address: [email protected]
Neither of those options look very professional for your business communications. So you’ll want to install and configure an SMTP plugin where you can specify your own domain address to be used as the sender email. For example: [email protected]
You can use any SMTP plugin you prefer, but we recommend our very own Branda plugin as it comes fully equipped with a host of additional white-labeling features.
Once installed and activated on the same site where you installed the Hub Client plugin, go to Branda > Emails in your site admin and activate the SMTP module. Then follow the setup steps detailed in the Branda plugin documentation if needed to help you get things configured.
Step 3 – Invite Your Clients from Your Branded Hub
Now that you have your own branded instance of the Hub set up on your own domain, and SMTP configured to ensure that emails are sent from that domain, the last thing to do is to ensure that you do not invite clients from the Hub on the WPMU DEV site.
When adding a new client to your Client Tools, or when editing an existing one, you want to be sure that the Primary Hub set for that client is your site where you have installed the Hub Client plugin.
They will receive the invitation email from the email address you set in the SMTP module in Branda. The confirmation and login link in that email will point them to your Hub on your site.
All future billing emails will come from your SMTP email address, and all billing activity for the client will occur on your branded Hub site.
7.5 Get Support
Copy chapter anchor to clipboardIf you still have questions or need assistance after reading this document, please don’t hesitate to contact our support superheroes using the available options under the Support tab in your Hub or via the Support tab in your WPMU DEV Dashboard.
