6. Defender

This guide explains how to use Defender’s security features to protect your WordPress sites from malicious attacks.
Defender requires PHP 8.0 or greater. See WPMU DEV Minimum Requirements for details.
Once Defender is installed and activated, refer to this guide for assistance configuring and managing Defender. Use the index on the left to quickly access guidance on specific features.
If you haven’t installed Defender yet, then you should visit the Defender Pro page where you can explore the plugin’s many features.
Upon activation or when certain features are configured, this plugin may add cookies to the user’s browser, store personal information in your database, or integrate with 3rd-party applications. You may need to disclose this information to your site visitors. For details, see Our Plugins in our privacy policy documentation.
Every WPMU DEV hosted site comes fully loaded with Pro versions of the following plugins automatically installed for you: Smush, Hummingbird, Defender, SmartCrawl, and Forminator. Not hosting with us yet? Check out our Hosting page to see if we might be a good fit for your projects.
Checklist for Securing Your WordPress Site – We’ve put together a super-handy 16-Step Checklist for Securing Your WordPress Site to ensure you don’t overlook any essentials and help you to build up the most robust security for your site.
Quick & Easy Security Tips – If you’re looking for some simple and effective security tips for your WordPress site, we’ve got you covered. Check out 7 Quick & Easy Security Vulnerability Fixes for a concise guide to fixing any weak points in your site security.
DDoS Protection Guide – If you’ve ever been hit by a DDoS attack, you know how crippling it can be. If your site’s security isn’t as tight as it could be, check out our DDoS Protection Guide and learn how to help protect your site from attacks with Defender’s IP ban, IP lockout, and 404 detection features.
Stop Hackers in Their Tracks – If you’re unfamiliar with security plugins it may be helpful to read our blog post, How to Stop Hackers in Their Tracks with Defender, before proceeding. The post discusses Defender’s features in a less technical manner than this guide and can help users formulate a plan to make the most of our premium website security plugin.
Expert Advice – Looking for some security tips from the experts? We recently interviewed some of our members to provide professional advice on WordPress security. For more information, read our blog, WordPress Security Expert Stories & Security Tips.
Recommended Reading – Looking for a concise guide to using Defender’s prime features to your advantage? Read our blog on how to Get the Most Out of Defender Security.
Prevent Hacking – Prevention is better than cure in many ways but it is crucial when talking about getting hacked – or rather, not getting hacked. For a full guide on how to protect your site from hackers, check out How Not To Get Hacked.
6.1 Quick Setup Wizard
Copy chapter anchor to clipboardThe Quick Setup Wizard walks you through enabling the core security features for your site and runs a pre-check scan to identify any security issues that need to be addressed.
The wizard appears the first time the plugin is activated, or if you use the Reset option.
If you do not wish to use the wizard to set up the plugin, you can exit at any time by clicking the Skip start up wizard link. This will close the wizard and take you to Defender’s Dashboard screen.

On the welcome screen, click the Start wizard button to begin setting up Defender. The wizard guides you through enabling key security features for your site.

The Local Firewall option is enabled by default. It protects your site by automatically locking out IP addresses and user agents that repeatedly attempt to brute-force your login page or access files that don’t exist. Click Continue to move on to the next step.

The next step in the wizard displays a set of security options that harden your WordPress installation by reducing potential vulnerabilities. All options are enabled by default, including disabling XML-RPC and error reporting, trackbacks and pingbacks, PHP execution and the file editor, user enumeration and information disclosure, and automatic regeneration of security keys.
You can review or modify any of these settings later from their respective screens. Click Continue to move on to the next step.

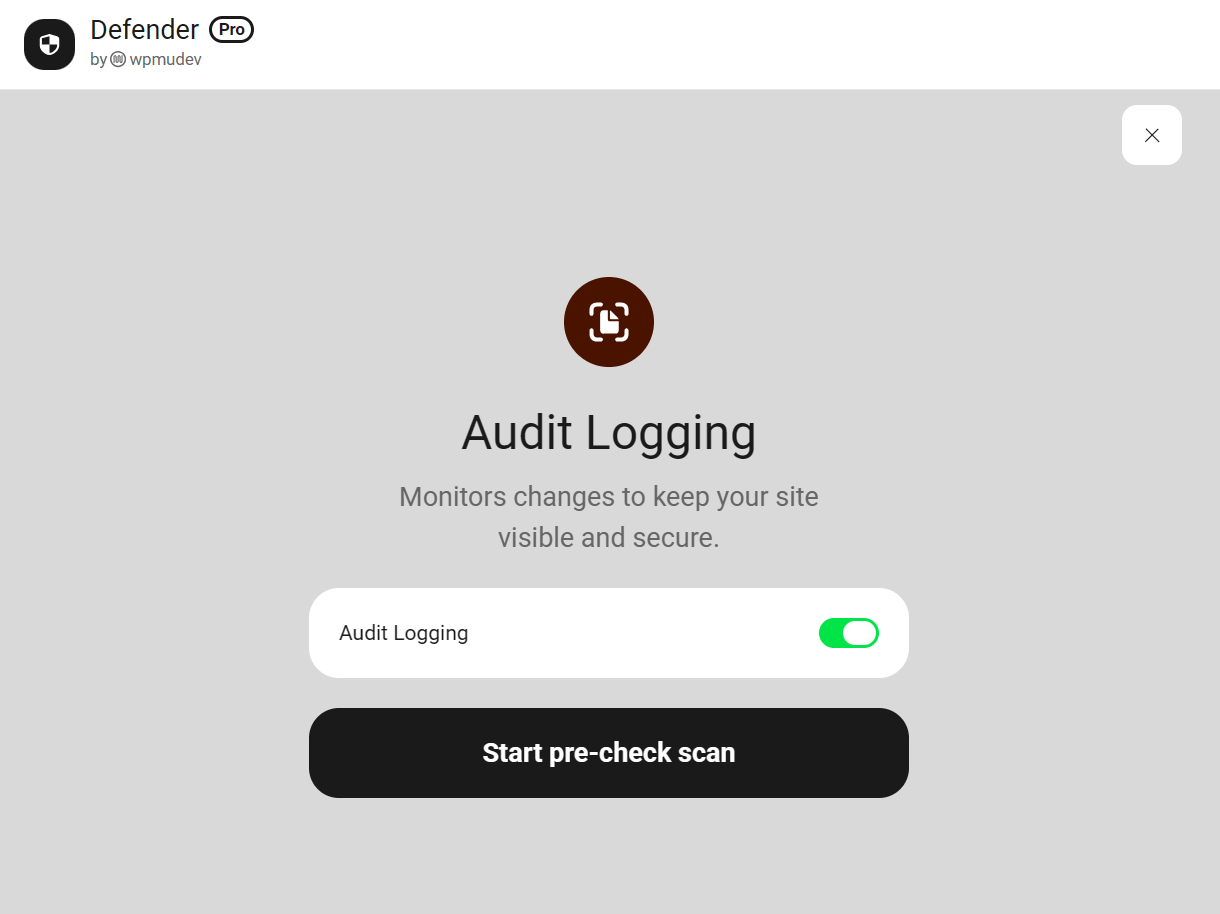
The final step before the pre-check scan lets you enable the Pro Audit Log feature that monitors and logs all changes on your site to help you identify what triggered any unwanted behavior. The option is enabled by default. Click Start pre-check scan to proceed.
If your site is not yet connected to a WPMU DEV account, you will be prompted to connect. Connecting your site is required to run the pre-check security scan. Connecting also unlocks the following features: Anti-bot Firewall, Advanced Site Scanning (includes scanning for suspicious code & known vulnerabilities, Block List Monitor, as well as Safe Repair & Quarantine.
Click Sign in if you already have a WPMU DEV account, or Create free account to create one for free.
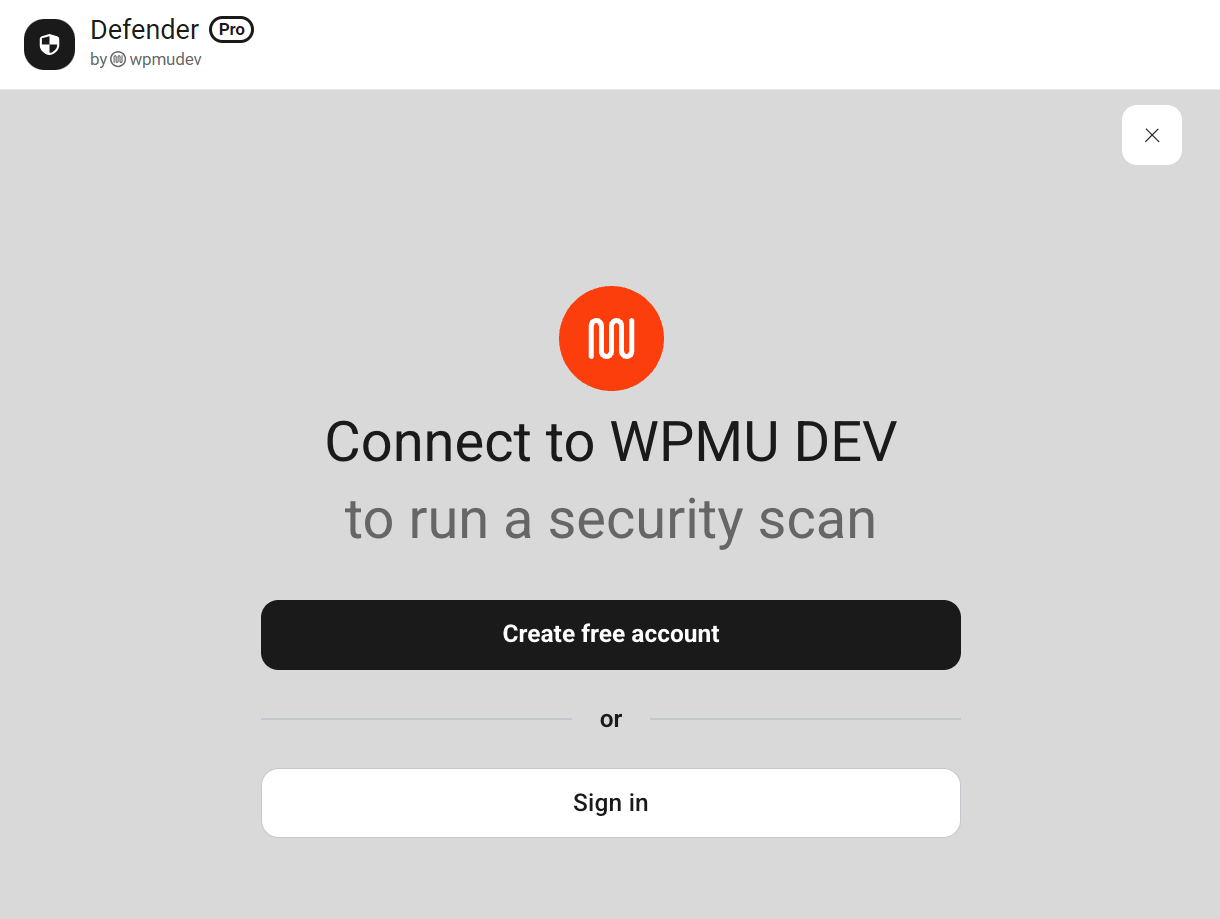
Clicking Create free account opens a registration form where you can create your free WPMU DEV account by entering your name, email address, and password, then clicking Create a free account. Alternatively, click Sign up with Google to sign up using your Google account.

Once you click Start pre-check scan, Defender begins scanning your site for security issues. A progress bar shows the current scanning status. No action is required while the scan runs.

Once the scan completes, Defender notifies you if any security actions are required. Click View results to go to the Defender Dashboard, where you can review and action any security issues found.

6.2 Dashboard
Copy chapter anchor to clipboardThe Dashboard provides an overview of your site’s security status and quick access to key actions and features.
6.2.1 Header Bar
Link to chapter 2The header bar is displayed across all screens in Defender and provides quick access to WPMU DEV tools and resources.
Click WPMU DEV to navigate to The Hub, your central dashboard for managing all your WPMU DEV-connected sites. You can also quickly access WPMU DEV support and this usage guide.

The Activity Log sidebar displays a timestamped record of all actions performed in Defender. The icon appears in green when there is new activity, and turns grey once you have viewed all activity.
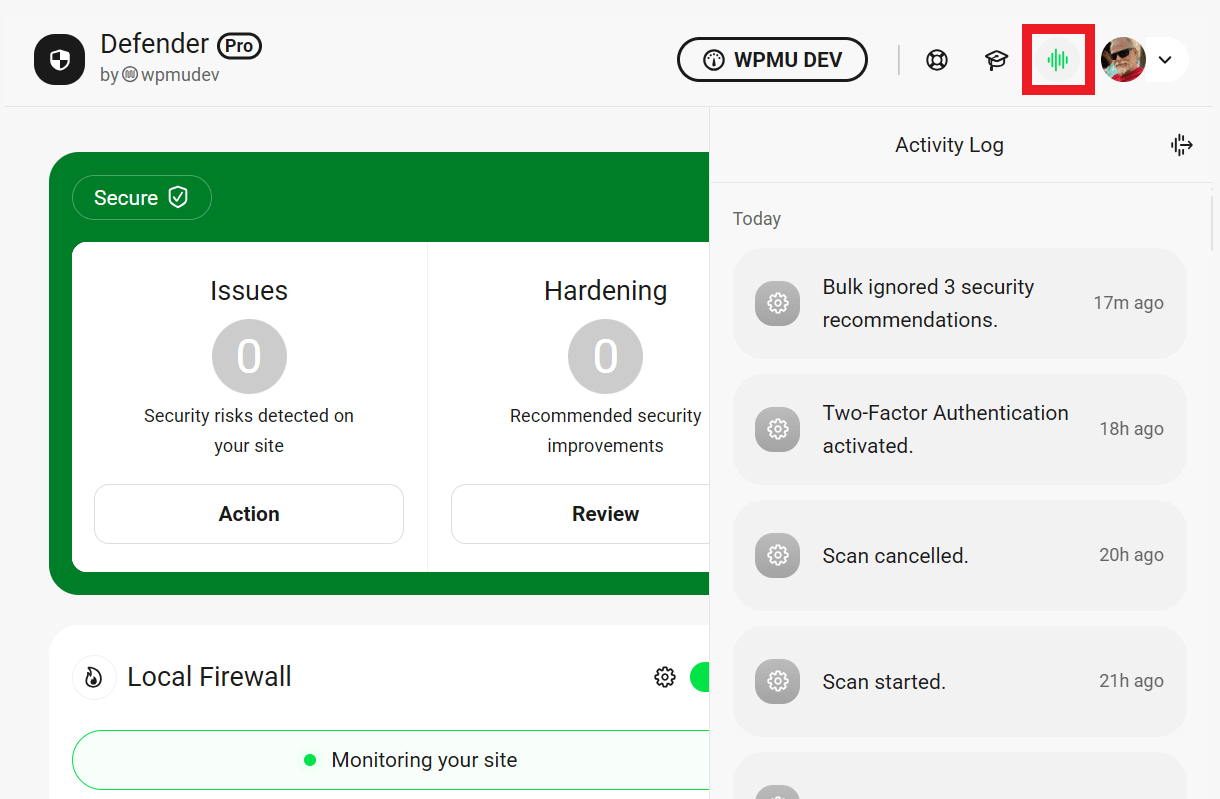
Click your profile picture to access a menu with links to Support, Documentation, and the Product Roadmap.

If your site is connected to a free WPMU DEV account, an additional Disconnect option appears in the menu, allowing you to disconnect your site from the account.

If your site is not yet connected to a WPMU DEV account, a crossed-out profile icon appears in its place. Clicking it prompts you to connect by either creating a free account or signing into an existing one.

6.2.2 Summary Panel
Link to chapter 2The Security summary panel allows you to perform certain actions directly from the Dashboard.
Scan Site
You can trigger an immediate scan of your site at any time by clicking the Scan site button. The date and time of the last scan is displayed next to the button for reference.

While the scan is in progress, a progress bar appears in the bottom-right corner of the screen showing the current scanning status. If you ever need to abort a scan in progress, simply hover your cursor over the progress bar and click the [X] icon.
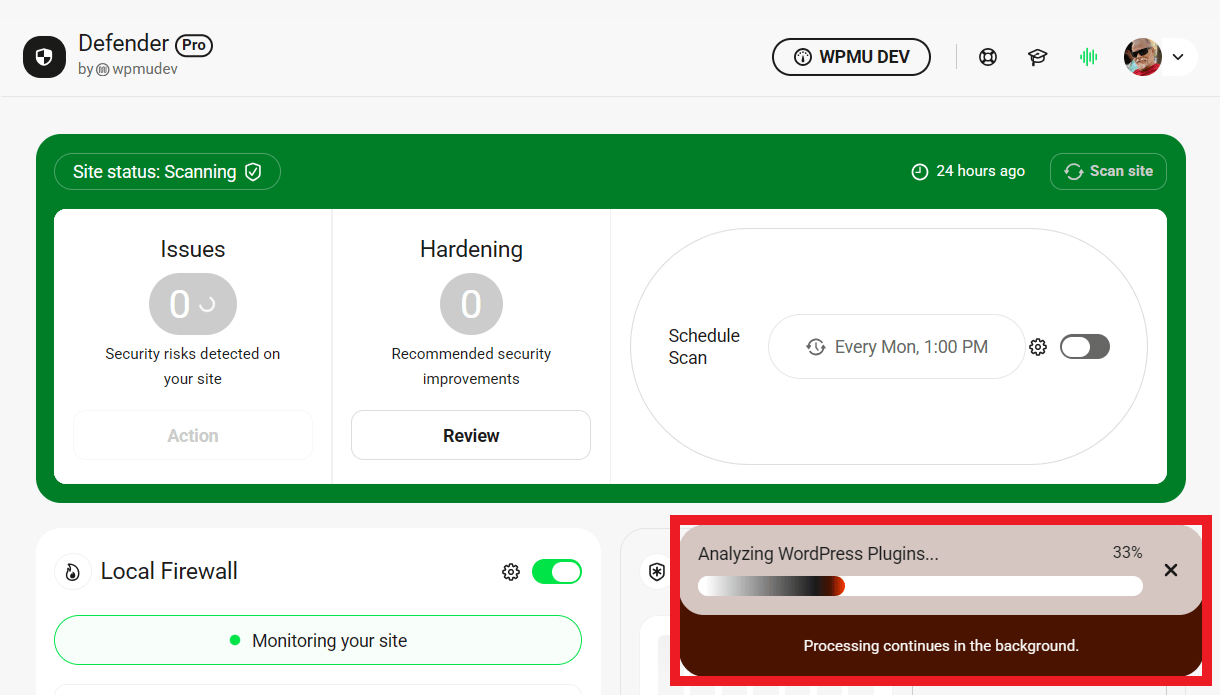
When the scan is complete, and there are no security issues at all on the site, the summary box will display in green as seen above. If any security Issues or Hardening recommendations are discovered, the summary box will be highlighted in red, with the issues indicated in their respective widgets.

Click either the Action or Review buttons to be redirected to the corresponding screens in Defender where you can take any needed actions.
Schedule Scan (Pro only)
This indicates the scan schedule you have currently set, if any. Toggle on the feature and click on the displayed schedule to be redirected to Settings > Reports & Alerts where you can adjust the schedule and set up any reports you might need.

6.2.3 Quick Feature Controls
Link to chapter 2This section displays cards for key Defender features, giving you a quick way to enable or disable each feature directly from the Dashboard. Each card includes a brief description of the feature along with options to toggle them on and links to each feature’s configuration screen where you can manage its settings in detail.

6.3 Issues
Copy chapter anchor to clipboardDefender scans WordPress core, plugin and theme files for unexpected changes, known vulnerabilities & suspicious code, and alerts you if it finds any outdated plugins or themes. You can enable or disable any scan types you need in the Settings > Tools section.
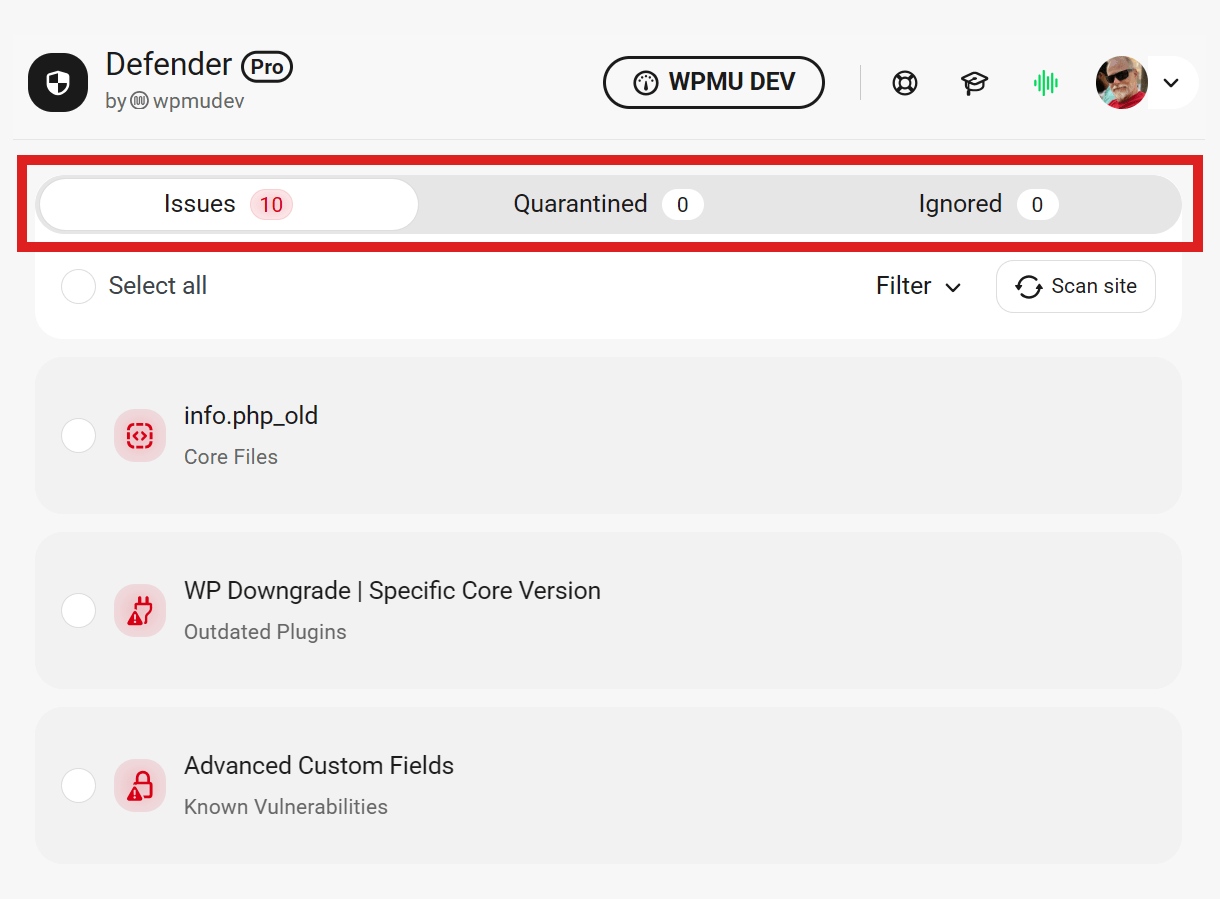
The three tabs in this section of Defender include:
- Issues – Suspicious PHP functions, file changes, known issues, or published vulnerabilities that Defender has discovered within a site’s code.
- Quarantined – Files that have been quarantined using the Safe Repair option.
- Ignored – Files that you have chosen to ignore in all subsequent scans.
You can trigger a new scan at any time from this screen by clicking the Scan site button at top-right.

When a scan is running, the scan progress is displayed in a bubble at the bottom-right of the screen. You can monitor the scan progress there while it continues running in the background.

You can continue working on other tasks while the scan is in progress, and Defender will notify you via email when it’s complete.
At this time, the notification email will be automatically sent to whoever triggered the manual scan. A future update to Defender will include an option to configure the recipient(s) for this notification.
Note that the scanning feature will run for a maximum of 3 hours before timing out. If it does fail to complete in that time, it will cancel itself and display any issues it found within that time frame.
If the scan does time out, we recommend that you try increasing the PHP memory on your site, or disable one or more scan types, and try running the scan again.
Click the Filter option to open a dropdown where you can filter the scan results to show only selected issue types:
- Core files
- Plugin files
- Outdated plugins
- Removed plugins
- Known vulnerabilities
- Suspicious code
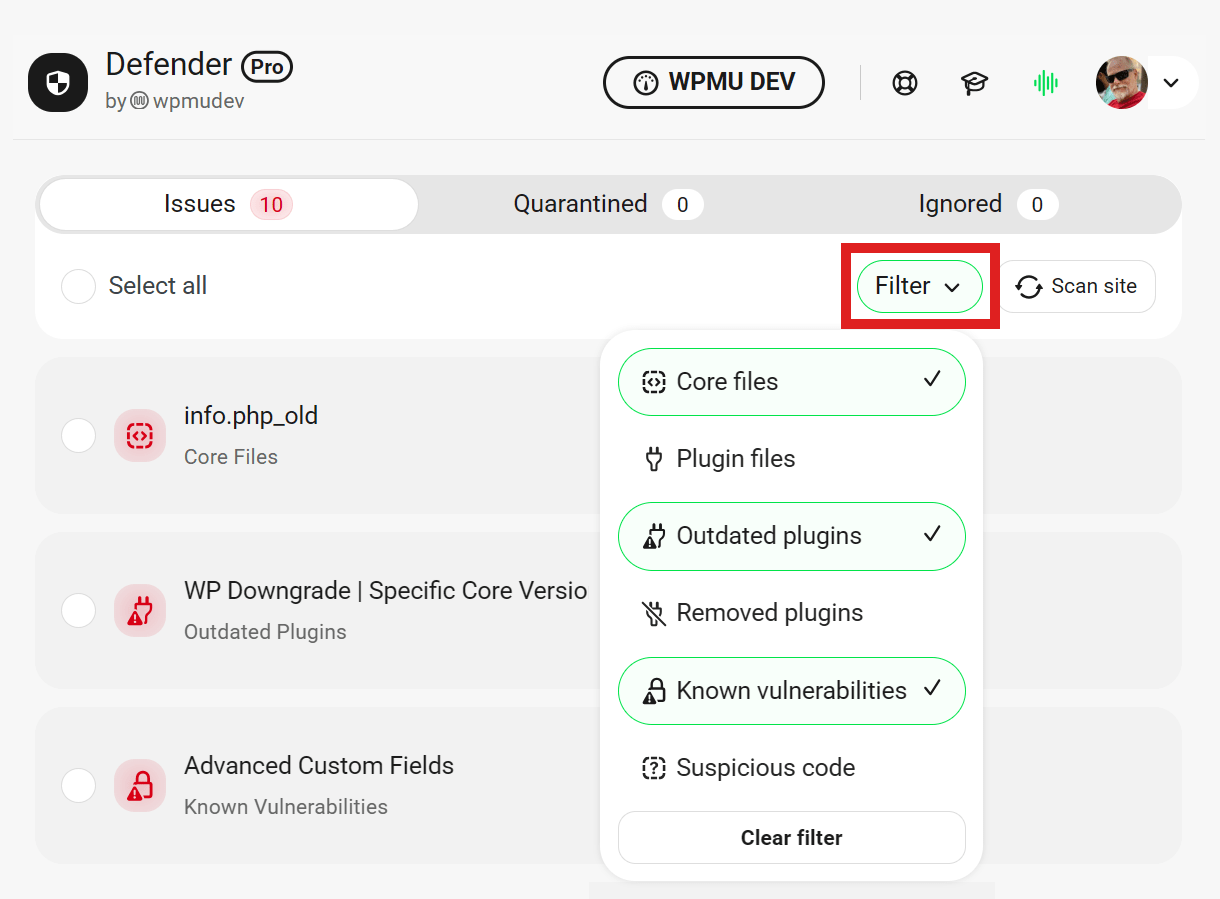
Hover your cursor over any issue in the list to reveal options to Ignore or Delete the issue, or select several to perform the same actions in bulk. Actions will appear either to the right of the details or below them depending on your screen resolution.

Defender’s security scanning features can help you determine if you’ve been hacked, and our blog post Find Out if You’re Hacked: How to Find and Delete Suspicious Code with Defender can help you understand how to get the most from these features.
Defender is a fantastic tool that can be used to scan your WordPress site security, and we stand by that. However, there is no harm in being extra secure by working additional tests into your security routine. If you are interested in using other free scanners, check out our blog on 6 Free WordPress Security Scanners.
So, you’ve been hacked! As terrible as this is, there is something you can do about it. See the Malware Removal chapter in our Expert Services documentation.
6.3.1 Issue Details
Link to chapter 3Click the arrow to the right of any issue to expand it and see a detailed explanation of the issue. See the Resolving Issues chapter below for guidance on resolving specific issue types.

-
- Issue Details — A brief explanation of the issue
- Error— A snippet of the suspicious code, or information about the modified/unknown file found
- Location — The issue’s file path
- Size — The file’s size
- Date added — The date and time the code or file was added to the site.
- Ignore — Click Ignore to remove a specific issue from the Issues tab. Ignored issues will no longer appear in the Issues tab, but will appear in the Ignored tab, instead.
- Delete — Click Delete to delete the suspicious file. However, if the quarantine option is checked, a copy of the file will be quarantined before deletion. The quarantined version can be restored anytime within its retention period. Note that the quarantine option is available only for the plugin files from wp.org
- Safe Repair – Click Safe Repair to replace the modified plugin file with its latest copy fetched from the Official WordPress repository. This option is available only for the files of plugins downloaded from WordPress.org. When a file is repaired, any local changes made to the file are overridden
You can also quarantine the modified files before repairing them. Enabling the Quarantine option will quarantine a copy of the modified file before replacing it with the latest version from the wordpress repository. This helps you to restore the quarantined version of the file if you need it later.
- Quarantine – The Safe Repair and Delete features come with an option to enable file quarantine for plugin files from WordPress.org. This option comes in handy when any unexpected issues occur during the file deletion or repair. The quarantined file can later be restored. All the quarantined files will appear under the Quarantined tab.
Once an issue has been ignored, Defender will no longer identify the issue as a potential risk in future scans. So we strongly recommend being sure something is harmless before choosing to ignore it or delete it.
False Positives
Given the virtually unlimited potential for customization in WordPress, legitimate code can occasionally be flagged as suspicious because it resembles malicious code. This can happen, for example, when a function is modified by a plugin or multiple plugins, by a theme, or when a user (admin or developer) edits site code directly in the file or theme editor.
Defender is designed to minimize the occurrence of false positives, but since malicious code is almost always written to resemble legitimate code, it is impossible to completely avoid them.
Consider the following code, which was flagged as potentially harmful because it employs the eval() function in a way similar to how it is used in malware.
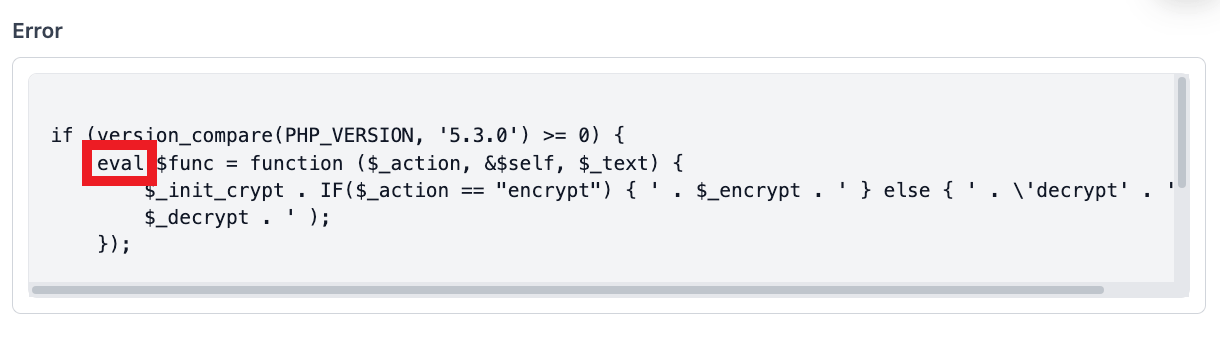
The eval() function executes a value from string, which became problematic when malware developers began using it to insert malicious code. The eval() function still has valid uses, however, so Defender flags the function wherever it appears so admins can verify its use as harmless.
6.3.2 Resolving Issues
Link to chapter 3Defender flags PHP functions, code & files when they vary from what is expected or when they match known issues.
Once a flagged function or suspicious code has been verified as safe or malicious as seen below, click Ignore or Delete File, as appropriate. These options will appear either to the right of the details or below them depending on your screen resolution.
Issue – Unknown file in WordPress core
Defender scans your WordPress core files and compares the current version with the WordPress.org repository. Any core file that does not exactly match what is found in that repository will be flagged as an issue. Please review the content of the file before taking any action.
Known safe files
Files like .htaccess, error.log, web.config, usually are part of your hosting. If your WordPress install is not in English, you might detect files such as license-sv_SE.txt where sv_SE is one of the languages of your site. Also, robots.txt, wordfence-waf, etc files can be created by a plugin and be perfectly legitimate.

Issue – This directory does not belong to WordPress core
Much like files mentioned above, this indicates a directory that does not match the current WordPress version found in the repository.
Known safe directories
Directories like cgi-bin, .welknown, are usually safe to ignore as they are part of the server setup where a site is hosted. Before ignoring them, please review their contents; in some cases, directories can contain malicious files. If you’re not sure, please contact your hosting to verify their integrity.
Issue – This plugin file appears modified
The code in the plugin file doesn’t match what is found in the official WordPress repository. Please compare the file with the original after expanding the report’s details, and if it has not been changed by you or your developer, it is important to restore it back to the original state. Simply click on the Restore button to fix the issue.
Issue – This theme file appears modified
Similar to plugin files as seen above, the theme code doesn’t match the official WordPress repository. It is very common for a developer to modify a theme file, so please review the changed code before taking any action. If these changes are made by you or your developer, create and use a child theme instead to avoid losing the changes when you update the theme. If the changes made are suspicious, please restore the original file by clicking on the Restore button.
Issue – Vulnerability found in [v.X.X]
When you see this report, update the corresponding plugin, theme, or WordPress core immediately (If an update is available). This means the plugin, theme, or WordPress core has a known security vulnerability that hackers can exploit and do damage to your site.
The severity of the vulnerability will be indicated by a CVSS (Common Vulnerability Scoring System) Score ranging from 0 to 10, 10 being the most severe. Note that the CVSS score will not be shown for issues with a score of 0.
Click the Update button to update the affected plugin, theme, or WordPress core right from this screen (this button appears instead of a Delete button for this issue type). If there are no updates we advise deactivating the plugin or theme immediately and enabling it only after an update is released, or check for an alternative plugin or theme. If you are currently using the latest version of WordPress in which a known vulnerability has been found, we recommend waiting for the next core update instead of downgrading to a previous version.

Issue – Suspicious code found
Suspicious function found in the file. The red highlighted code is the code flagged as suspicious. Be sure that a plugin or theme is deactivated before taking action to remove a flagged file. Note that these warnings can be false positives, so consult a plugin developer before taking action. If this is a false positive and the file is removed while the plugin is active, it can cause a fatal error on your site.
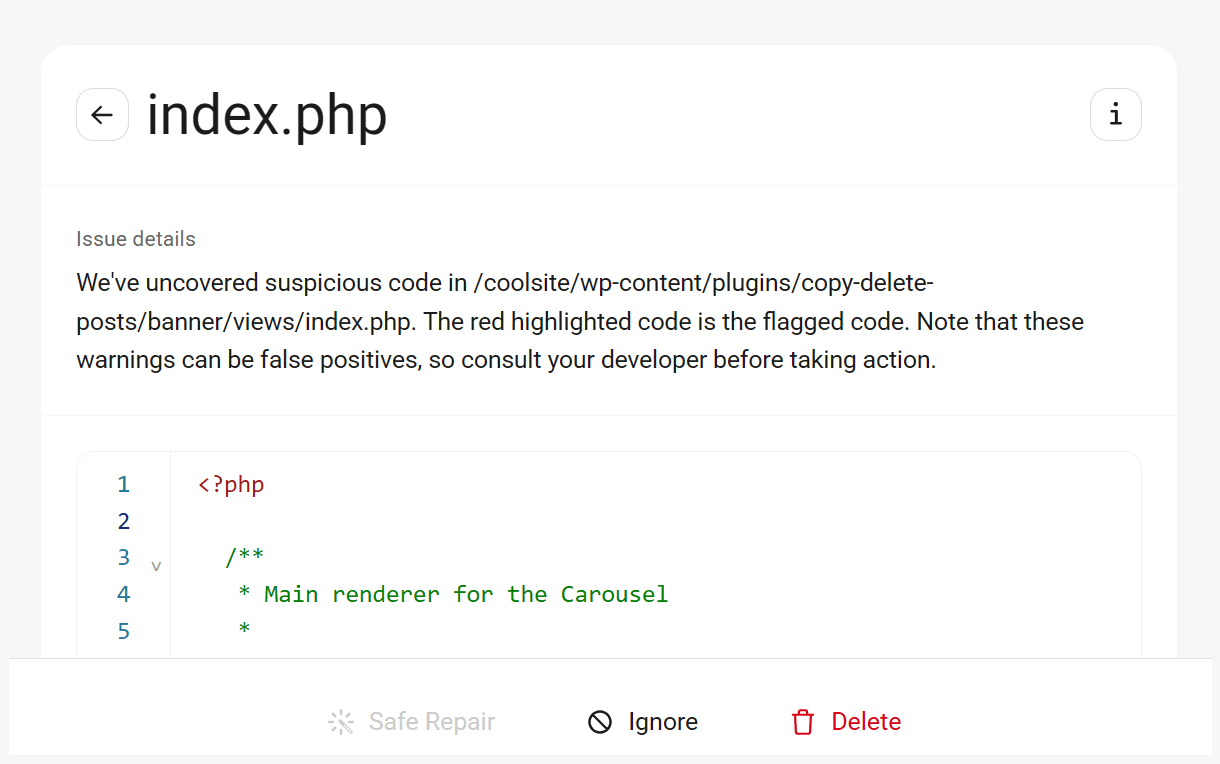
Note that if a plugin or theme is currently active on the site, the Delete button will be disabled for issues of the Suspicious function found type, and a notice will appear in the issue details to remind you to deactivate the plugin or change the theme before deleting the file.
Issue – Plugin not updated in the past 2 years
Defender flags plugins as outdated when they have not been updated by their developer in the last 2 years. While these plugins may still function correctly, lack of updates can pose a security risk, especially if vulnerabilities are discovered but not patched.
We recommend checking the plugin’s changelog and support forum on WordPress.org to determine whether it is still actively maintained. If the plugin is no longer supported, consider replacing it with a more actively maintained alternative.
To fix this issue, use the Delete button to remove the plugin from your site. If the plugin is active, the button will be grayed out to prevent you from accidentally breaking functionality it provides (for example, a forms plugin with live forms on your pages). Before deleting, make sure the plugin’s functionality is no longer in use on your site. If you are still using it, find a suitable replacement first, then deactivate and delete the plugin.

Issue – Plugin removed from the WordPress.org repository
This issue appears when Defender detects that an installed plugin has been removed from the official WordPress.org repository. Plugins are typically removed due to security issues, violations of repository guidelines, or abandonment by the developer.
Removed plugins may no longer receive updates or support, and keeping them installed could pose a security risk to your site. It’s best to discontinue use and replace the plugin with a reputable alternative.
To fix this issue, click Delete to remove the plugin from your site. If the plugin is active, the Delete button will be grayed out. Removing the plugin will break any functionality it provides, so we strongly recommend identifying a replacement before taking action.
Verifying Suspicious Code or Files
Advanced users familiar with code have an advantage when it comes to verifying code as safe. However, there are things any user can do to determine the best response to suspect functions, code & files.
- Verify custom edits – Verify that the code in question wasn’t edited by an admin user or developer. Often, if the code was manually edited, the person who performed the edit is in the best position to verify the code in question. This is one reason why it’s important to keep track of the custom edits made to your sites.
- Contact Developer – If Defender flags code within a plugin or theme and you didn’t add the code yourself, it’s a good idea to share the issue details, including the code snippet, with the original developer and request guidance.
- Be sure to have a current backup of your site before making any changes. So if something goes wrong, you can always restore your site.
- Contact WPMU DEV Support – Our support team is better acquainted with Defender than anyone and should be your first call if you are confronted with a security scanning issue you do not understand.
6.3.3 Quarantined Issues
Link to chapter 3When a file is repaired, it will be deleted from its plugin directory and replaced by its latest copy from the WordPress repository.
If the quarantine option is enabled, then a copy of the file will be quarantined before being repaired or deleted. This quarantined file will be moved to the Quarantine directory with a hashed file name. For security, access to this directory is forbidden by default. The URI of this can be found in the Quarantine Settings section.
Note that the “File change detection” or “Suspicious code” options should be enabled in Settings > Tools to view the Safe Repair feature in action.

A list of all the quarantined files is displayed under the Quarantined tab.
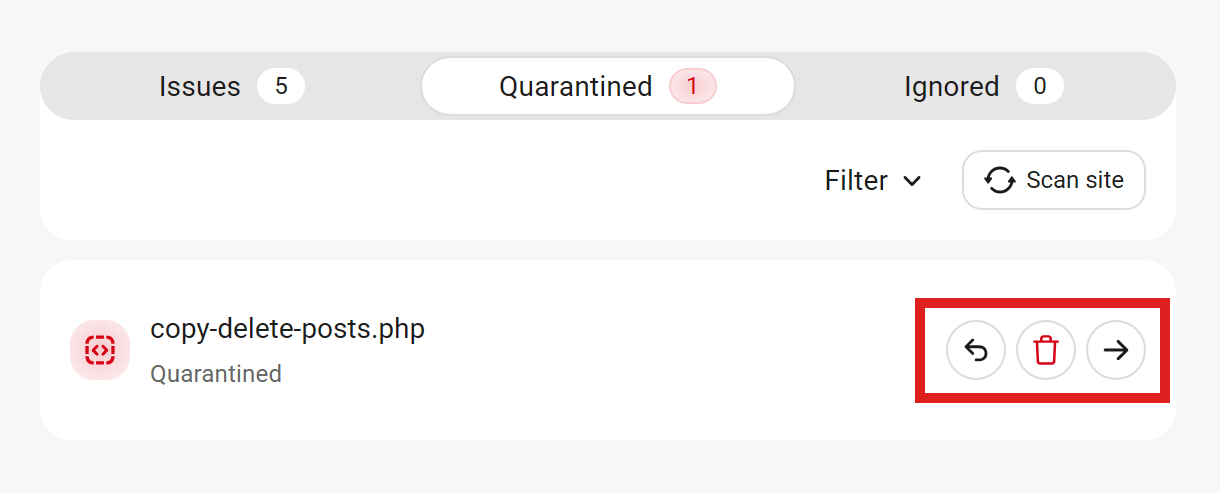
Hover your cursor over a quarantined file to reveal the options to Restore or Delete it.
Click Restore to restore the quarantined version of a repaired or deleted file back to its corresponding plugin directory. After restoration, the quarantined file will be removed from the Quarantined tab as well as the Quarantine directory.
Note: The local changes made to the quarantined files will be preserved after restoration.
Click Delete to permanently delete the quarantined file.
Click on any issue to reveal the following information:
- File Name – The name of the file being quarantined
- Quarantined by – The name of the user who quarantined the file
- Quarantined filename – The hashed file name in the quarantined directory
- Path – The path of the original file in the server
- Modified On – The date the file was last modified
- Quarantined On – The date the file was quarantined

Every Quarantined file will be retained in the Quarantine directory for the chosen time period (retention period), the default being 30 days. After this period, the file will be automatically deleted. You can change the retention period of the quarantined files in the Settings > Tools section.
File already quarantined
If a file that has already been quarantined gets modified and is quarantined again, you will find all quarantined versions of that file under the Quarantined tab. You can restore the version you want.
Orphaned files
If you attempt to restore a quarantined file but the plugin the file belongs to is currently not available on your site, then you can choose to install the required plugin(s) and try to restore the file or retain this orphaned file until its retention period or delete it.
Updating retention period to a greater value
If the quarantine retention period is updated to a value greater than its initial value, then the new retention period of a file is calculated as follows:
“updated retention period value” – ”number of days retained since quarantine”
For example: If the quarantine retention period was initially set to 30 days, and after retaining a file for 10 days (number of days retained since quarantine), the retention period is updated to 60 days (updated retention period), then the new retention period of the file will be: 60 – 10 = 50 days.
Updating retention period to a lesser value
If the quarantine retention period is updated to a value lesser than its initial value then the file will be immediately deleted if the file has retained past the updated retention period else the new retention period of the file is calculated as follows:
“updated retention period value” – ”number of days retained since quarantine”
For example: If the quarantine retention period was initially set to 60 days, and after retaining a file for 10 days (number of days retained since quarantine), the retention period is updated to 30 days (updated retention period), then the new retention period of the file will be: 30 – 10 = 20 days
6.3.4 Ignored Issues
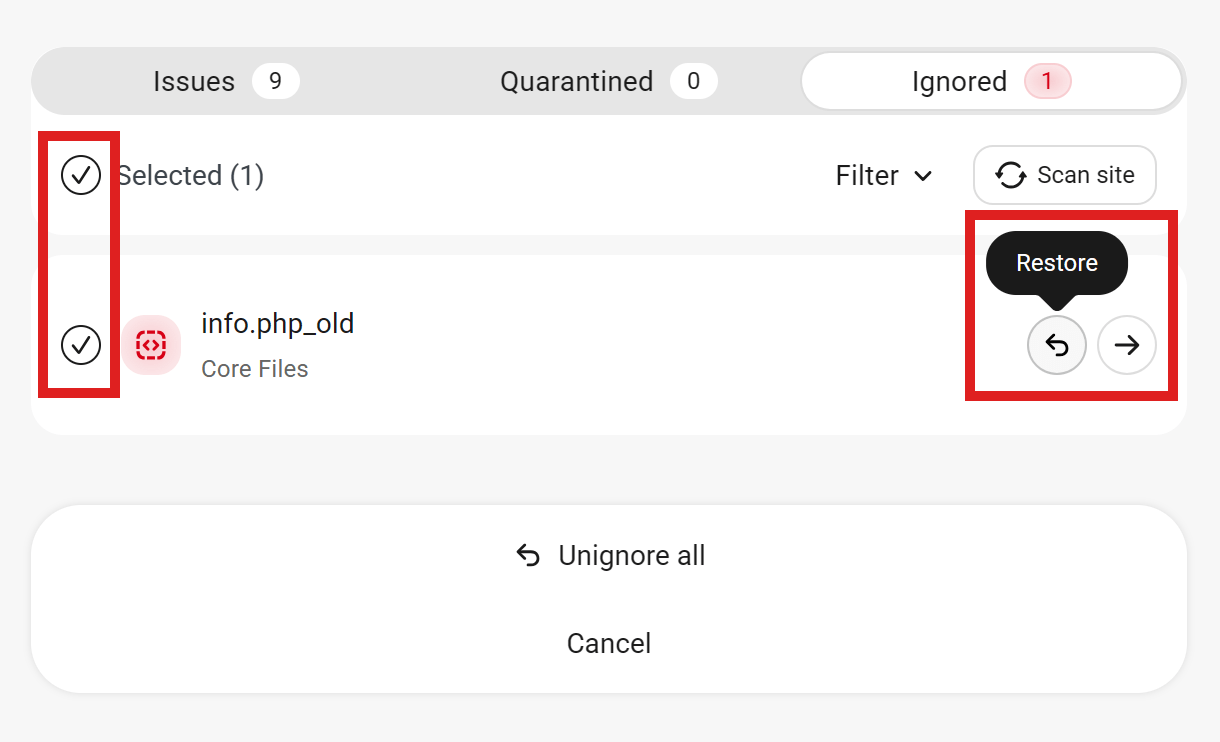
Link to chapter 3Ignored issues are those which Defender identified as suspicious and displayed in the Issues tab, after which a user admin selected the Ignore option.
Once an issue has been ignored, Defender will no longer identify it as a possible vulnerability, so it is wise to be sure an issue is harmless before clicking the Ignore option.
Restoring Ignored Issues
Each ignored issue will be accompanied by a Restore button. Click Restore to return any ignored issue to the Issues tab, where it can be addressed as necessary. Use the Bulk Action option to restore multiple selected items at once.
6.4 Hardening
Copy chapter anchor to clipboardHardening recommendations are, generally, common security vulnerabilities that can be addressed by applying security best practices to a site’s configuration wherever possible.

The three tabs in this section of Defender include:
- Hardening – Potential security vulnerabilities, along with suggested fixes.
- Actioned – Issues for which a fix has been applied, along with the option to undo (Edit) that fix.
- Ignored – Issues Defender will no longer identify as a potential vulnerability because the Ignore option has been selected in the recommendations details.
6.4.1 Hardening Recommendations
Link to chapter 4Recommendations are, generally, opportunities to improve site security with relatively simple configuration changes. Each recommendation is accompanied by a suggested solution, many of which require nothing more than a single click to implement.
We recommend applying every possible tweak. However, some fixes may not be practical for every site. Keep in mind that most tweaks can easily be undone using the Edit option, available in the Actioned tab. The Edit option allows admins to temporarily disable a tweak to accomplish a task, then enable it again when the task is complete to maintain site security.
Ultimately, admins must determine for themselves which tweaks work for their sites and which do not.
You can also use the Bulk Actions feature to either Action or Ignore several recommendations at a time.

Applying Fixes
Each item under the Recommendations tab can be expanded to see a detailed explanation of the issue, as well as our suggested fix. Click the arrow to the right of any issue to access the detailed explanation.
Each detailed explanation includes:
- Overview – An explanation of the potential vulnerability.
- Potential risk – The current state of a specific issue.
- Recommendation – Our recommendation for addressing a specific issue.
- Ignore – Click Ignore to remove any issues from the Recommendations tab. Ignored issues will no longer appear in the Recommendations tab, but will appear in the Ignored tab, instead.
- Action – An action button unique to the suggested fix appears in the bottom right corner.

6.4.2 Recommendations Overview
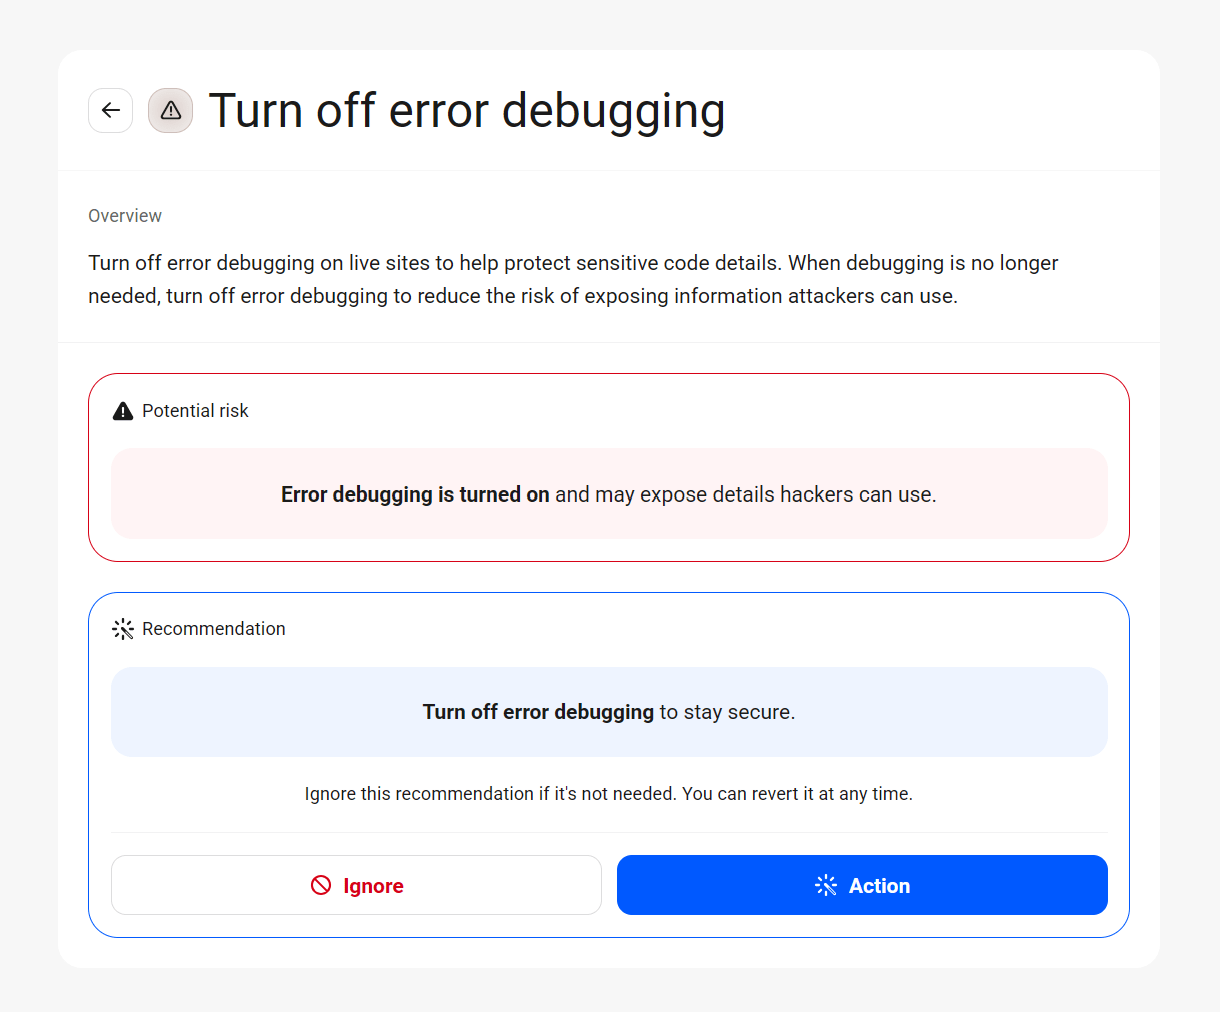
Link to chapter 4Turn off error debugging
Developers often use the built-in PHP and scripts error debugging feature, which displays code errors on the frontend of your website. It’s useful for active development, but on live sites provides hackers yet another way to find loopholes in your site’s security.
Enabling this recommendation will automatically add the following constant to your wp-config.php file to disable error reporting: define( 'WP_DEBUG', false ); // Added by Defender
If that constant is already defined in your wp-config.php file with the value set to true, enabling this recommendation will change the value to false.
Reverting this recommendation will change the value of the constant from false to true to re-enable error reporting.
If the automatic method fails for any reason, you can apply the constant manually following the steps detailed in Manually Applying Recommendations below.
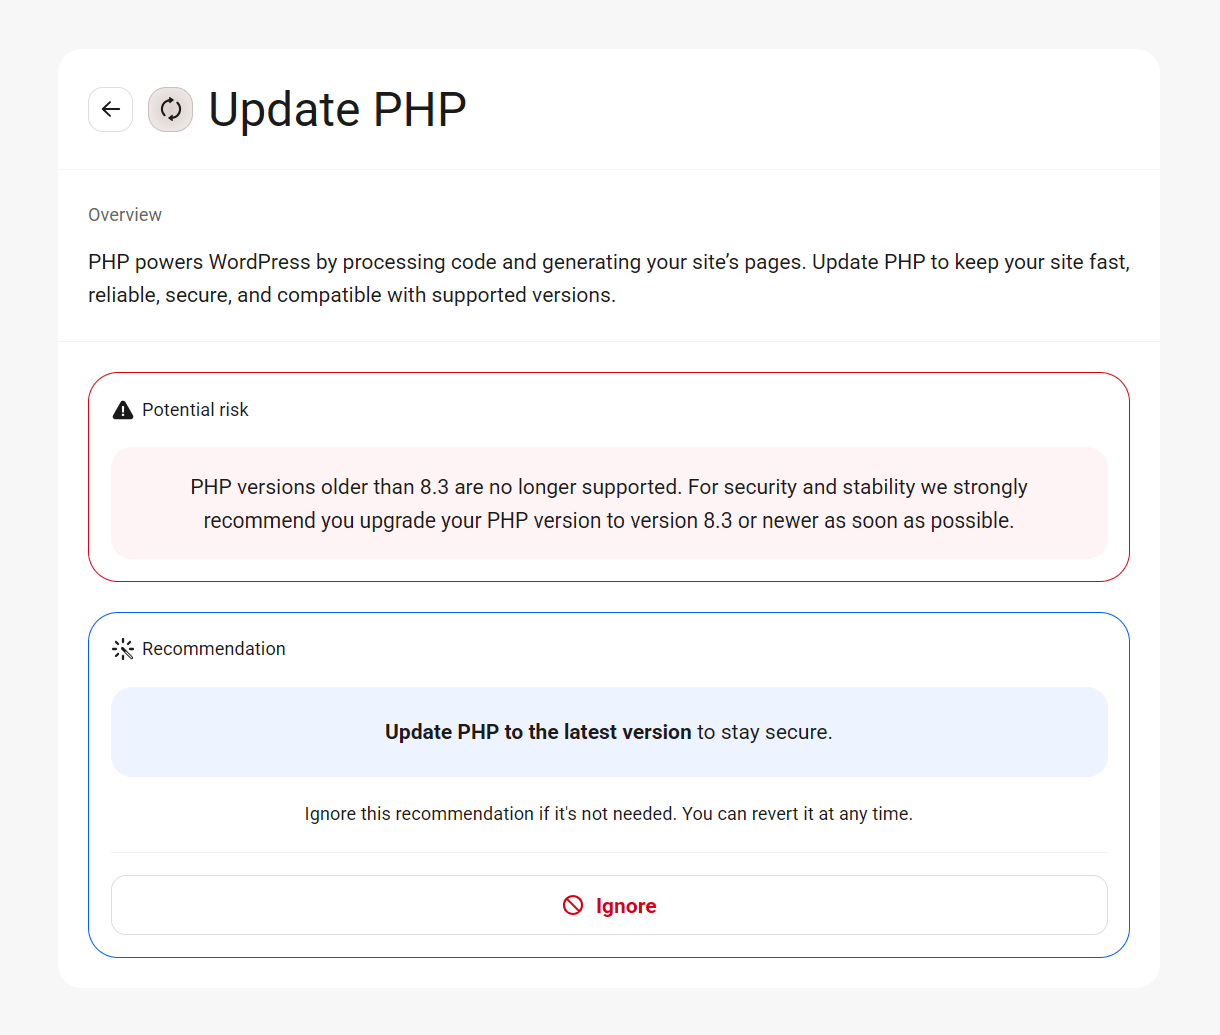
Update PHP to latest version
PHP is the software that powers WordPress. It interprets the WordPress code and generates web pages people view. Naturally, PHP comes in different versions and is regularly updated. As newer versions are released, WordPress drops support for older PHP versions in favor of newer, faster versions with fewer bugs.
Unfortunately, Defender cannot update the PHP version for you as it does not have access to your server settings. Most hosting companies allow you to update the PHP version via cPanel or a custom dashboard. Check your hosting provider documentation for instructions on updating the PHP version.
If you are unsure how to proceed, ask your system administrator, developer or hosting provider for assistance or to do it for you.
Prevent PHP execution
By default, a plugin/theme vulnerability could allow a PHP file to get uploaded into your site’s directories and in turn execute harmful scripts that can wreak havoc on your website. Prevent this altogether by disabling direct PHP execution in directories that don’t require it.
This issue cannot be fixed automatically. Instead, server-specific instructions are provided to help you manually disable PHP execution based on the type of server your site is hosted on. Instructions are available for Apache, LiteSpeed, Nginx, and IIS environments, along with the required configuration rules and steps needed to apply the protection.
In some cases, this issue may already appear in the Actioned tab if your hosting provider enforces PHP execution restrictions at the server level. This typically happens on managed or security-hardened hosting environments where PHP execution is already disabled in writable directories, even though the manual instructions are still shown for reference.
Follow the instructions shown for your server type to apply the fix manually if needed.

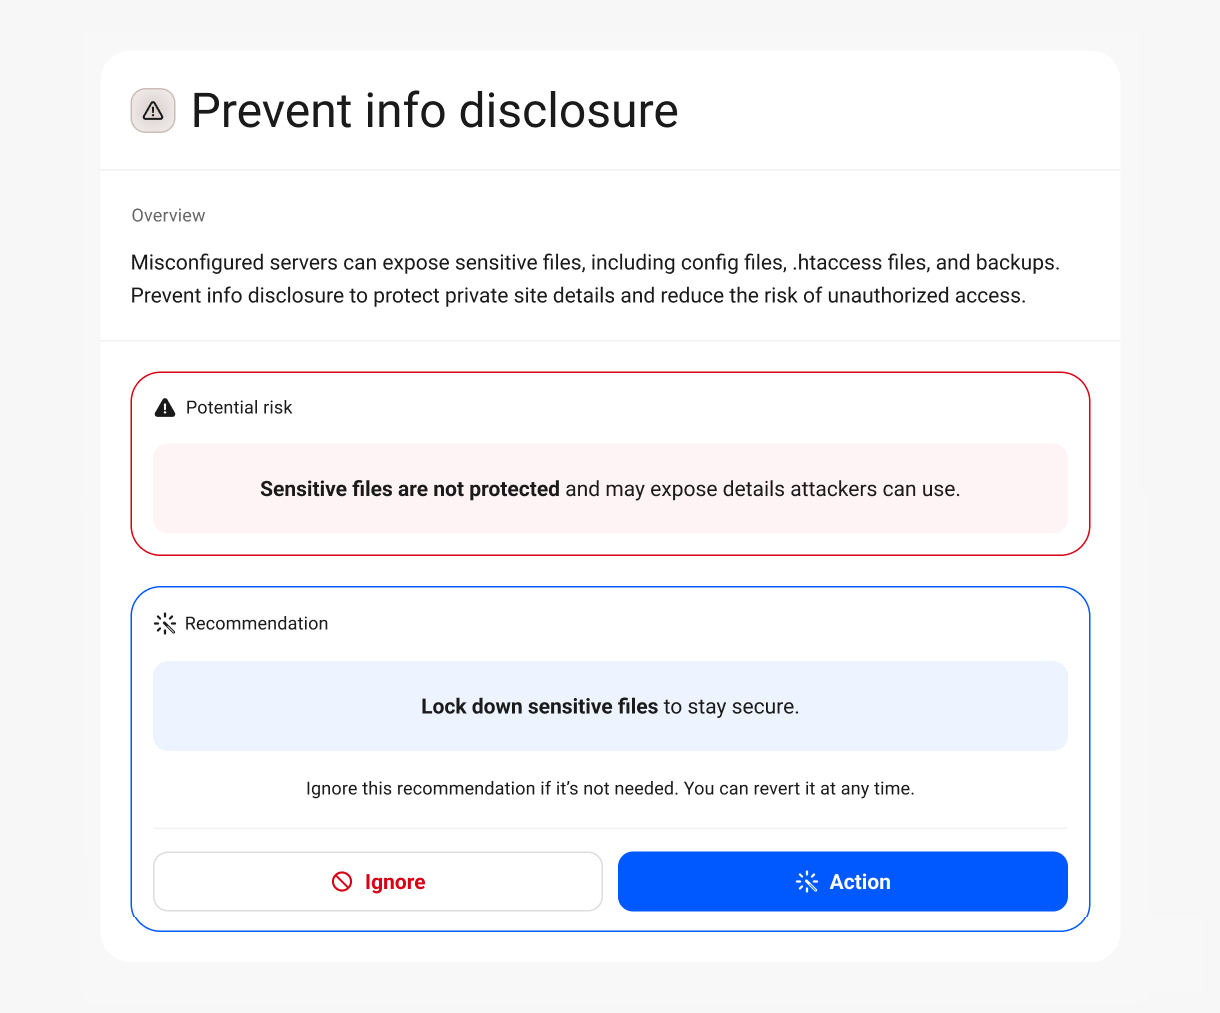
Prevent information disclosure
Often servers are incorrectly configured, and can allow an attacker to get access to sensitive files like your config, .htaccess and backup files. Hackers can grab these files and use them to gain access to your website or database.
Defender can automatically add the code needed to an .htaccess file in the root directory of your site to lock down specific file types so only WordPress can access them.
In case the automatic method does not work, or if your site is on an Nginx server, you can apply the rules manually following the steps detailed in the recommendation, or see Manually Applying Recommendations below: If your site is on an IIS server, you’ll want to visit visit Microsoft TechNet for instructions.
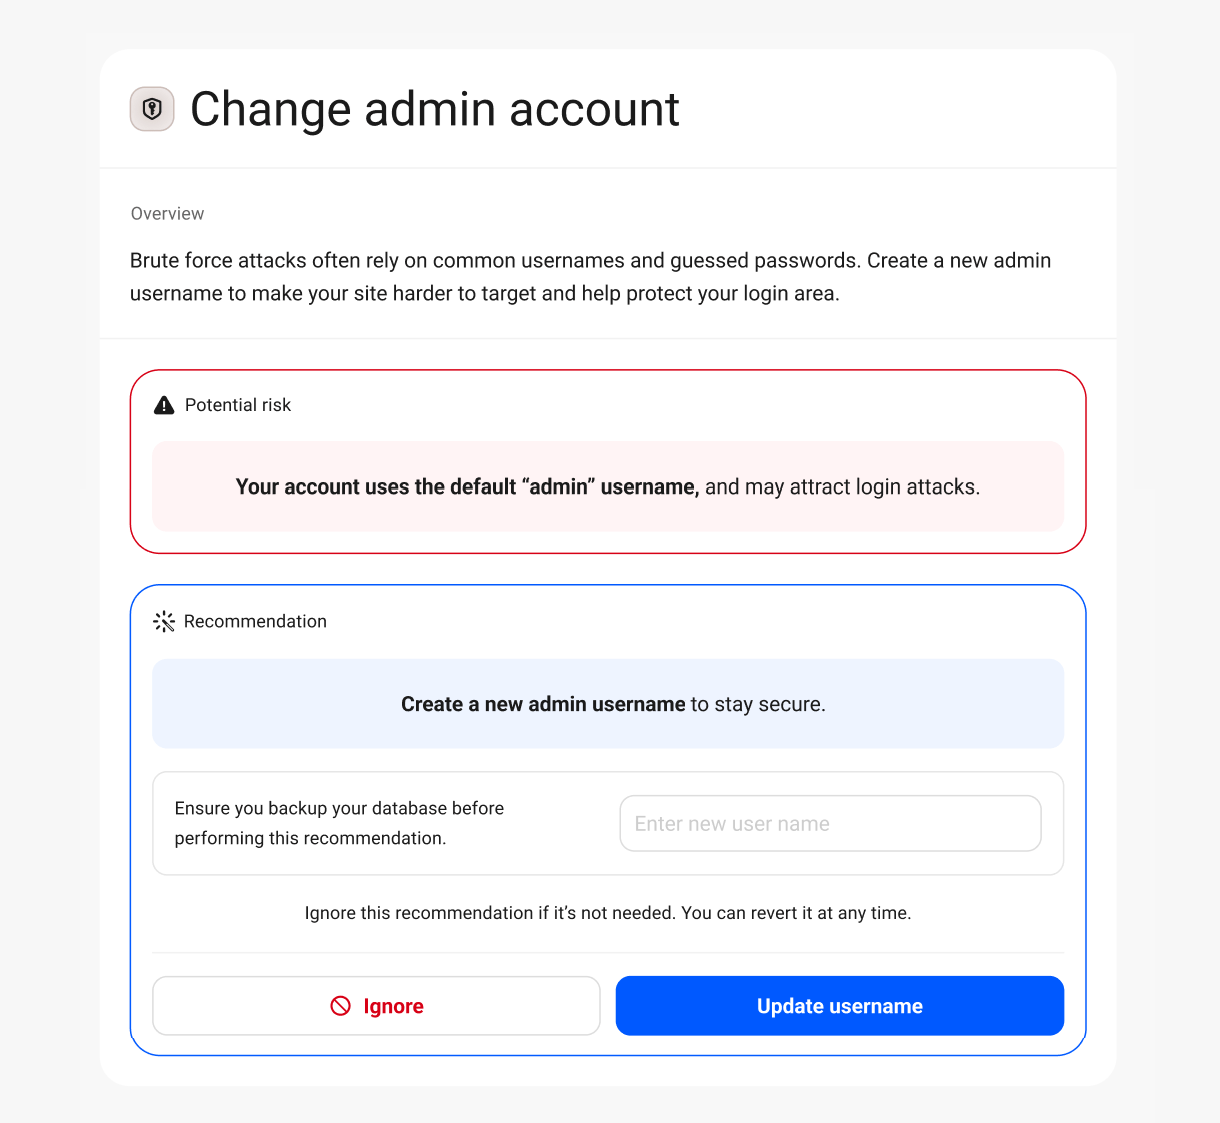
Change default admin user account
One of the most common methods of gaining access to websites is through brute force attacks on login areas using default/common usernames and passwords. If you’re using the default ‘admin’ username, you’re giving away an important piece of the puzzle hackers need to hijack your website.
Using the default admin username is widely considered bad practice and opens you up to the easiest form of entry to your website. We recommend avoiding generic usernames like admin, administrator, and anything that matches your hostname (domain) as these are the usernames hackers and bots will attempt first.
You can action this recommendation right in Defender by entering a new username for the admin user in the field provided. Then click Update Username to make the change.
Update WordPress to latest version
WordPress is an extremely popular platform, and with that popularity comes hackers that increasingly want to exploit WordPress based websites. Leaving your WordPress installation out of date is an almost guaranteed way to get hacked as you’re missing out on the latest security patches.
Clicking the Update WordPress button will redirect you to the WordPress Updates screen in your wp-admin where you can perform the update.

Disable the file editor
WordPress comes with a file editor built into the system. This means that anyone with access to your login information can further edit your plugin and theme files and inject malicious code.
Enabling this recommendation will automatically add the following constant to your wp-config.php file to disable the file editors in your wp-admin: define( 'DISALLOW_FILE_EDIT', true ); // Added by Defender
If the automatic method fails for any reason, you can apply the constant manually following the steps detailed in Manually Applying Recommendations below.

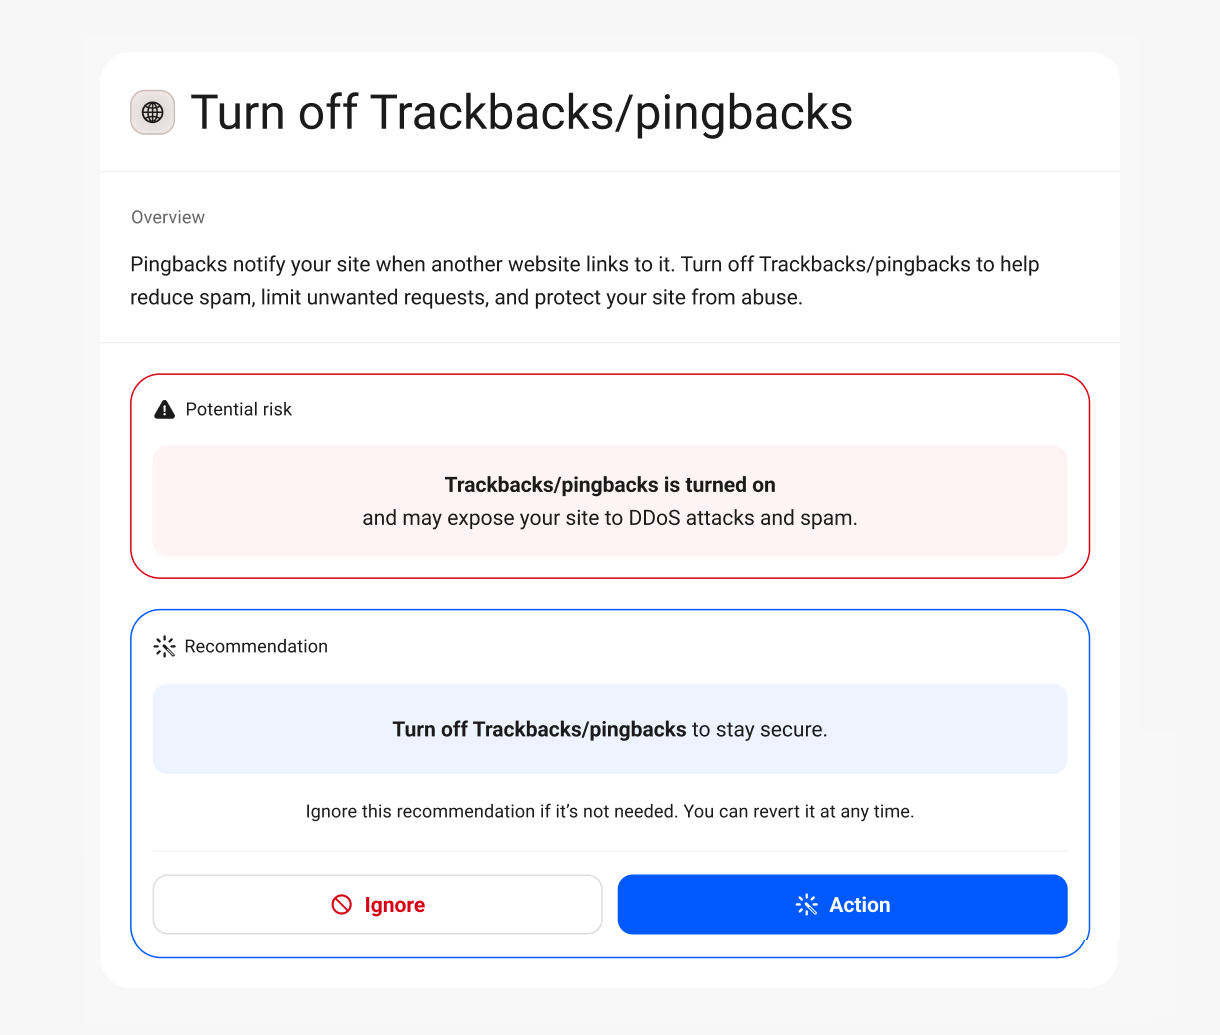
Disable trackbacks and pingbacks
Pingbacks notify a website when it has been mentioned by another website, like a form of courtesy communication.
However, these notifications can be sent to any website willing to receive them, opening you up to DDoS attacks, which can take your website down in seconds and fill your posts with spam comments. Disabling these notifications will provide a level of spam protection for your site.
Click the Disable Pingbacks button to automatically action this recommendation.
Disable XML RPC
XML-RPC is a system that allows you to post on your WordPress blog using popular weblog clients like Windows Live Writer. Technically, it’s a remote procedure call which uses XML to encode its calls and HTTP as a transport mechanism.
If you are using the WordPress mobile app, want to make connections to services like IFTTT, or want to access and publish to your blog remotely, then you need XML-RPC enabled, otherwise it’s just another portal for hackers to target and exploit.
Click the Disable XML-RPC button to automatically action this recommendation.
If your site is hosted by WPMU DEV, you’ll also find a tool to block XML-RPC at the server level. Server-level blocking is more effective, as XML-RPC requests are stopped before they reach your site.
If XML-RPC is disabled only in Defender, requests can still reach the site and consume resources. For this reason, we recommend disabling XML-RPC at the server level whenever possible.
When XML-RPC is blocked at the hosting level, Defender reflects this status and marks the recommendation as Actioned. In this case, XML-RPC settings are managed from Hosting Tools, and the option to revert the setting in Defender is not available.
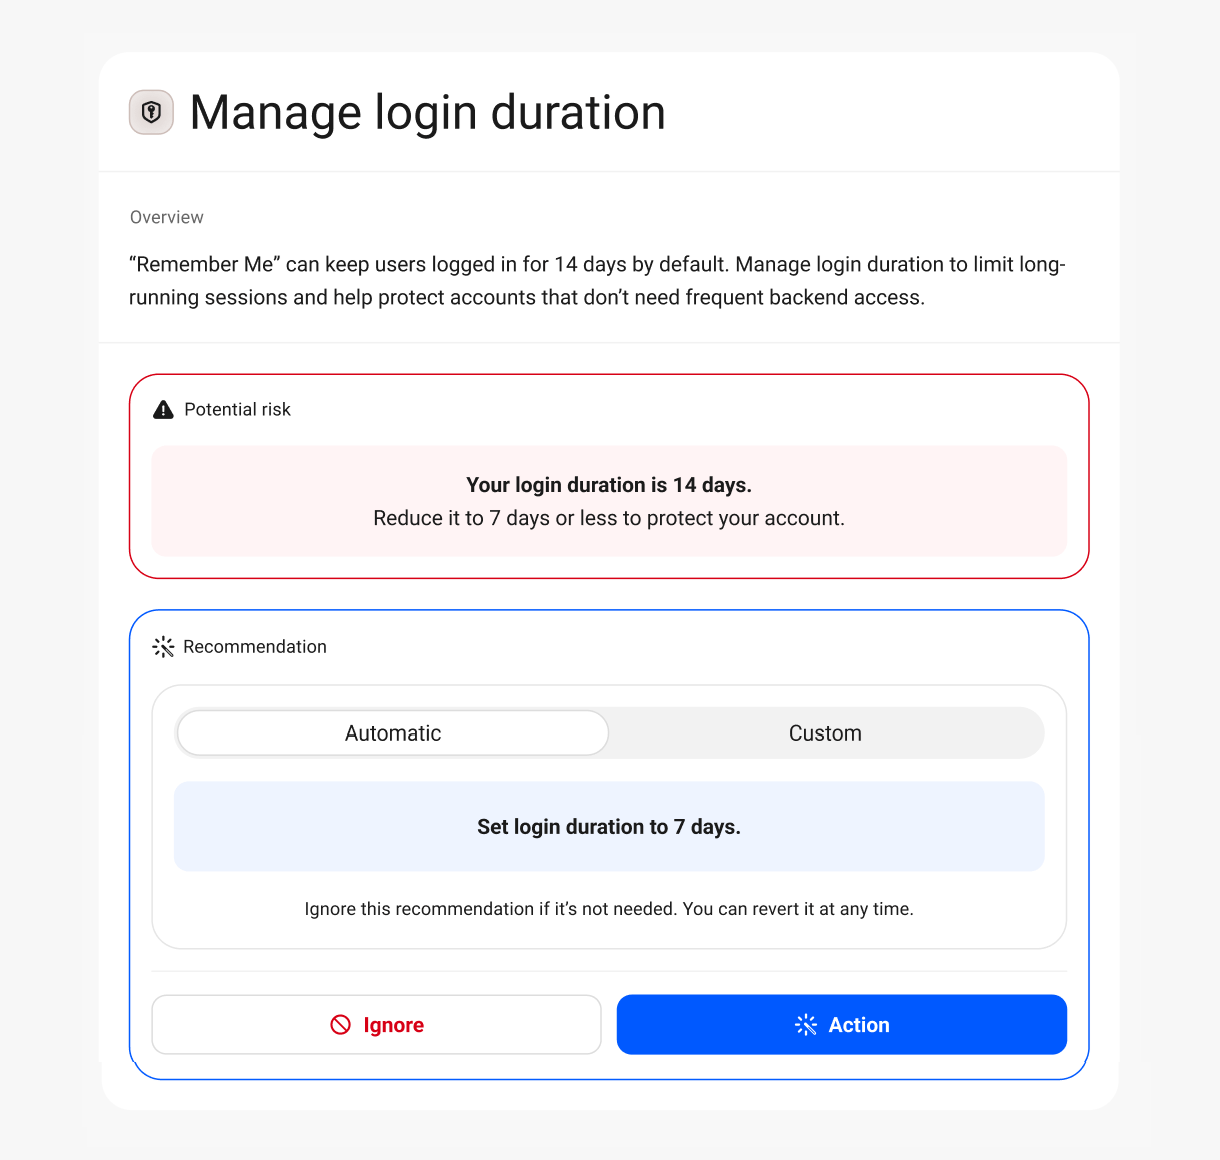
Manage login duration
By default, users who select the ‘remember me’ option will stay logged in for 14 days. If you and your users don’t need to login to your website backend regularly, it’s good practice to reduce this default time to reduce the risk of someone gaining access to your automatically logged in account.
Enter the desired duration (in number of days) in the field provided, and click Update Duration.
Prevent user enumeration
One of the more common methods for bots and hackers to gain access to your website is to find out login usernames and brute force the login area with tons of dummy passwords. The hope is that one the username and password combos will match, and voila – they have access (you’d be surprised how common weak passwords are!).
There are two sides to this hacking method – the username and the password. The passwords are random guesses, but the username is easy to get. Simply typing the query string ?author=1, ?author=2 and so on, will redirect the page to /author/username/ and bam, the bot now has your usernames to begin brute force attacks with.
This security tweak locks down your website by preventing the redirect, making it much harder for bots to get your usernames. We highly recommend actioning this tweak.
Enable any of the following options to make it harder for bots to discover your usernames.
- Stop REST API User calls – This option restricts REST API calls to find users. Only requests by logged-in users will be allowed.
- Stop oEmbed calls revealing user IDs – This excludes Author Archives links from oEmbed calls which expose the user ID by default.
- Disable author sitemaps – Disables sitemaps for built-in content types like Author Pages & Archives which expose user ID by default.
Click the Action button to action the recommendation.

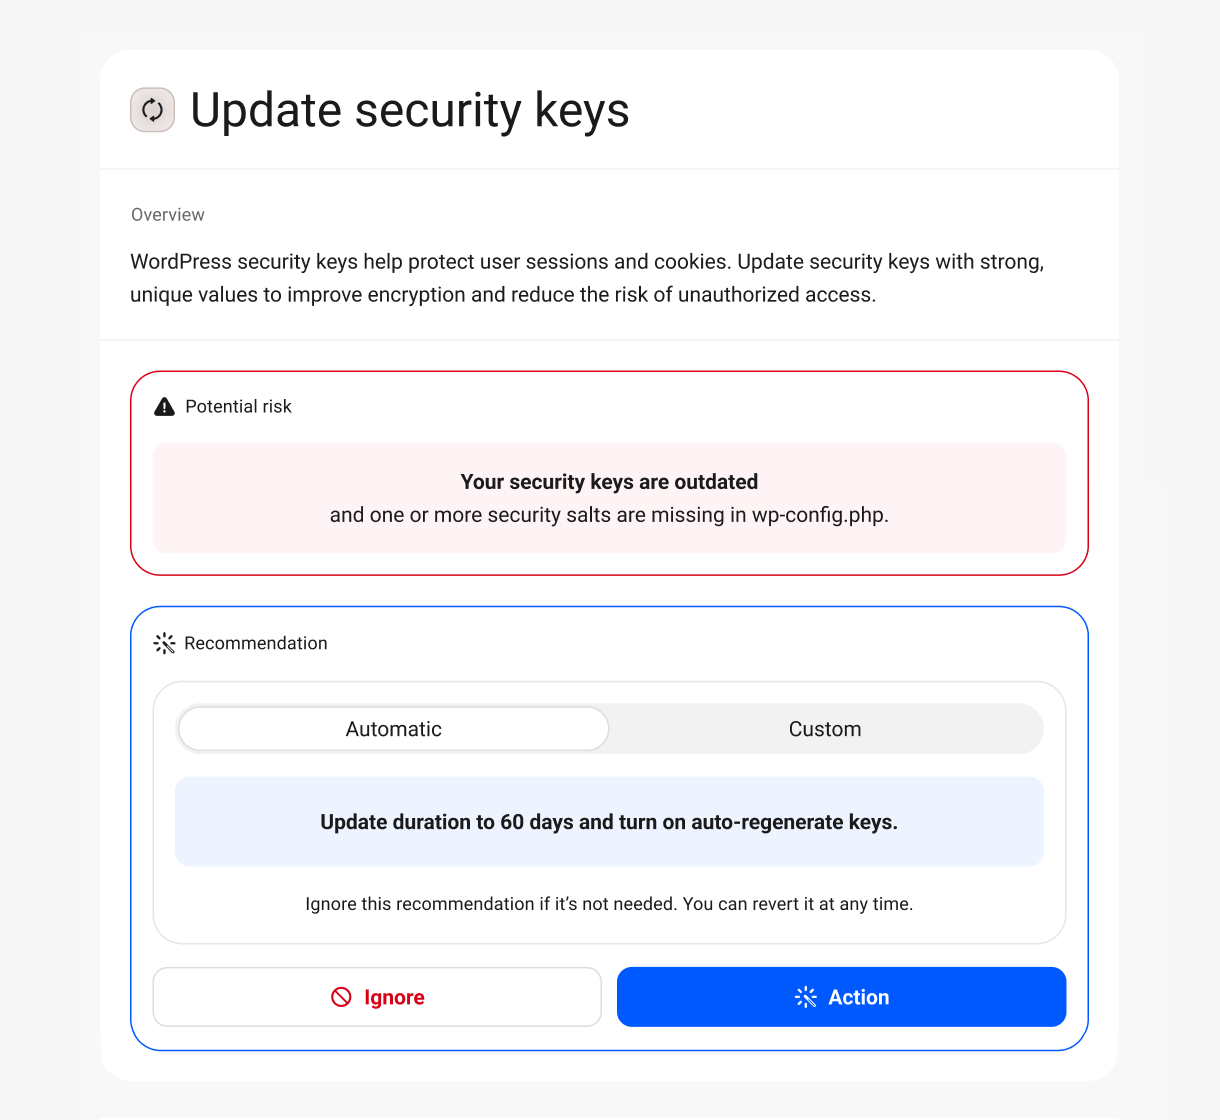
Update old security keys
WordPress uses security keys to improve the encryption of information stored in user cookies, making it harder to crack passwords. A non-encrypted password like wordpress can be easily broken, but a random, encrypted password such as 88a7da62429ba6ad3cb3c76a09641fc can take years to crack.
Select the Reminder Frequency you prefer from the dropdown to have Defender remind you when it’s time to update your security keys.
You can also optionally enable Automatically regenerate security keys to have Defender automatically generate new keys for you in your wp-config.php file at the frequency you set here.
You can click the Update button at any time to refresh the keys immediately and force-logout all users on the site.
6.4.3 Actioned Recommendations
Link to chapter 4The Actioned tab displays all potential security vulnerabilities that have been resolved.

Issues can be resolved by applying the fix suggested in the Recommendations tab, but that is not the only way an issue is resolved. Hosting providers and other plugins may also action recommendations. In other words, user interaction within Defender is not always required for a recommendation to be actioned.
For example, the following issues will appear as actioned for all WPMU DEV hosted sites because our hosting applies the recommended fix by default:
- Hide error reporting
- Prevent PHP execution
- Prevent Information Disclosure
Additionally, issues related to keeping files up-to-date will appear as resolved until an update is released, and then only become an issue if the file is not automatically updated.
Editing/Modifying Issues
Each item under the Actioned tab can be expanded to see a detailed explanation of the issue (Overview), as well as its current state (Status).
Click the arrow to the right of any resolved issue to access the detailed explanation.
Some resolutions cannot be modified in any way, such as those mentioned above that are required for all WPMU DEV hosted sites. Other resolutions, on the other hand, can be modified or completely undone.
For example, if the file editor was disabled in the Recommendations tab, it will appear as an Actioned issue and will include an Edit button. Clicking Edit will re-enable the editor. This option is available for all user-enabled tweaks.

6.4.4 Ignored Recommendations
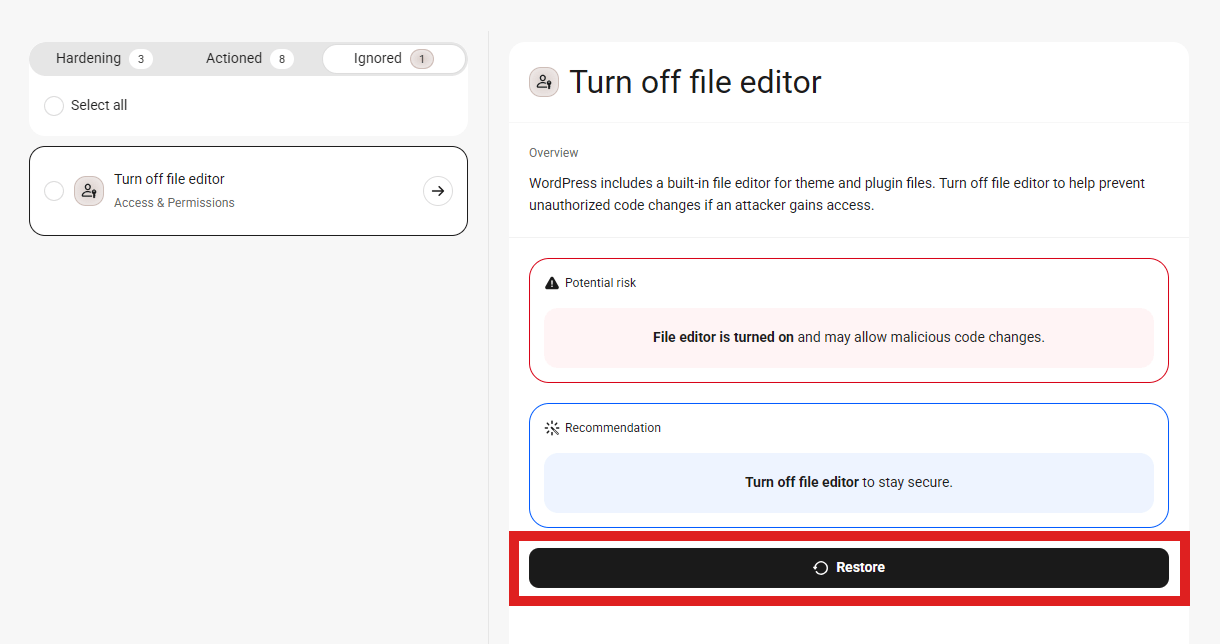
Link to chapter 4Ignored issues are those which Defender identified as possible security vulnerabilities and displayed in the Recommendations tab, after which a user admin selected the Ignore option.
Once an issue has been ignored, Defender will no longer identify it as a possible vulnerability, so it is wise to be sure an issue is harmless before clicking the ignore option.
Restoring Ignored Issues
Each ignored issue will be accompanied by a Restore button. Click Restore to return any ignored issue to the Recommendations tab where you can address it by following the How to fix guidance there.
6.4.5 Manually Applying Recommendations
Link to chapter 4In some site configurations, it may not be possible for Defender to automatically apply the code needed to resolve some security recommendations. So you may need to manually apply the code to the appropriate file to resolve the issue.
To do that, access your site’s files & folders via FTP or a File Manager. Locate the file mentioned in the following recommendations and select to edit it.
Disable the file editor
If you get an error message when trying to action this recommendation, look for this line in the wp-config.php file:
define( 'DISALLOW_FILE_EDIT', false );
Change that line to this instead:
define( 'DISALLOW_FILE_EDIT', true );
If that line does not yet exist in your wp-config.php file, add it just above the line that says “That’s all, stop editing”
If you get an error message when trying to revert this recommendation, change the value of that line from true to false instead.
Hide error reporting
If you get an error message when trying to action this recommendation, look for these lines in the wp-config.php file:
define( 'WP_DEBUG', true );

define( 'WP_DEBUG_DISPLAY', true );

define( 'WP_DEBUG_LOG', true );
Change the value in each of those lines from true to false
If you get an error message when trying to revert this recommendation, change the value of those lines from false to true instead.
Prevent PHP Execution
The steps required to disable PHP execution depend on your server environment. Follow the server-specific instructions provided within this item to manually apply the required configuration.
In some hosting environments, PHP execution may already be restricted at the server level, in which case this item may appear in the Actioned tab even though the instructions are still shown for reference.
Prevent Information Disclosure
If your server type is Apache or LiteSpeed, this security recommendation can be configured manually in case the Automatic option fails for any reason.
Click the Manual tab to open the instructions. Create an .htaccess file in the wp-content directory if it doesn’t already exist. Then copy the code shown, paste it into that file, and save it. Once done, click the Re-Check Status button.
6.5 Audit Log Pro
Copy chapter anchor to clipboardWith the Audit Log activated, Defender displays a log of events recorded by the system that can be extremely helpful when trying to determine what event(s) triggered unwanted behavior on a site.

6.5.1 Event Logs
Link to chapter 5Use the Filter dropdown menu in the top right hand corner to filter logs to show only selected Event types.

Click the ellipsis icon at top-right and select Export to export the results as a .csv file, allowing you to use the log info in any spreadsheet application.

Event Details
Each event can be expanded by clicking on it to reveal a summary of the event that includes the following information:
- Context — Where the event originated, such as during a user/visitor session, in a plugin or theme, in a post, etc.
- Type — Refines the Context by identifying the type of session as a user or visitor session
- IP Address — The IP address of the user/visitor referred to in the Context column
- User — If the user/visitor involved in the event is a registered user on your site, that person’s username will appear here
- Date/Time — The date and time of the event

Note that when Defender is network activated in a multisite, the Event Logs will indicate the title of the subsites where each action took place.

6.5.2 Event Types
Link to chapter 5Below is a handy list of all the event types that the Audit Logging feature logs for you, as well as the associated WordPress hook that is fired when each event occurs. As noted above, you can filter the log list to display only selected event types if needed.
In the event examples below, [username] will display the username of the user who performed the action. It will appear as Hub if the action was initiated from your Hub. It will appear as Guest if the event is from a not-logged-in user, or from AJAX or REST requests. Also note that post revisions do not trigger log events.
User Events
User login fail. Username: [username]
Hook: wp_login_failed
User logout success: [username]
Hook: wp_logout
User login success: [username]
Hook: wp_login
[username] added a new user: Username: [new username], Role: [user role]
Hook: user_register (action from wp-admin)
A new user registered: Username: [new username], Role: [user role]
Hook: user_register (action from frontend)
[username] deleted a user: ID: [deleted user ID], username: [deleted user name]
Hook: delete_user, or if multisite: wpmu_delete_user
[username] removed a user: ID: [deleted user ID], username: [deleted user name] from blog [blog ID]
Hook: remove_user_from_blog
User [updated username] updated his/her profile
Hook: profile_update
[username] updated user [updated username]’s profile information
Hook: profile_update
Password requested to reset for user: [username]
Hook: retrieve_password
Password reset for user: [username]
Hook: after_password_reset
[username] changed user [changed username]’s role from [old_role] to [new_role]
Hook: set_user_role
2fa user login success: [username]
Hook: wpmu_2fa_login
Hub SSO login success: [username]
Hook: wpmudev_sso_set_current_user
Password Events
[Blog name] [username] changed their password
Hook: password_reset
[Blog name] [username] changed their password
Hook: profile_update
[Blog name] [admin] changed the password for user: [username]
Hook: password_reset
[Blog name] [admin] changed the password for user: [username]
Hook: profile_update
Application Password Events
[Blog name] [username] created an application password
Hook: wp_create_application_password
[Blog name] [admin] created an application password for [username]
Hook: wp_create_application_password
[Blog name] [username] revoked an application password
Hook: wp_delete_application_password
[Blog name] [admin] revoked an application password for [username]
Hook: wp_delete_application_password
[Blog name] [username] revoked all application passwords
Hook: wp_delete_application_password
[Blog name] [admin] revoked all application passwords for [username]
Hook: wp_delete_application_password
Multisite User Events
[Blog name] [admin] granted Super Admin privileges to [username]
Hook: grant_super_admin
[Blog name] [admin] revoked Super Admin privileges from [username]
Hook: revoke_super_admin
User created on [blog name], Username: [username], Role: [role]
Hook: wpmu_new_user
User added to [site name], Username: [username], Role: [role]
Hook: add_user_to_blog
System Events
[username] activated theme: [theme name]
Hook: switch_theme
[username] activated plugin: [plugin name] , version [plugin_version]
Hook: activated_plugin
[username] deleted plugin: [plugin name]
Hook: deleted_plugin
[username] deleted theme: [theme name]
Hook: deleted_theme (WP v5.8.0 and newer only)
[username] deactivated plugin: [plugin name] , version [plugin_version]
Hook: deactivated_plugin
[username] installed plugin: [plugin name]
Hook: upgrader_process_complete
[username] installed theme: [theme name]
Hook: upgrader_process_complete
[username] updated plugin: [plugin name], version [version number]
Hook: upgrader_process_complete
[username] updated theme: [theme name], version [version number]
Hook: upgrader_process_complete
[username] updated themes: [theme name] to [version number]
Hook: upgrader_process_complete
[username] updated plugins: [plugin name] to [version number]
Hook: upgrader_process_complete
[username] updated WordPress to [version number]
Hook: upgrader_process_complete
[username] updated file [file name] of [plugin or theme name] [ name]
Hook: wd_plugin/theme_changed
A new file added, path [file path]
Hook: wd_checksum/new_file
A file has been modified, path [file path]
Hook: wd_checksum_file_modified
Feature Events
[Blog name] Audit Logging feature deactivated by [username]
Hook: update_site_option
Theme Events (Multisite)
[Blog name] [username] activated theme [theme name] on network
Hook: update_site_option_allowedthemes
Comment Events
[comment_author] commented on [post title] “[post singular_name]” – comment status: [comment_status]
Hook: wp_insert_comment
[comment_author] replied to [comment_author]’s comment on [post title] “[post singular_name]” – comment status: [comment_status]
Hook: wp_insert_comment
User [username] flooded comment
Hook: comment_flood_trigger
[username] deleted comment ID [comment_ID], comment author: [comment_author] on [post title] “[post singular_name]”
Hook: deleted_comment
[username] trashed comment ID [comment_ID], comment author: [comment_author] on [post title] “[post singular_name]”
Hook: trash_comment
[username] untrashed comment ID [comment_ID], comment author: [comment_author] on [post title] “[post singular_name]”
Hook: untrash_comment
[username] marked comment ID [comment_ID], comment author: [comment_author] on [post title] “[post singular_name]” as spam
Hook: spam_comment
[username] unmarked comment ID [comment_ID], comment author: [comment_author] on [post title] “[post singular_name]” as spam
Hook: unspam_comment
[username] edited comment ID [comment_ID], comment author: [comment_author] on [post title] “[post singular_name]”
Hook: edit_comment
[username] approved comment ID [comment_ID] from [comment_author], on [post title] “[post singular_name]”
Hook: transition_comment_status
[username] unapproved comment ID [comment_ID] from [comment_author], on [post title] “[post singular_name]”
Hook: transition_comment_status
User [username or comment author] submitted a duplicate comment on [post title] “[post singular_name]”
Hook: comment_duplicate_trigger
Media Events
[username] uploaded a file: “[file path]” to Media Library
Hook: add_attachment
[username] updated a file: “[file path]” form Media Library
Hook: attachment_updated
[username] deleted a file: “[file path]” form Media Library
Hook: delete_attachment
Settings Events
[username] disabled site registration
Hook: update_option
[username] opened site registration
Hook: update_option
[username] update option [option name] from [old value] one to [new value]
Hook: update_option
[username] update option [option name] to [new value]
Hook: update_option
[username] update option [option name] from [old value]
Hook: update_option
Content Events
[username] updated [post type title] ID [ID_number] from “[post type singular_name before]” to “[post type singular_name after]”
Hook: save_post
[username] added new [post type title] “[post type singular_name]”
Hook: save_post
[username] published [post type title] “[post type singular_name]”
Hook: transition_post_status
[username] pending [post type title] “[post type singular_name]”
Hook: transition_post_status
[username] drafted [post type title] “[post type singular_name]”
Hook: transition_post_status
[username] drafted [post type title] “[post type singular_name]”
Hook: transition_post_status
[username] changed [post type title] “[post type singular_name]” status from [old_status] to [new_status]
Hook: transition_post_status
[username] deleted [post type title] “[post type singular_name]”
Hook: delete_post
[username] untrashed [post type title] “[post type singular_name]”
Hook: untrashed_post
[username] trashed [post type title] “[post type singular_name]”
Hook: trashed_post
Menu Events
[username] created a new menu “[menu_name]”
Hook: wp_create_nav_menu
[username] updated menu “[menu_name]”
Hook: wp_update_nav_menu
[username] deleted menu “[menu_name]”
Hook: wp_delete_nav_menu
[username] added item “[menu_item_title]” to menu “[menu_name]” OR [username] updated item “[menu_item_title]” from menu “[menu_name]”
Hook: wp_update_nav_menu_item
6.6 Firewalls
Copy chapter anchor to clipboardThe Firewall features protect your site by enabling you to automatically lockout undesirable IP addresses and user agents, as well as hackers & bots who attempt to brute-force your login pages or access files that don’t exist.
Our blog post, How to Create a Powerful and Secure Customized Firewall with Defender, discusses how to get the most out of the plugin’s firewall feature.
All lockout options detailed below display a customizable message to the user when a lockout occurs. If you also wish to change the image that appears on these lockout screens, enable the White Label feature in the WPMU DEV Dashboard plugin on your site, and upload or link your custom image in the WPMU DEV branding setting there.
6.6.1 Global Firewall
Link to chapter 6The AntiBot Global Firewall proactively protects your site by automatically blocking hundreds of thousands of known malicious IP addresses.
The feature actively monitors over a quarter of a million websites and intelligently updates its blocklist data twice daily to ensure your site is protected by the most robust firewall available.
Toggle on the feature to get started.

Note that this feature requires a connection to the WPMU DEV API. So if the WPMU DEV Dashboard plugin is installed on your site but not yet active, or you’re not logged into it, you’ll be prompted to do that first. If the WPMU DEV Dashboard is not installed on your site, you’ll be prompted to create a free account or connect to an existing one.
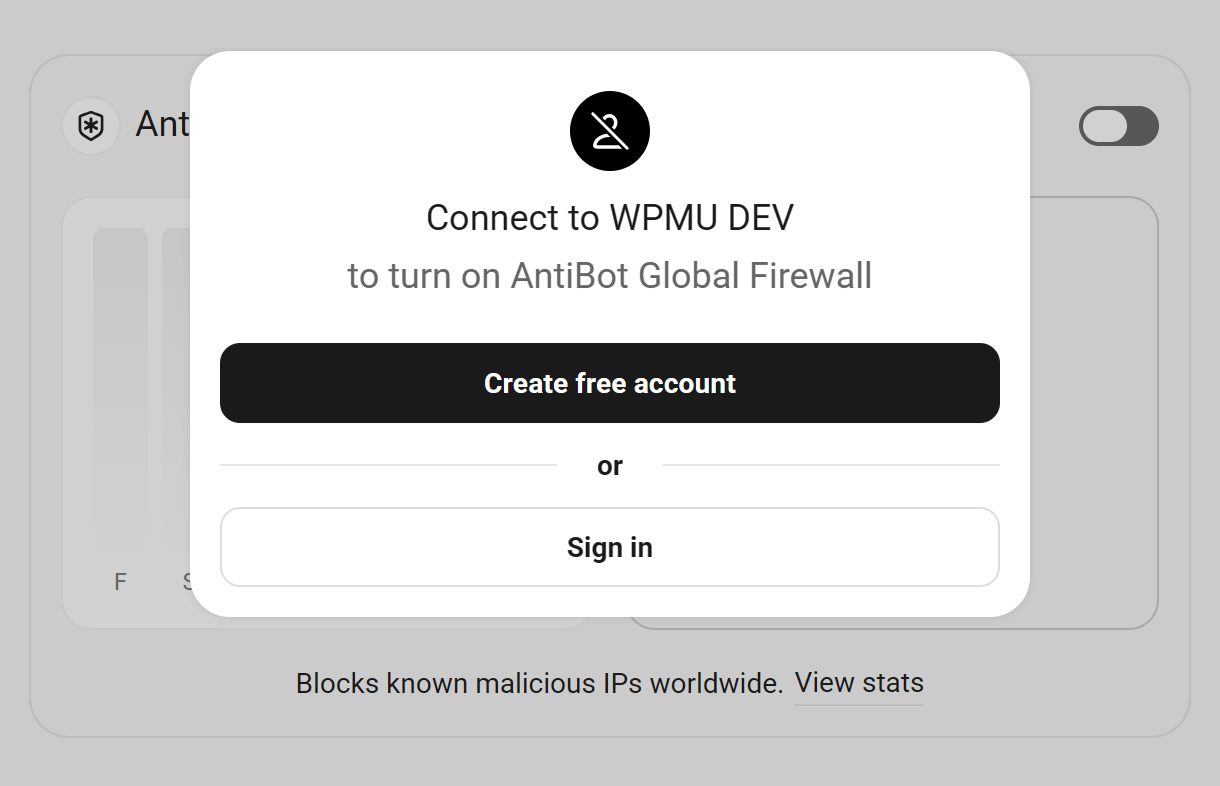
Once activated, you’ll see the total number of malicious IP addresses in the blocklist. You can hover your cursor over any column in the graph to view the number of blocked IPs for that day. Click View stats to be directed to a WPMU DEV page where you can view live stats for up to 30 days.

Status
The Status widget displays information about the current status of AntiBot on your site.

- Status tracking – This indicates that your site is Connected to the service and protected.
- Sync schedule – The AntiBot blocklist automatically syncs with your site twice every day, and this schedule cannot be modified.
- AntiBot managed by – This indicates whether the feature is managed by the Defender plugin or by WPMU DEV hosting. See Managed By below for details.
AntiBot Mode
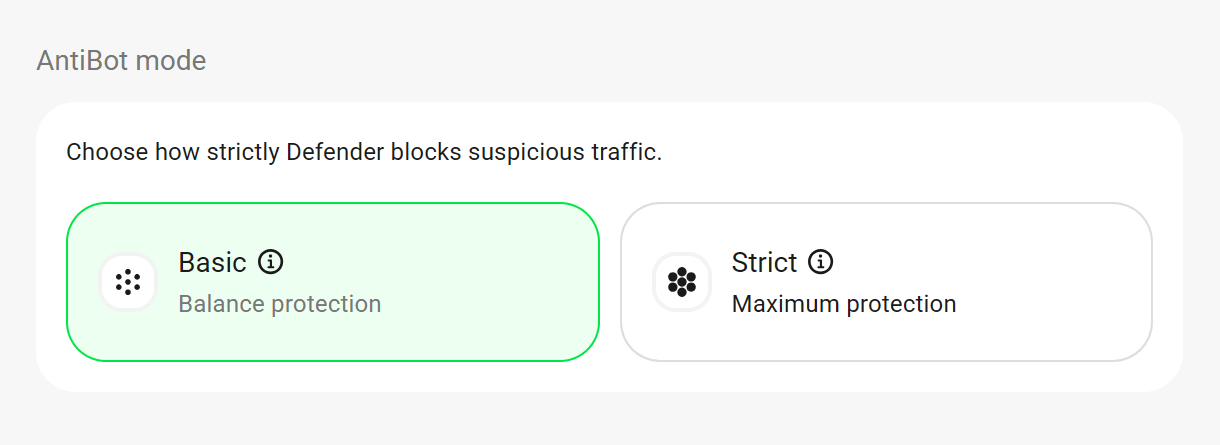
With this option, you can choose how strictly AntiBot should block suspicious traffic.
- Basic – This is the default mode and it allows safe bots and tools like uptime monitors or SEO scanners to access your site, and it skips blocking visitors with minor issues like 404 errors.
- Strict – This mode blocks all suspicious activity, including visits with broken links.
Self-unlock
By default, a site visitor whose IP address is found in the AntiBot blocklist will be blocked from accessing your site, and will be presented with an Access Denied message.
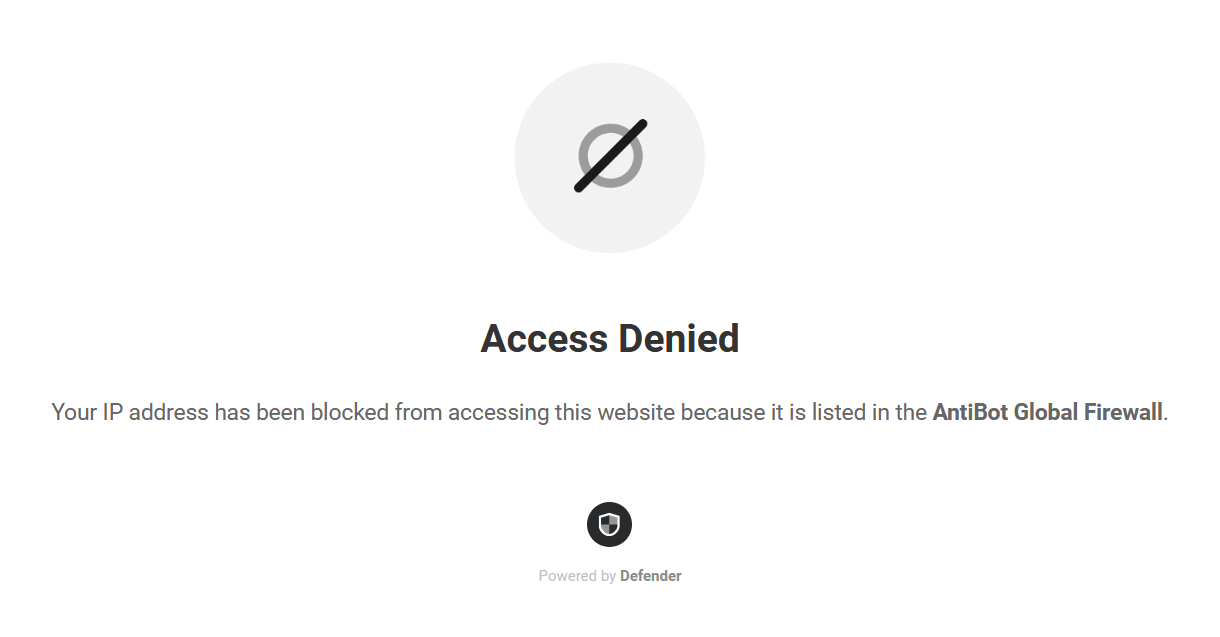
However, right after the AntiBot Mode section, you’ll find an option to allow your site visitors to temporarily unlock themselves if their IP address is ever in the AntiBot blocklist.

When this option is enabled, if a user with a blocked IP address tries to access your site, they’ll see the Access Denied message along with a button they can click to unlock their IP.
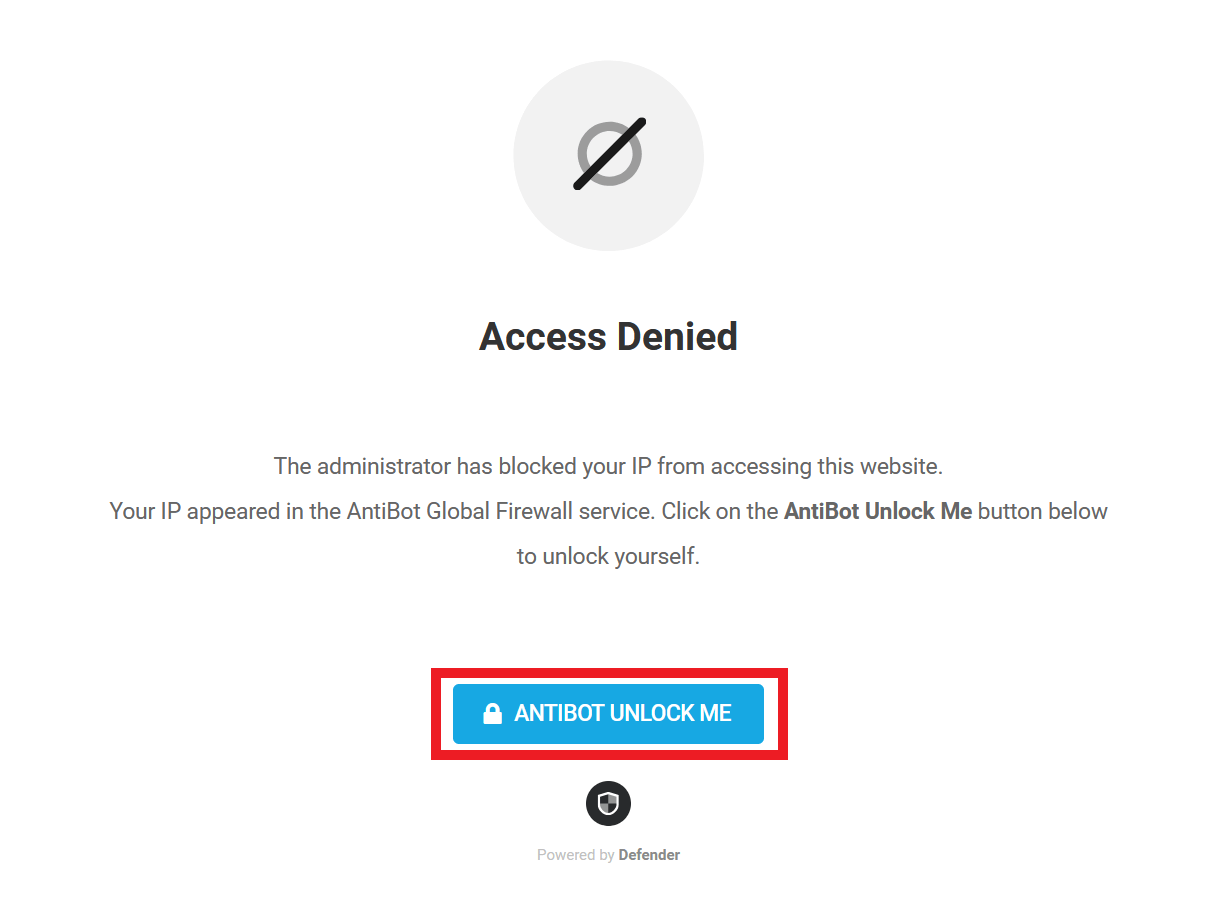
This will allow them to access your site until the next time the blocklist is synced (up to 12 hours later). This feature is site-specific: if a site visitor unlocks themself on your site and tries to access another of your sites that is also protected by AntiBot, they will still be blocked there.
You’ll find these actions logged in your Firewall Logs and can filter the logs for them by selecting the IP Unlock event type.
Be aware that allowing site visitors to unlock themselves could allow some smart bots to bypass the AntiBot Global Firewall.
This option is only available on WPMU DEV hosted sites if the AntiBot Global Firewall is managed by the Defender plugin. See Managed By below.
This option is not to be confused with the Unlock Me (Email) feature which is available to admin users if they accidentally lock themselves out of your site.
What is the difference between Self-unlock and Unlock Me (Email)?
Self-unlock
- This feature is disabled by default, and must be activated by toggling on the option to Allow site visitors to temporarily unlock themselves above
- It temporarily unlocks an IP that is blocked by AntiBot when the user clicks the button on the lock screen
- The IP will be blocked again when the next blocklist sync occurs (max 12 hours)
- If the IP address is a legitimate one, we recommend using the Blocklist Checker to add it to your Local and/or Custom IP blocklists, and report it as a Trusted IP
Unlock Me (Email)
- This feature is enabled by default, but can be disabled with an mu-plugin
- It permanently unblocks IPs that are in either the Local and/or Custom IP blocklists
- It requires users to click a confirmation link in an email to unblock themselves
Restore Access After AntiBot Block
AntiBot’s Global Firewall can block an IP when it detects suspicious behavior such as repeated failed login attempts, an unusual number of 404 errors, or similar request patterns. If this happens, the blocked user won’t be able to access the site.
If you are blocked, add your IP address to the Custom IP List in the Hub to restore access. This is a self‑service option that works even when you cannot reach the site.
Site administrators can also add a blocked IP to the Local Allowlist in the Defender plugin from the site dashboard. Note that this requires site access, so it isn’t suitable for a user who is currently blocked.
Tip: If you frequently run tests or automations from a known static IP, consider adding it to Defender’s Local Allowlist or the Hub’s Custom IP List in advance to avoid future blocks.
Blocklist Checker
The Blocklist Checker enables you to check if an IP address is in the AntiBot Firewall Blocklist, or your Custom IP List in your Hub, or in your site’s Local Blocklist.

Simply enter the IP address you want to check and click the Search button. The results will indicate the blocklist(s) where that IP is included, if any.
If an IP is found in either your Custom IP Blocklist or your Local Blocklist, you can click the ellipsis icon next to that list for a quick link to Manage the Blocklist. That will direct you to the management screen of the corresponding blocklist.

If an IP is found in the AntiBot Global Firewall blocklist, you can click the ellipsis icon next to that list for options to Add to Site Allowlist or to Report as Trusted IP.
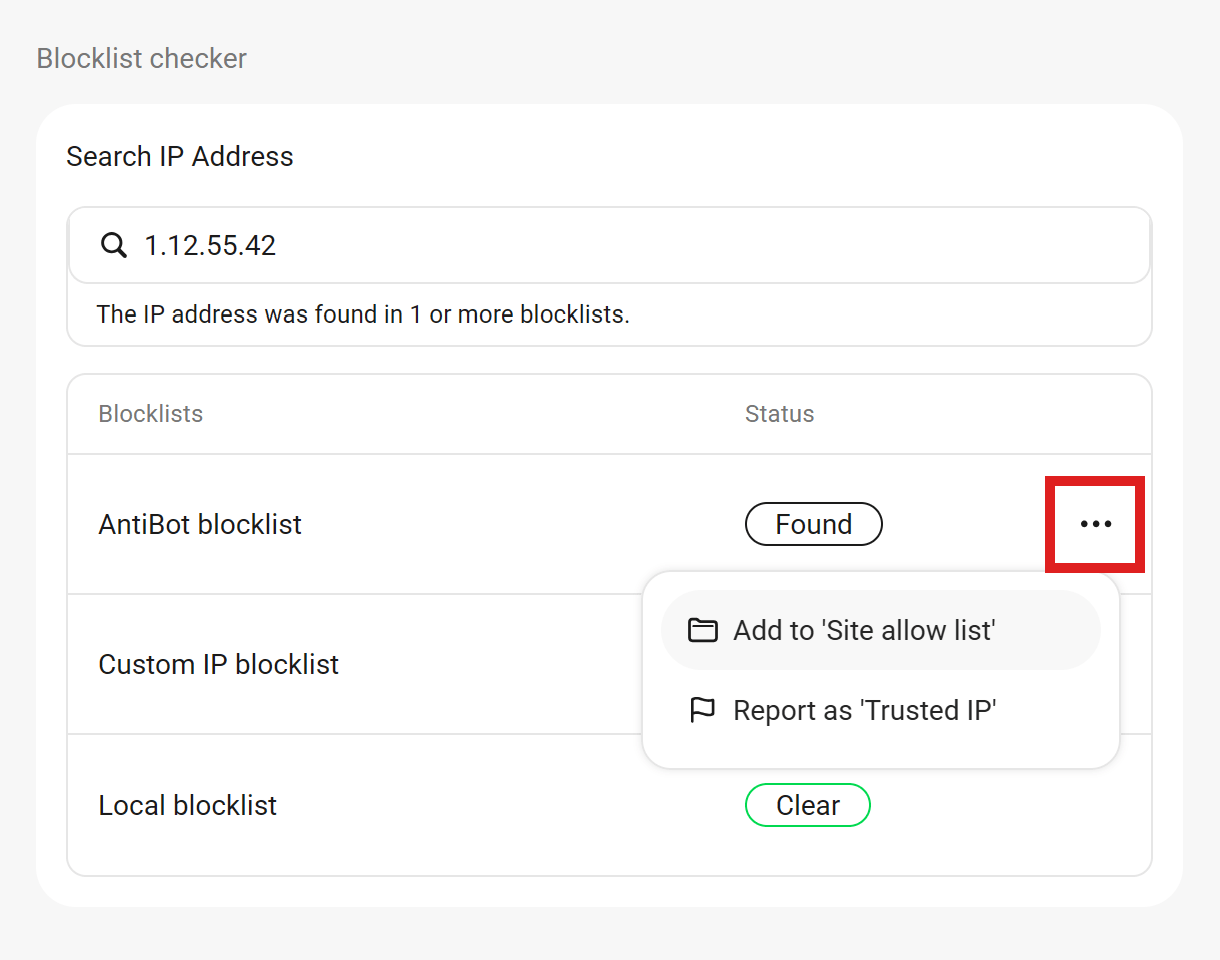
Clicking the Report as Trusted IP option will slide open a panel where you’ll be prompted to provide your email address, the service the IP belongs to, and any additional details in the comment box.
Our team will review the reported IP to see if it meets our trusted IP standards. If approved, it will be added to the AntiBot Trusted IPs list to prevent any future blocks or flags.

Hosting with WPMU DEV?
If your site is hosted with us, the appearance of the Blocklist Checker may vary depending on the following:
- The AntiBot service is not Managed By the Defender plugin.
- If your site is hosted with us, the feature will only appear if AntiBot is managed by Defender. If you choose to have AntiBot managed by hosting instead, this feature will be replaced with a prompt and a button to check and manage IPs in your Hub.
- You have the White Label feature enabled in your WPMU DEV Dashboard.
- If you have White Label enabled in your WPMU DEV Dashboard, an admin user who has not been granted Permission to access the Dashboard will not see this feature.
Managed By
At the bottom of the Status widget, you’ll see a notice informing you how the service is being managed on your site.

If your site is hosted by WPMU DEV, this will indicate that AntiBot is managed by WPMU DEV Hosting by default. This makes the AntiBot Firewall even more robust as access requests will be blocked at the server level, so they never even reach your WordPress install.
When the service is managed by WPMU DEV Hosting, Defender’s Unlock Me (AntiBot) option above will not be available, and the Blocklist Checker feature will only be available in your Hub. However, you can switch to the Plugin option if you prefer to have those features available in your site admin.
If your site is not hosted by WPMU DEV, this will simply indicate that the service is managed by Defender, and access requests will be blocked by the plugin.
Note that if you enable the White Label feature in your WPMU DEV Dashboard, this option will be hidden.
AntiBot IP Logging
When AntiBot is managed by Defender, IP addresses blocked by this service, or those checked with the Blocklist Checker above, are logged locally and retained for 7 days. The log files are located at /wp-content/uploads/wp-defender/antibot-global-firewall-{date}-{hash}.log
If you do not want these IP addresses to be retained, you can disable logging by adding the following filter in a mu-plugin:
add_filter( 'wpdef_antibot_global_firewall_ip_log', '__return_false' );
6.6.2 Web Application Firewall (WAF)
Link to chapter 6This feature is only available for sites hosted with WPMU DEV. Don’t have your sites hosted here yet? Get started today with our hosting and explore all the awesome features!
The Web Application Firewall (WAF) from WPMU DEV is a first layer of protection to block hackers and bot attacks before they ever reach your site. The WAF filters requests against our highly optimized managed ruleset covering common attacks (OWASP top ten) and performs virtual patching of WordPress core, plugin, and theme vulnerabilities.
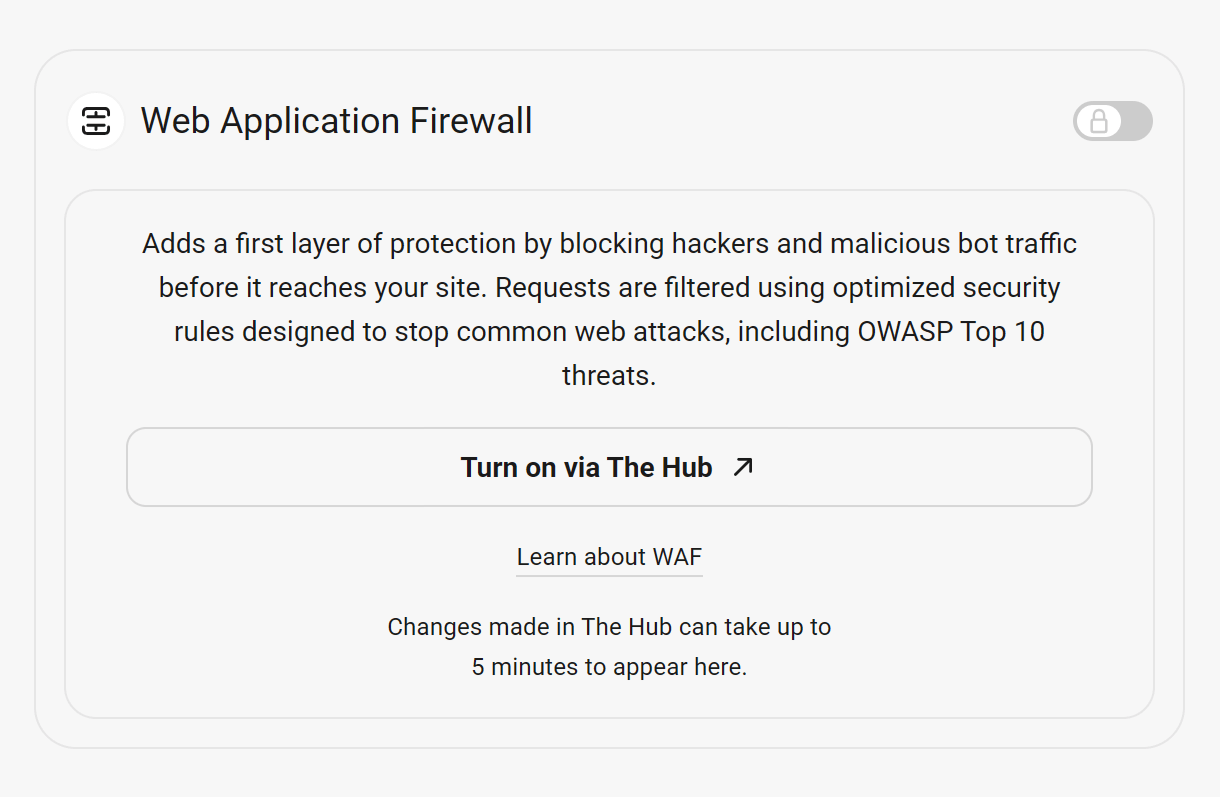
Clicking the Turn on via the Hub button will direct you to the Tools menu for your site in your Hub, and the WAF activation modal will open automatically for you. For more info on configuring the WAF for your site, see the Web Application Firewall (WAF) section in the WPMU DEV Hosting docs.
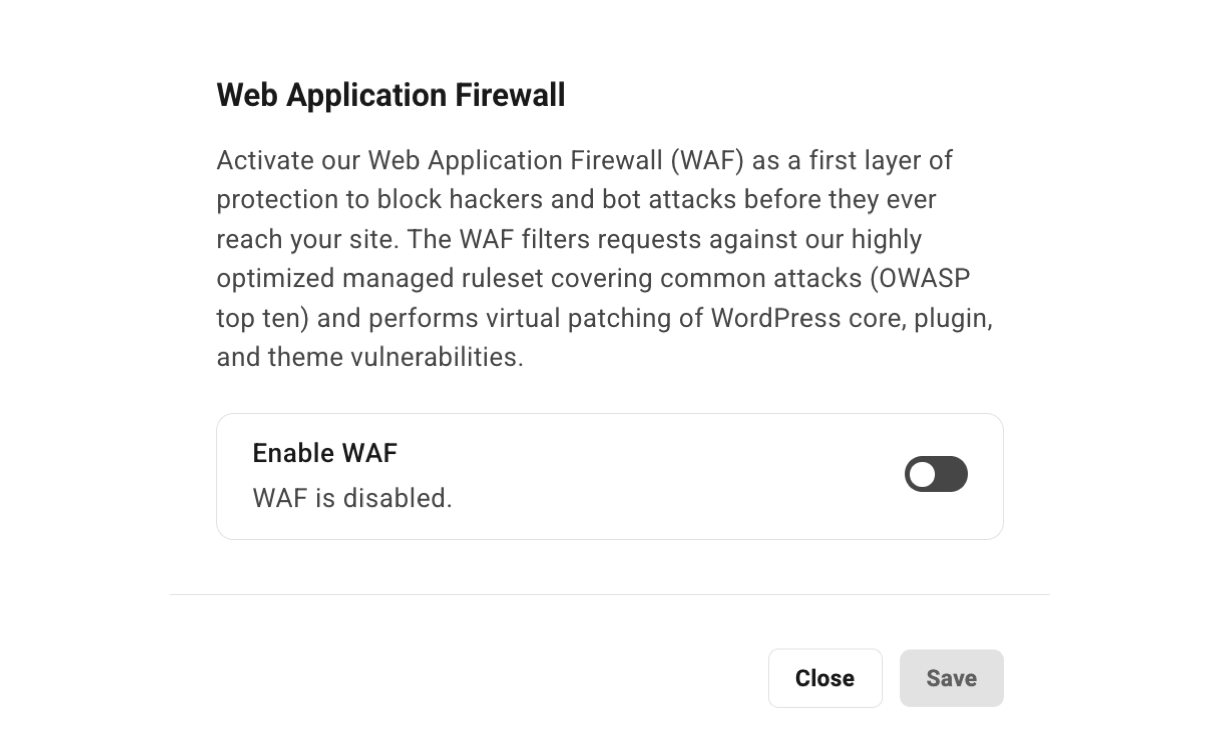
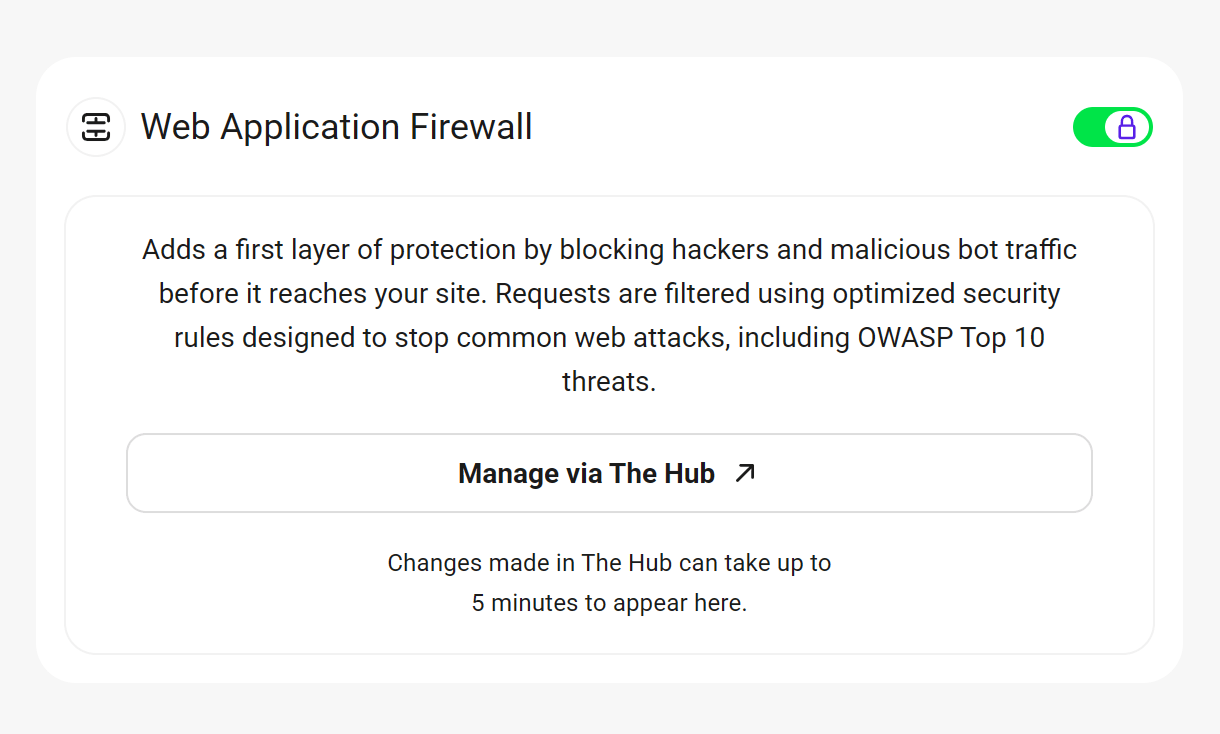
Once activated, the WAF module in Defender will display a Settings screen with confirmation that it is enabled. At this time, the configuration of the WAF must be done in your Hosting Hub for your site. To quickly access the configuration modal there, click the Manage via The Hub button.
6.6.3 Local Firewall
Link to chapter 6The Local Firewall section includes several tools that enable you to keep malicious bots and spammy humans out of your site.
Login protection
Login Protection enables you to lock out users after a set number of failed login attempts.
Threshold
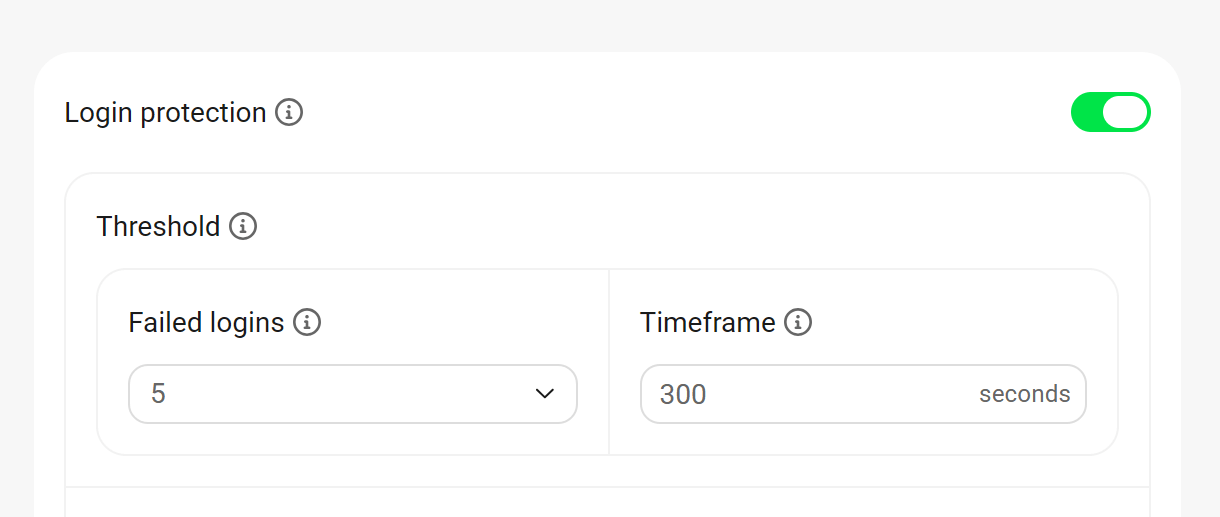
This setting defines the number of failed attempts within a certain period of time that will trigger a lockout. The default setting is 5 failed attempts, within 300 seconds.
Duration
This setting defines how long the lockout will last, once triggered. You can also opt to permanently ban anyone that’s been locked for failed logins.

Message
If you wish, create a custom message that will be displayed after a user has been locked out. You can also preview how the message will appear on your site by clicking the blue “here” link.

Unlock Me
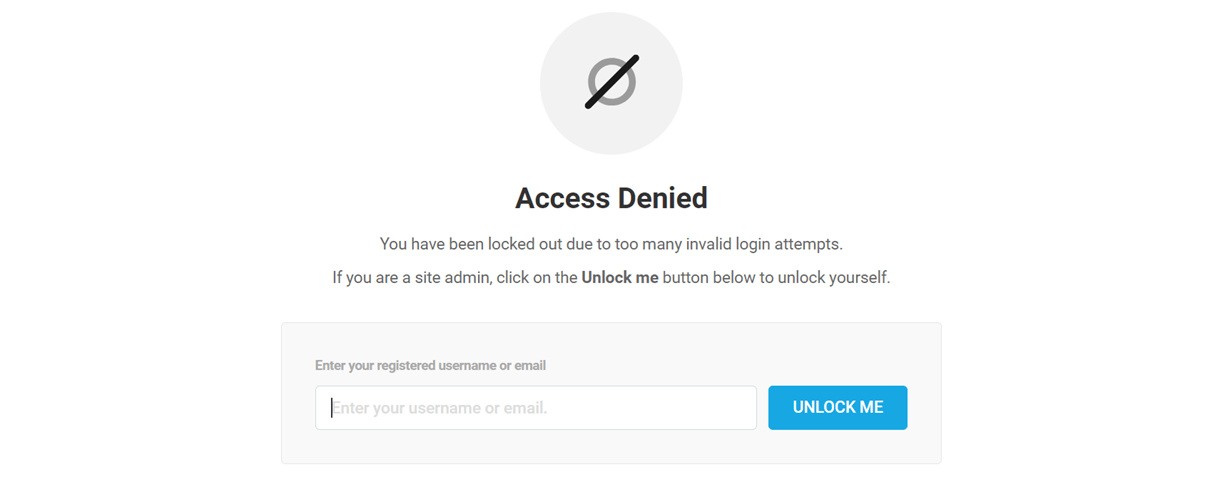
If you are the administrator and you accidentally locked yourself out due to multiple failed login attempts, click the Unlock Me button and enter the username or the email address associated with your site login. You’ll receive an email containing the link to unlock yourself.
Disable Unlock Me Button
If you wish to disable the Unlock Me button, use the code below:
This filter can be used in your active theme’s functions.php file, or in a mu-plugin uploaded to your site. For more on using mu-plugins, see our Installing Mu-plugins documentation.
Prevent Lockout Caching
If your site visitors get locked out due to your Login Protection settings and remain locked out even if they use a different device or a VPN to change their IP address, it’s likely that the lockout is cached.
To prevent this, you can add the following cookie to your cache plugin’s exclusions list:
wpdef_lockout_
If you are using the Static Page Caching feature in our Hummingbird plugin, this cookie will be added automatically to the Page Caching Cookies Exclusions list.
404 detection
404 Detection enables you to ban IP addresses that repeatedly try to access pages that do not exist.
Threshold
You can adjust how many events within a certain period of time will trigger a lockout. In this example, if a single IP address generates 20 404 errors within 300 seconds, then their IP will be temporarily locked out from your site.

Duration
Here you can indicate how long you would like the lockout to last for. And you can even permanently ban IP address that trigger your 404 lockout.
Include logged-in users
If you’d like to monitor 404s that come from logged-in users, and have your lockout rules apply to them also, enable this option.

Message
In this section you can customize the message that will appear to your site visitors when they’ve been locked out after triggering a 404 Detection lockout. Enter the message you wish to appear into the field provided.

If you wish to also change the image that appears on the lockout screen, enable the White Label feature in the WPMU DEV Dashboard plugin on your site, and upload or link your custom image in the WPMU DEV branding setting there.
Malicious Bot Detector
The Malicious Bot Detector is a powerful shield against malicious bots. It combines multiple layers of defense to identify and block harmful bots.
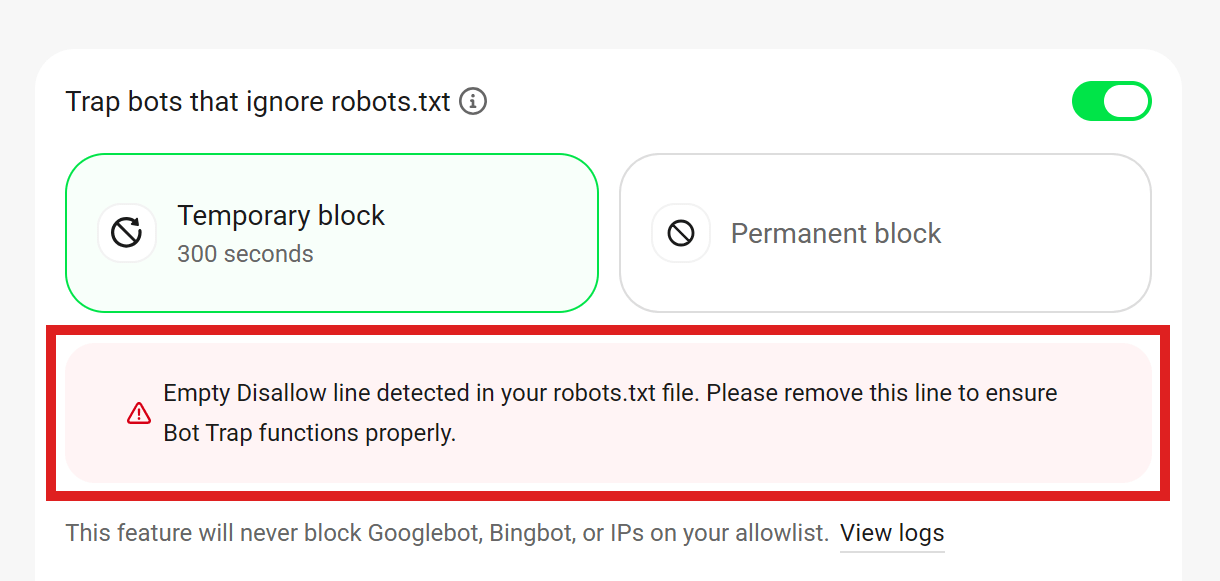
Trap bots that ignore robots.txt
Enable this to add an invisible link to the footer of every public page on your site. Legitimate bots like Googlebot and Bingbot ignore this link because it’s disallowed in your robots.txt file. Malicious bots often don’t—and when they follow the link, they trigger the trap.
You can choose how to block bots that trigger the trap:
- Temporary Block – Blocks the IP for 300 seconds.
- Permanent Block – Blocks the IP permanently.

If your robots.txt file contains an empty Disallow line, a warning notice will be displayed. This can prevent the bot trap from working correctly, as bots may not be properly excluded from the trap URL.
To ensure this feature functions as intended, remove any empty Disallow lines from your robots.txt file.
Catch fake bots
Enable this option to detect and block bots that disguise themselves as trusted crawlers (e.g., Googlebot, Bingbot) in order to bypass defenses.
You can choose how to block fake bots:
- Temporary Block – Blocks the IP for 300 seconds.
- Permanent Block – Blocks the IP permanently.

Empty Headers
Enable this option to block requests with missing or empty HTTP headers.

Banning locations
Location banning, using the latest GEO IP Database from MaxMind, allows admins to ban all traffic from an entire nation. You may consider banning any nation from which you do not expect or desire traffic. Doing so can be a highly effective security measure, if you are certain you don’t need the traffic.
Geo IP Banning requires users sign up for GeoLite2 Downloadable Databases, which is free, although paid services are available.
Note that the Phar PHP module must be enabled on your server in order to download the GEO IP database from MaxMind. This module is enabled by default on WPMU DEV hosted sites. If you are a cPanel user, you can enable it in the PHP Selector under Extensions. Contact your hosting provider if you have difficulty enabling this module.
To get started, Create a free MaxMind account to access the GeoLite2 database.

MaxMind will send an email containing verification information. Follow the directions in the email to verify and activate the account.
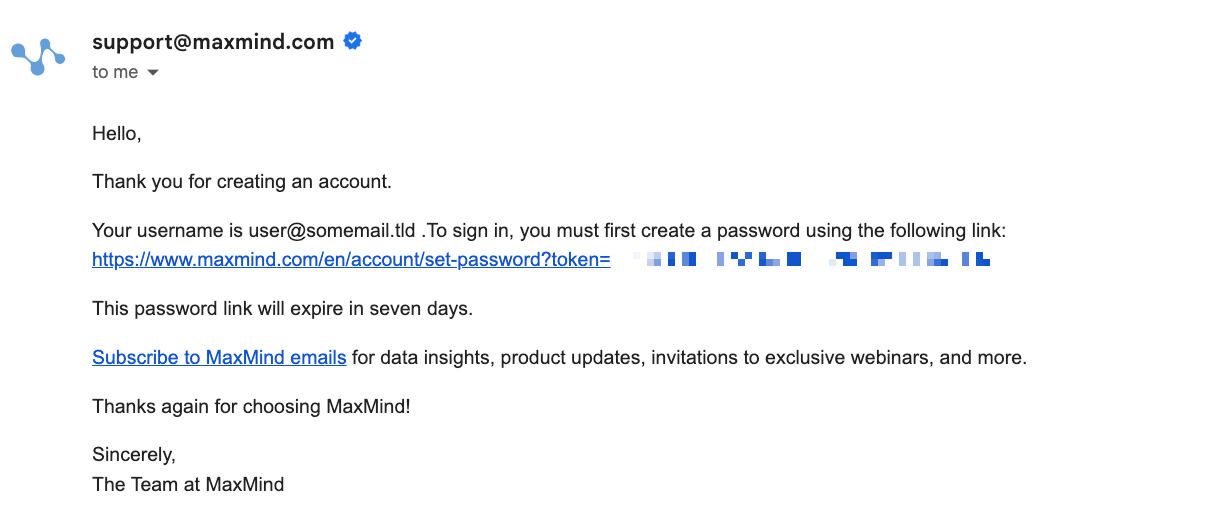
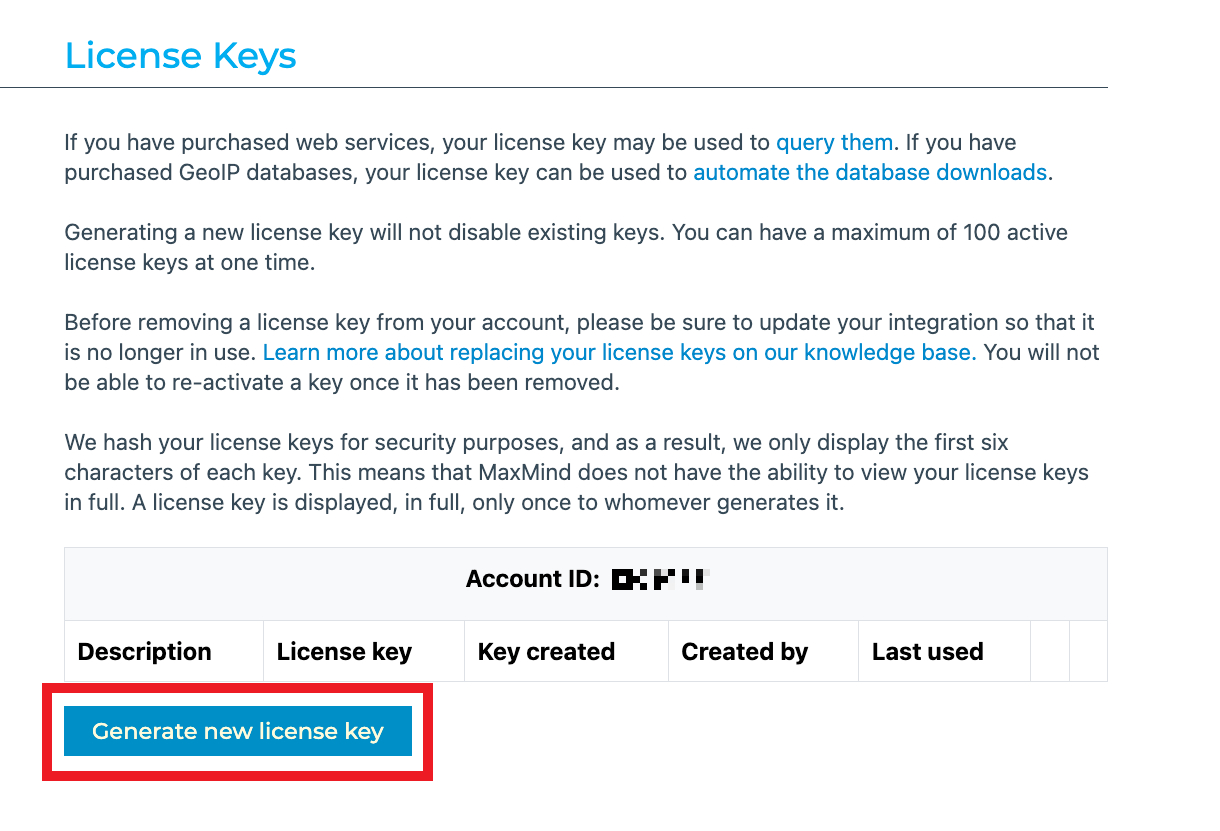
The next series of steps will generate the License Key needed to connect the service to your site. In the menu on the left, click Manage License Key.
Then click Generate new license key.
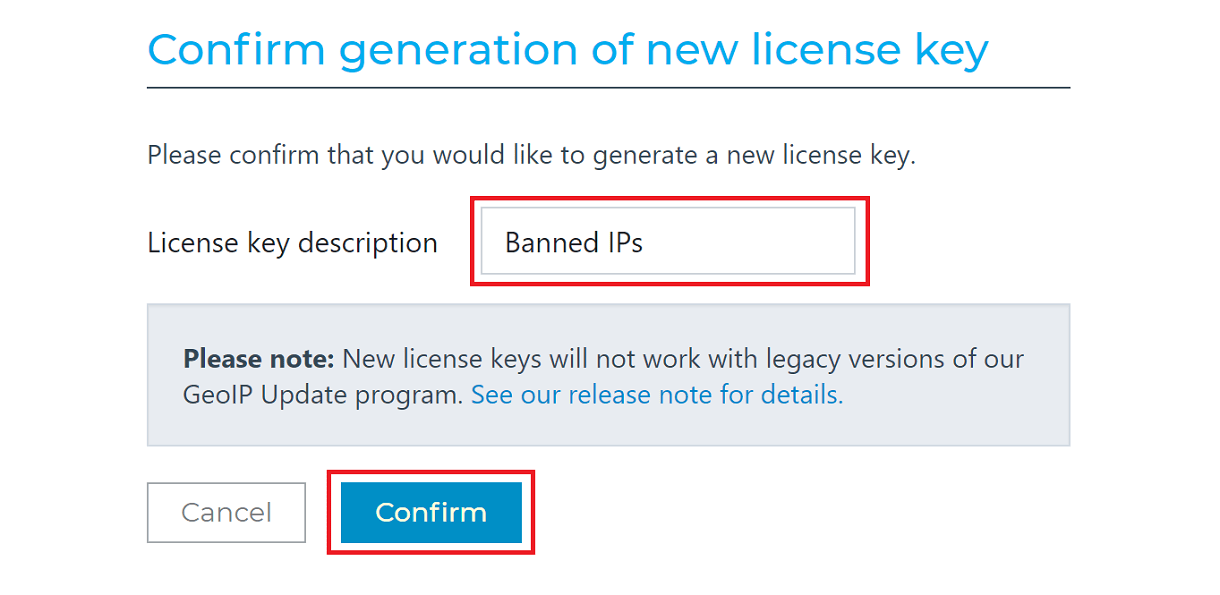
Give the License Key a name and click Confirm.
The License Key required to download the GeoLite2 database to your site will be generated and displayed.
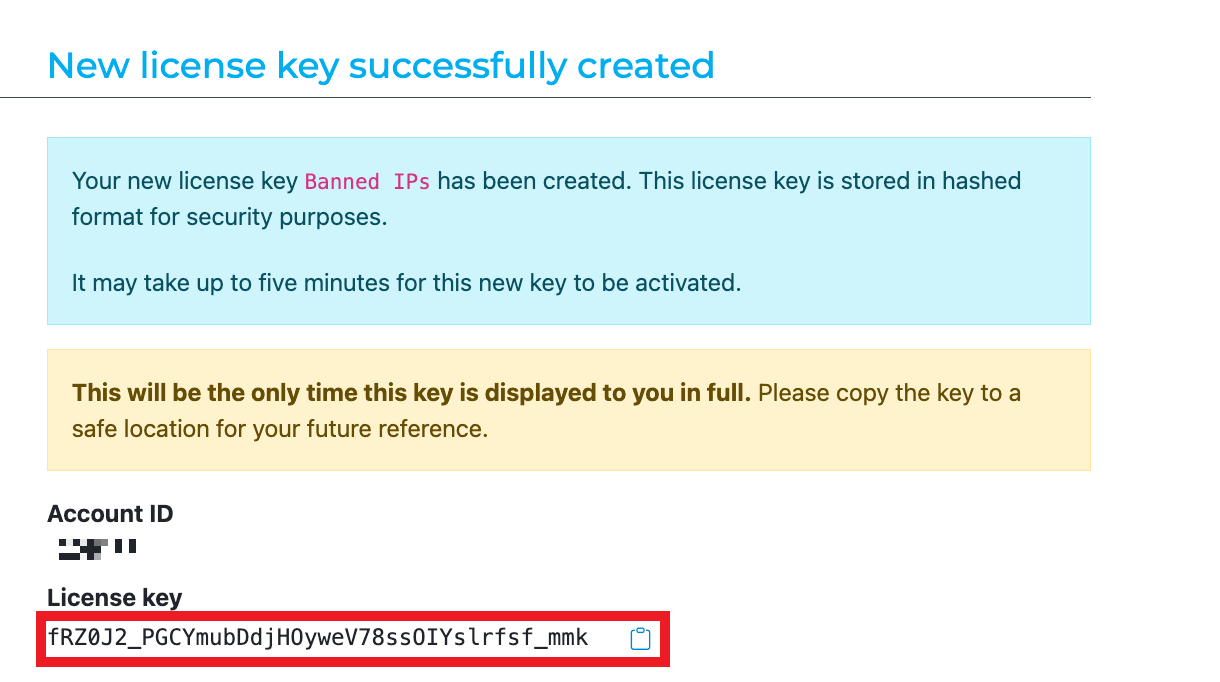
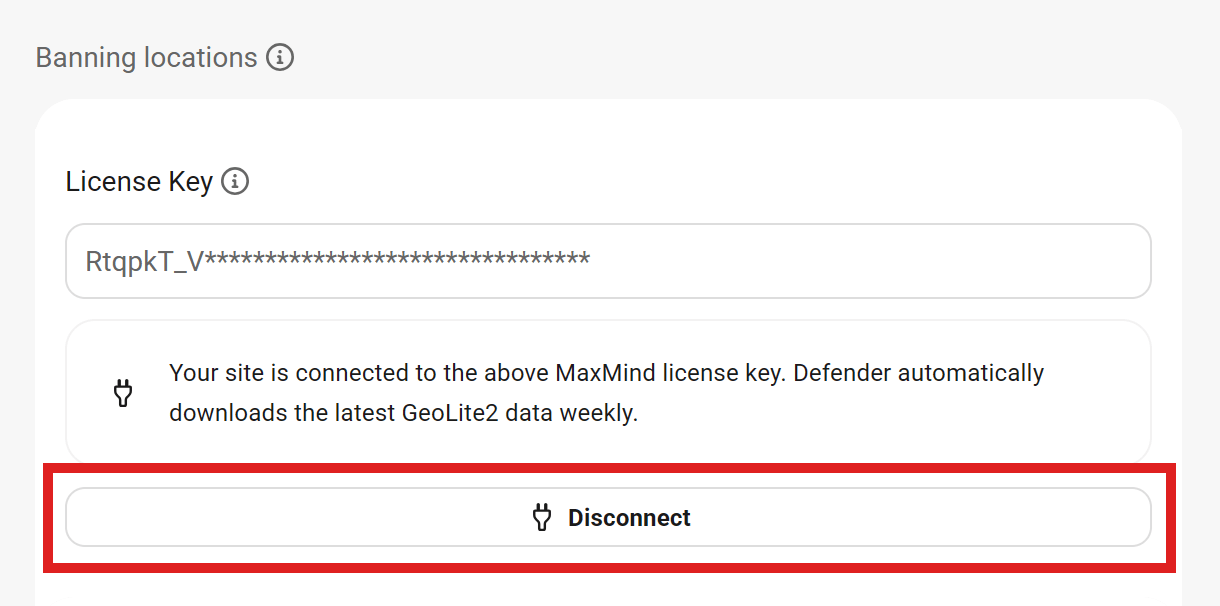
Copy and paste your License Key into the field provided in the Locations module.
A notice will pop up to remind you that it takes up to 5 minutes for Maxmind to activate your new key. So if you get a message saying that “The license key you entered is not valid”, please wait a few minutes and try again.

Once you have clicked the Download button and the GeolLte2 database has activated, use the drop-down menus to ban entire nations from accessing your site, or exclude entire nations from any geo-bans.
Nations allowlisted here will still be subject to the 404 lockout rules configured in the 404 Detection module. Note that your own country will be added by default to the Allowlist here.
To disconnect or reset the previously entered license key, click the Disconnect button.
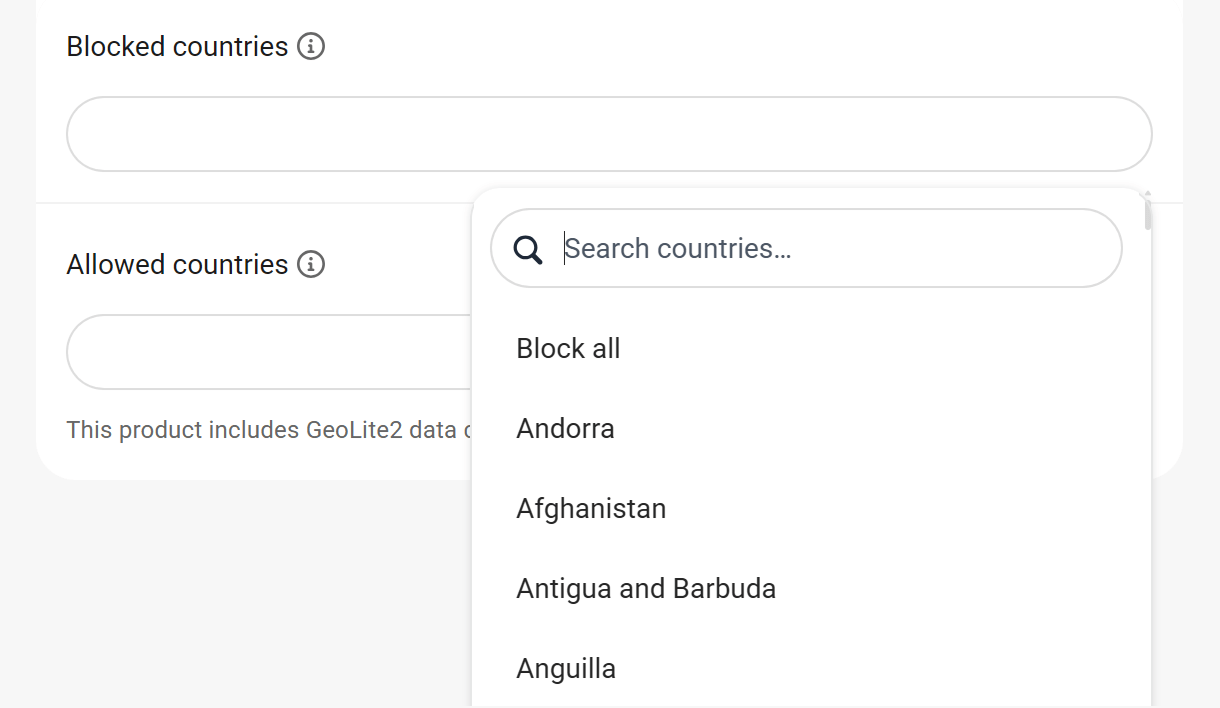
Managing Blocked and Allowed Countries
To add countries to the Allowlist or Blocklist, simply click in the corresponding field to pop open a dropdown menu listing all countries. You can either select All or search for any specific countries to add to either list.
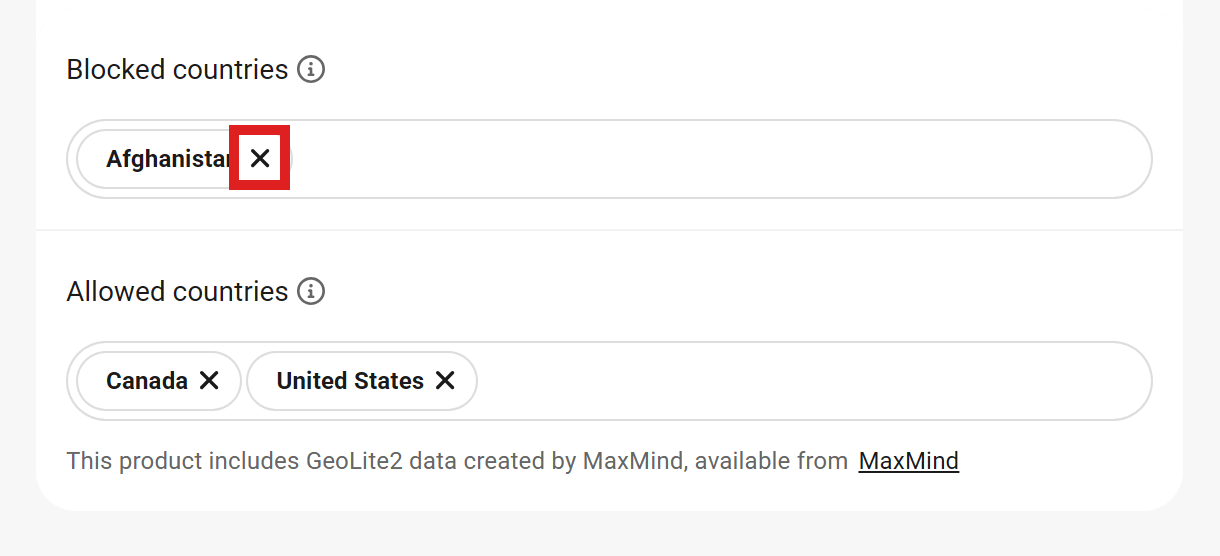
Note that as soon as you activate the MaxMind key, your location will be automatically added to the allowlist. This will increase the likelihood that your requests to the site will not be blocked even after unsuccessful login attempts (if you have enabled Defender’s Login protection), provided your current IP is not added to the blocked IPs list.
To remove any added country from either list, simply click on the [X] next to its name.
Location Data Updates
Defender automatically updates the GeoLite2 data every week using this internal cron job:
wpdef_update_geoip
The GeoLite2 data file is located on your server at
../wp-content/uploads/wp-defender/maxmind/GeoLite2-Country_20220215/GeoLite2-Country.mmdb
The date last updated is indicated in this part of the file path: GeoLite2-Country_20220215
If the .mmdb file on your server appears to be outdated, you can install a free plugin like WP-Crontrol to help you troubleshoot any issues and optionally run the cron job manually.
Also see our System Cron & Custom Cron Jobs documentation for more info.
6.6.4 Custom Rules
Link to chapter 6Set up custom rules to permanently ban persistent troublemakers by blocking their IP addresses or user agents, prevent the use of specific usernames during registration, and allow or block access to file types.
IP Addresses
Create a custom list of banned IP addresses by adding them here.

- Blocklist — Enter IP addresses or address ranges that should be blocked from accessing a site. List one IP address per line in IPv4 or IPv6 format. You can also ban IP ranges by entering them in hyphenated (ex: 127.0.0.1-127.0.0.100) or CIDR format (ex: 127.0.0.1/24).
- Allowlist — Add IP addresses that should be exempt from all ban rules. List one IP address per line in IPv4 or IPv6 format. You can also allow IP ranges by entering them in hyphenated (ex: 127.0.0.1-127.0.0.100) or CIDR format (ex: 127.0.0.1/24).
You’ll find banned IP lockouts logged in your Firewall Logs and can filter the logs for them by selecting the Custom IP Lockout event type.
If any IP address or range you enter here is in a format that Defender does not recognize, it will not be added to your list and a notice will appear so you can make any necessary adjustments.

We recommend Allowlisting your own IP address to avoid accidentally locking yourself out. Your IP address is displayed at the top of this section for your convenience. If you do get locked out, see Accidentally locked yourself out? below for how to get back in again.
Lockout message
Craft a custom lockout message for users you have added to the blocklist.

Sync with the Custom IPs Block/Allow list
This option enables you to instantly synchronize the Custom IP List that you have set up in your Hub with your site. Click the toggle to activate the feature.

If the WPMU DEV Dashboard plugin is not installed on your site, you’ll see an option here to connect your site to WPMU DEV. Clicking that button will pop open a modal window where you can create a free account or connect to an existing one.

Import & Export
If you ever need to move your Blocklist & Allowlist to another website, instead of copying and pasting all those IP addresses, simply Export a CSV file and then import it into Defender on your new site.

Accidentally locked yourself out?
If you haven’t added your own IP address to your IP Allowlist as recommended above, you may accidentally lock yourself out of your site. If that happens, use one of the below methods to get back into the site and ensure your IP is allowlisted.
- Add your IP to the Custom IP Allowlist in your Hub and sync it with all your sites so you never get locked out again.
- Use a different device to log into your site and add your IP to your allowlist.
- Restart your router to generate a new IP address for your device so you can then log in and allowlist your new IP. Note that this method will not work if you use a static (fixed) IP address.
- Create a whitelist-ip.php file, add the code below and replace YOUR IP HERE with your actual IP address. Then upload the file to the mu-plugins directory of your site via (S)FTP or a File Manager utility at your host.
- Experienced users can also use WP-CLI commands to clear one or more IP addresses from the Allowlist and/or Blocklist. See the Firewall chapter in the Defender API Docs for details.
Allowlist and Blocklist Logic
If you also have IP allow/blocklists set up in Defender as above, this is the logic that will be followed once your Custom IP Allow/Blocklists have been synced with your site:
- If an IP address is in either the Local IP Blocklist in Defender on your site, or the Custom IP Blocklist in your Hub, but not in either Allowlist, that IP will be blocked from accessing your site.
- If an IP address is in your local Allowlist, it will be allowed to access your site even if that same IP is in the Local and/or Central Blocklists.
- If an IP address is present in your Central Allowlist, it will be allowed to access your site even if that same IP is in any of the other lists.
This table shows all the possible combinations where an IP address is either present or not in each list, and the result; either allowed or blocked. A “0” indicates the IP is not in the list, and a “1” indicates the IP is in that list.
| Central Allowlist | Local Allowlist | Central Blocklist | Local Blocklist | Result |
|---|---|---|---|---|
| 0 | 0 | 0 | 0 | Allowed |
| 0 | 0 | 0 | 1 | Blocked |
| 0 | 0 | 1 | 0 | Blocked |
| 0 | 0 | 1 | 1 | Blocked |
| 0 | 1 | 0 | 0 | Allowed |
| 0 | 1 | 0 | 1 | Allowed |
| 0 | 1 | 1 | 0 | Allowed |
| 0 | 1 | 1 | 1 | Allowed |
| 1 | 0 | 0 | 0 | Allowed |
| 1 | 0 | 1 | 0 | Allowed |
| 1 | 0 | 1 | 1 | Allowed |
| 1 | 1 | 0 | 0 | Allowed |
| 1 | 1 | 0 | 1 | Allowed |
| 1 | 1 | 1 | 0 | Allowed |
| 1 | 1 | 1 | 1 | Allowed |
Banned Usernames
Automatically ban any IPs that attempt to log into your site using certain usernames. We recommend adding “admin” and “administrator” to this list, which are usually the first things that hackers will try when attempting to access your site. It’s also a good idea to make sure the username for your administrator account is something unique; details on that (plus other tips) can be found on our blog here.

Files, Folders and File Types
Create a custom allowlist and blocklist using the Blocklist and Allowlist tabs.
- Blocklist — Protect specific files or folders by listing their path, or protect certain file types by listing the extension. Users who attempt to access these files, folders, or file types will be served a 404 screen once. Users who attempt to access Blocklisted files or folders a subsequent time will be locked out of the site.
- Allowlist — Define commonly requested files or pages that are missing from your website by listing their path, or allow a certain file type by listing the extension. This will prevent your actual members from being locked out while browsing.
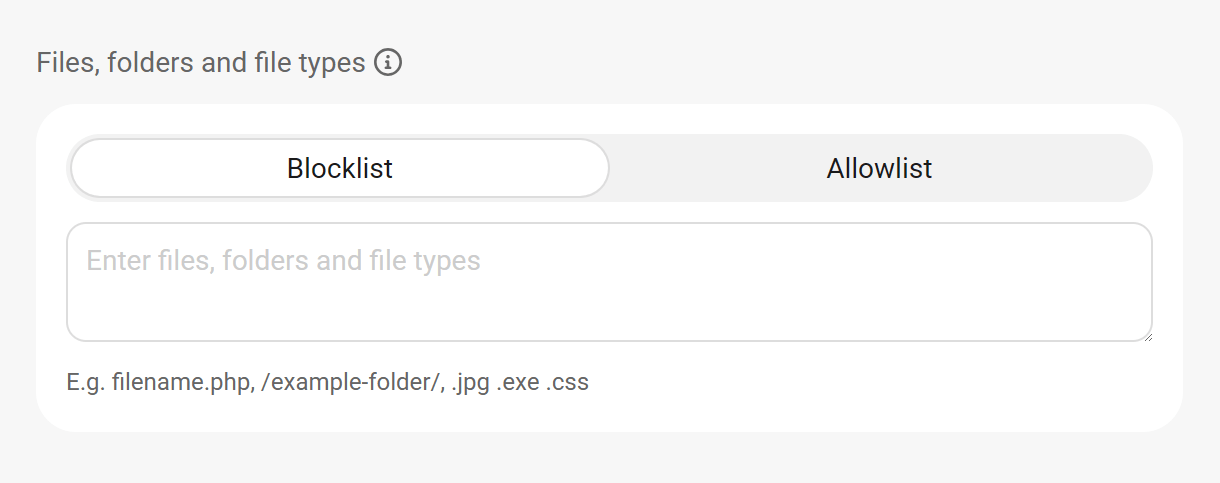
How Does it Work?
The blocklist and allowlist only support matching exact words or text. Special symbols like . \ + * ? [ ^ ] $ ( ) { } = ! < > | : - # won’t work as wildcards and will be treated as regular text.
Simply type in parts of file paths that you want to block, such as login or secret.php. Here are a few examples:
- To block links with “admin” in the URL: Type
adminto block things like example.com/admin. It won’t block things like example.com/wp-admin or example.com/admin-panel. - To block links with “login”: Type
loginto block pages like example.com/login. It won’t block things like example.com/wp-login.php or example.com/login-here. - To block files & links ending in “.php”: Type
.phpto block things like example.com/secret.php or example.com/wp-config.php. It won’t block things like example.com/secret.php5. - To block files & links like “backup.zip”: Type
backup.zipor.zipto block files like example.com/backup.zip.
On WPMU DEV hosting, requests for specific files bypass PHP, which means that the Allowlist/Blocklist for files will not apply. A file request is first made on a server level, where our hosting provides protection against injecting code and a shield against the execution of masked code. In addition, the WAF feature offers further protection by banning IP ranges.
User agents
A user agent is a program that retrieves web content, such as a web browser. However, some user agents may not be desired, such as a web crawler or a malicious bot. Defender allows you to prevent malicious user agents from accessing your website, presenting them instead with a lockout message. Safe user agents can also be allowed, as desired.
For more information about user agents & bots, see Protect Your WordPress Site from Bad Bots on our blog.
The User agent banning interface is divided into two tabs:
- Blocklist – User agents in this list are denied access to your site.
- Allowlist – These are always allowed access, even if they appear in the blocklist.
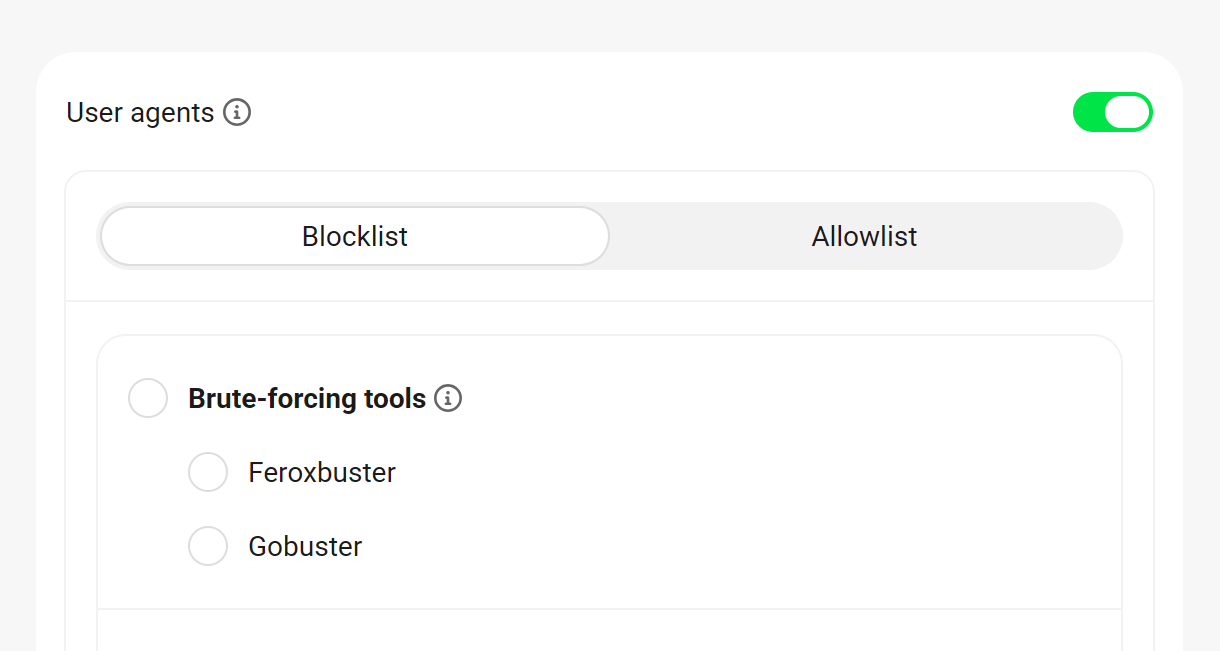
Blocklist Presets
User agents are organized into categories, each targeting a specific type of activity:
- Brute-forcing tools – Tools for uncovering hidden resources and testing security through brute-force methods.
- Security scanners – Automated tools for detecting vulnerabilities in web applications.
- SEO crawlers – Bots that repeatedly access websites to gather SEO-related data, consuming bandwidth and resources.
- Scripts – Automated script-based clients that may not have a legitimate reason to access your site.
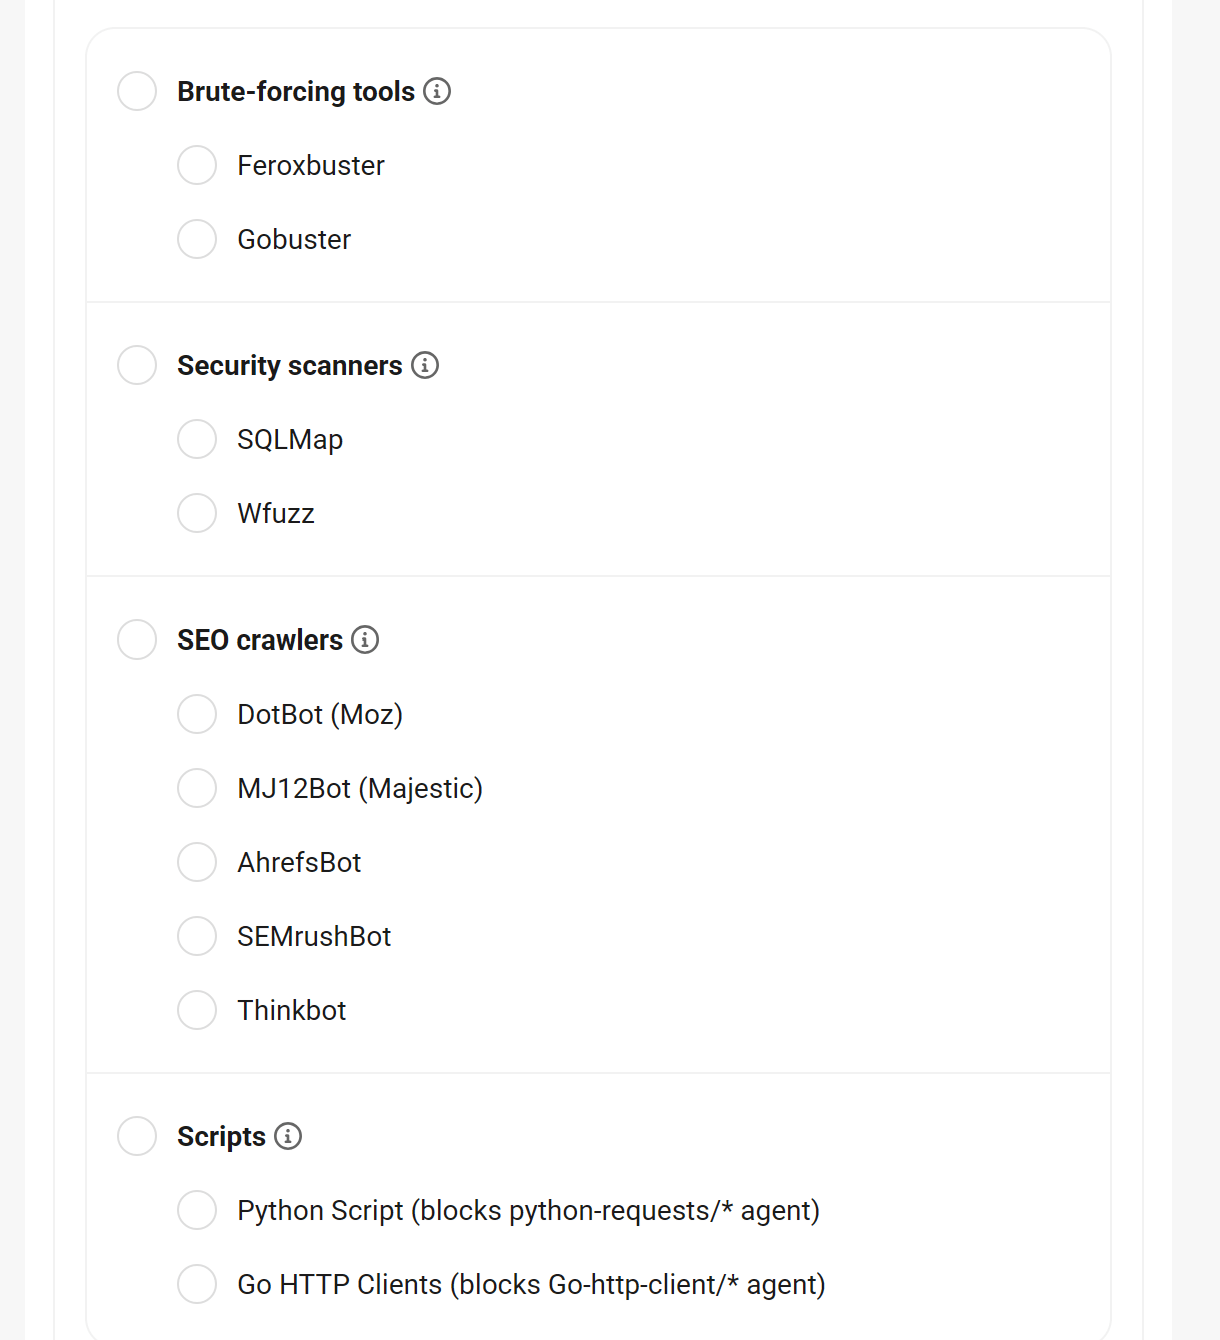
Custom User Agents
If you need more control, expand the Custom User Agents section and enter one user agent per line to block specific entries not listed in the presets.
The blocklist and allowlist fields support regular expressions. This allows you to block or allow any user agents matching the regular expression you specified. For example, you can block any user agent that contains the word root by adding .*Ro{2}t.* to the Blocklist field.

Lockout message
If desired, you can customize the message displayed to banned user agents. To preview the lockout message, click here below the custom message field.

Import & Export
If you ever need to move your User Agent blocklist & allowlist to another website, instead of copying and pasting all those IP addresses, simply Export a CSV file and then import it into Defender on your new site.
6.6.5 Logs
Link to chapter 6The Logs page enables you to view all Lockouts that have occurred on your site since activating Defender.
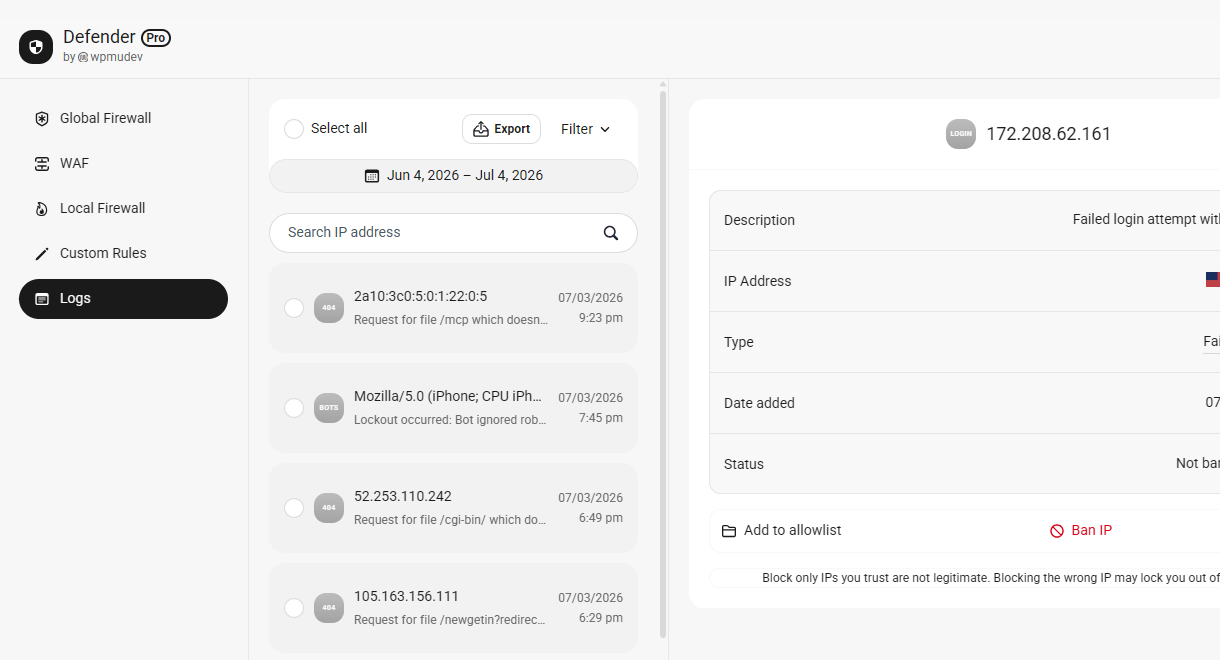
Use the Filter dropdown menu in the top right hand corner to filter lockouts by type and/or status, sort them by latest, oldest, IP address, or user agent, and set pagination to show 10, 20, 50, 100 or all results per page.
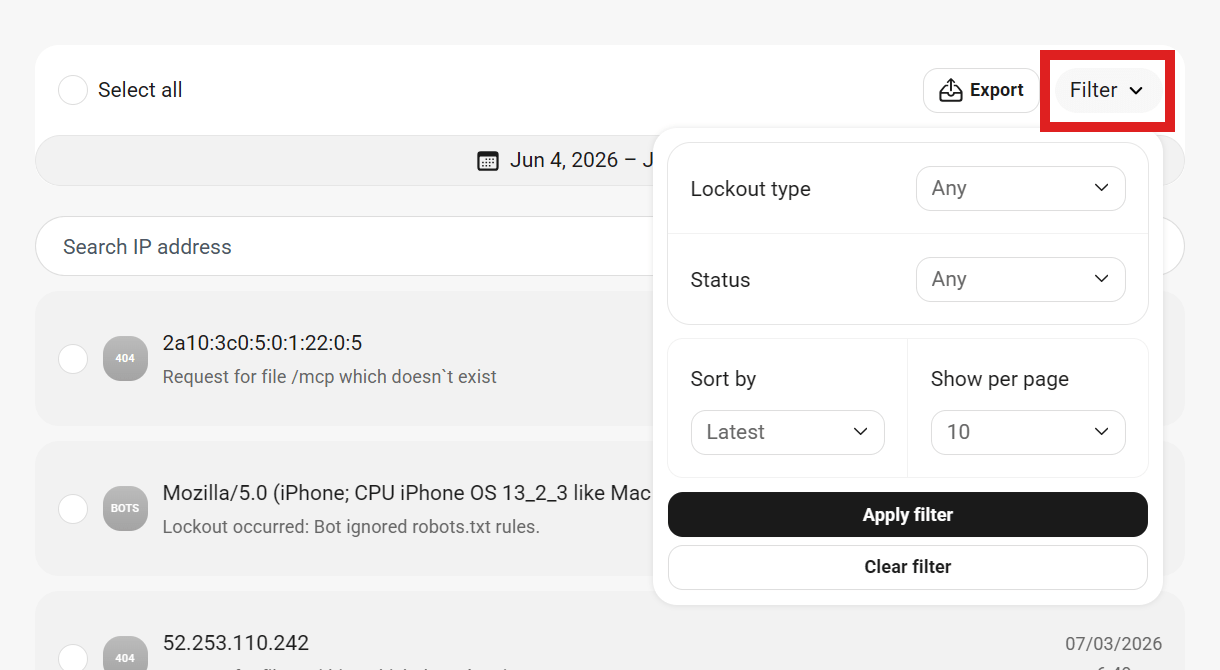
Click Export to export the results as a .csv file, allowing you to use the log info in any spreadsheet application.

Note that the Export feature can only export the currently displayed page of results, filtered & sorted however you need as above. So if you require more than just the current page, you would need to switch to the next page and export that as a separate file, and so on for any additional pages.
Click the currently displayed date range to view logs only for a selected date range.

Select any number of log events and use the bulk actions at the bottom of the screen to apply the selected action to all of them. The available actions are Add to allowlist, Ban or Unban IPs or User agents.

Click any event in the log to expand a detailed view of that event.
- Click Ban / Unban to ban or unban the IP address or user agent.
- Click Add to allowlist to prevent the IP address or user agent from being locked out again in the future.

6.7 Login & Access
Copy chapter anchor to clipboardHere, you’ll find all the tools you need to ensure your site is protected against unauthorized access, and that legitimate user sessions are secured.
6.7.1 Hide Login URL
Link to chapter 7This option enables you to create a custom login URL so that when site visitors access the default wp-login or wp-admin slugs, they’ll either see a “forbidden” message or be redirected to any other URL of your choosing.
This feature does not affect any other wp-admin URLs like /wp-admin/admin-ajax.php, only the wp-admin and wp-login.php slugs when used for logging in.
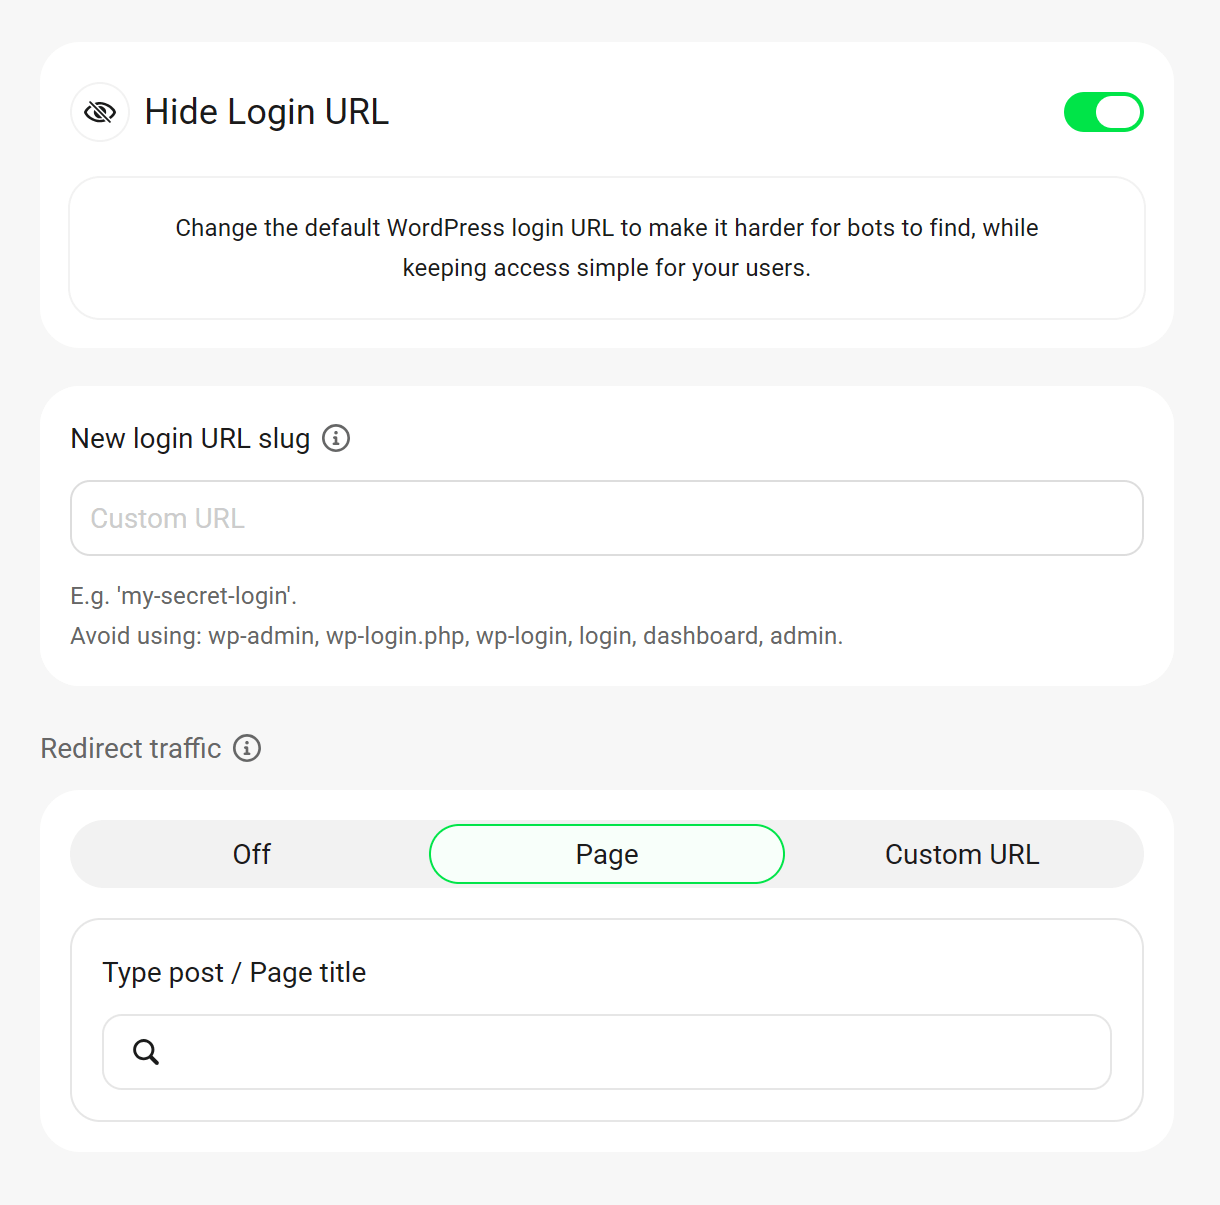
New login URL slug
Toggle on Hide Login URL and enter the New login URL slug you’d like to use. The slug must be unique (unlike any others on your site) and you can only create a custom slug, not an entirely new URL. The /wp-admin and /wp-login.php slugs will be automatically disabled for logged-out users and the login functionality moved to the new URL.
Redirect traffic
With the default login URLs disabled, bots attempting to locate them will generate 403 responses – possibly a lot of them – and that is not good. Therefore, this feature allows you to redirect these misguided users to another page, either an existing page or one created especially for them.
Choose Off to leave this feature inactive or click Page to select an existing page. You can also select Custom URL and then enter your unique URL in the space below. You can even enter an external domain (https://yourdomain.tld or yourdomain.tld), and users will be redirected to the specified domain.
The wp-admin links in your Hub will also respect your new login slug as long as you have logged in at that new URL at least once.
Reserved Slugs
You can use any custom slug you like, and it can include uppercase letters, but please note that the following slugs are reserved by WordPress and cannot be used for this feature:
- wp-admin
- wp-login.php
- login
- dashboard
- admin
- wp-signup.php
The wp-signup.php user registration page cannot be masked with a custom URL on WordPress Multisite installations. To minimize vulnerability to brute force attacks against the user registration page, enable Defender’s Firewalls and Hardening Recommendations.
Use a Reserved Slug for New Login URL
Once the Hide Login URL feature is enabled, any frontend pages with reserved slugs in their URL will be disabled by default and will not work. If you absolutely need any of those slugs to work on your site, add the following filter to the functions.php file of your active child-theme or as a mu-plugin to load these pages with the reserved slugs.
Forgot Your New Login URL?
In case you forgot the custom slug of your login page, you can find it in your database using phpMyAdmin database manager.
In phpMyAdmin, look for the wp_options table. Note that you might have a different WordPress database prefix such as wp_ar_options. Click on the Search tab. In the option_name Value field, type “wd_masking_login_settings” and hit enter.
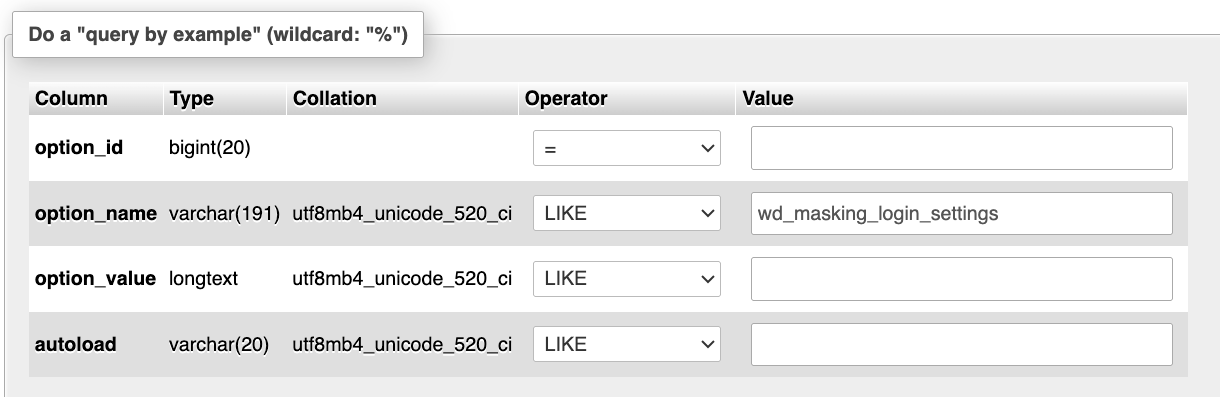
You can find the login slug under the option_value column. In this example, the masked login slug is “/my-login-page“.

If your site is hosted by WPMU DEV, you can access the database from your Hub by going to your site’s Hosting > Overview screen and clicking the Manage link next to Database.

No access to the database?
If SSO Login is enabled in your Hub for your site, you can log into the site directly by clicking the WordPress icon for that site in your Hub. If SSO Login is not enabled for your site, clicking that icon will direct you to your masked login URL where you would log in normally.
Alternatively, you can regain access to the default WordPress login page wp-admin by navigating to your site’s plugins folder via FTP and renaming the wp-defender folder (e.g., ‘wp-defender-disable’) to disable it temporarily.
Remember to rename the Defender plugin folder to its original name (wp-defender) to activate it again on your site.
Once logged in, go to Defender > Login & Access > Hide Login URL to view or change your custom login slug.
6.7.2 Two-Factor Auth
Link to chapter 7Two-factor authentication enhances your site’s security by requiring users to enter a unique passcode in addition to their WordPress login credentials. Two-factor authentication is an extremely effective tool against brute force attacks.

Check out The Ultimate Guide To Securing Your WordPress Login With Biometric Authentication on the blog, or jump down to the Web Authentication section in this doc for all the details.
User Roles
User Roles allows you to require two-factor authentication for some users on your site, but not others. For example, you can require Administrators & Editors to use two factor authentication because they have considerable privileges throughout the site, but not require subscribers to use it because, typically, their access is very limited.
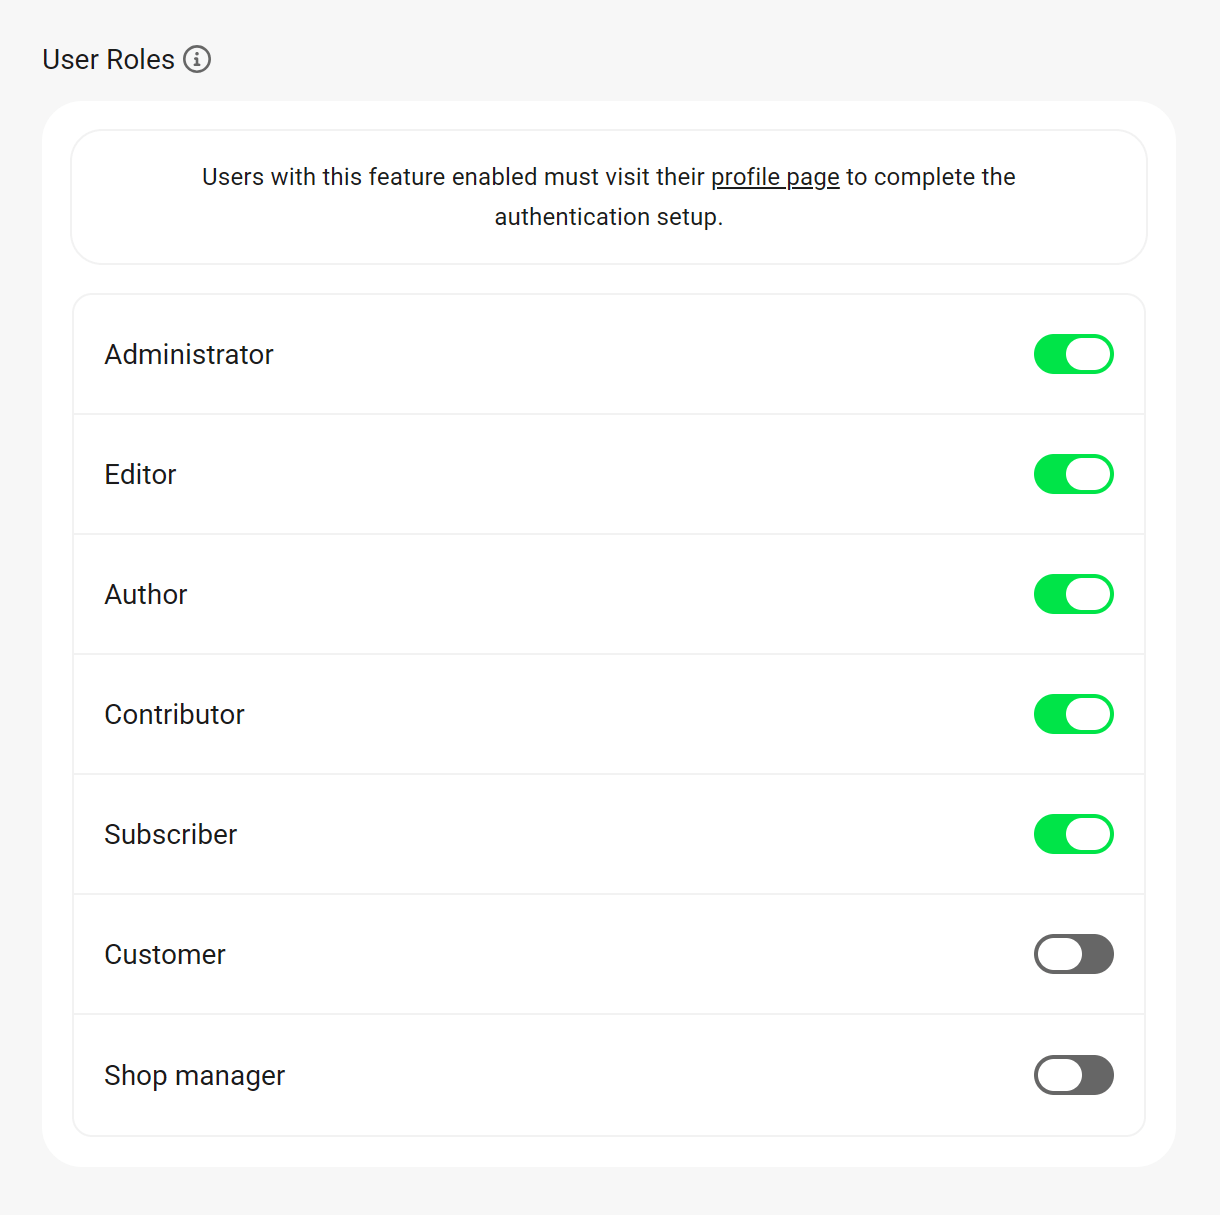
App Downloads
Use the link that corresponds with your operating system to download one of the three authenticator options available. Use the dropdown menu to choose between:
- Google Authenticator
- Microsoft Authenticator
- Authy

The TOTP Authentication method is designed to work with Google Authenticator, Microsoft Authenticator, and Authy. But if you prefer to use another app that functions in the same way to generate one-time passcodes, it should work as well. Here are a few alternatives:
Customization
Custom app title
Toggle on the Custom app title option to set the title that should appear in the authenticator app to identify your site.

If you are managing multiple sites that might have the same users, make sure to give descriptive and unique app titles for each site. This will prevent the (TOTP) Authenticator App from having the same app title for multiple sites or overwriting an existing one which may confuse your users.
Custom graphic
Toggle on the Custom graphic option to replace the Defender icon that appears on your login page above the login fields by default.
Select Upload to use an image from your media library, or select URL to add an image from a URL. Best results are achieved with a square image that is 168 x 168 pixels.

Custom authentication emails
Toggle on the Custom authentication emails option and edit the default content of the Fallback Email sent to users when they request a one-time fallback password on the login form.
Use the Available variables near the bottom of the template to insert the authentication data where you want.

Others
Force Authentication
By default, two-factor authentication is optional for users, meaning they can enable or disable it within their own wp-admin profile. However, you can enable and configure this feature to make two-factor authentication mandatory and remove the user profile option to disable it.
Select the user roles for whom 2FA should be forced, and optionally enter a custom message that will be shown to them if they have not yet enabled it. Note that any custom roles you may have active on your site will be available for selection here as well.
The first time a user logs in after 2FA has been forced for their user role, they will be redirected to their Profile page where they must configure 2FA before they can proceed to do anything else on the site. See User Configuration below for more info.

WooCommerce
By default, users are redirected to their Profile page to configure two-factor authentication. Enabling this option redirects customers to WooCommerce My Account page to configure two-factor authentication under the 2FA section.
Be sure to enable two-factor authentication for the Customer user role to show the 2FA section under My Account page.

Active Users
Click View users in the Active Users section to see a list of all users who have enabled two-factor authentication.

In a multisite installation, the list of users who have enabled two-factor authentication on any site can only be seen in the network admin under All Users.
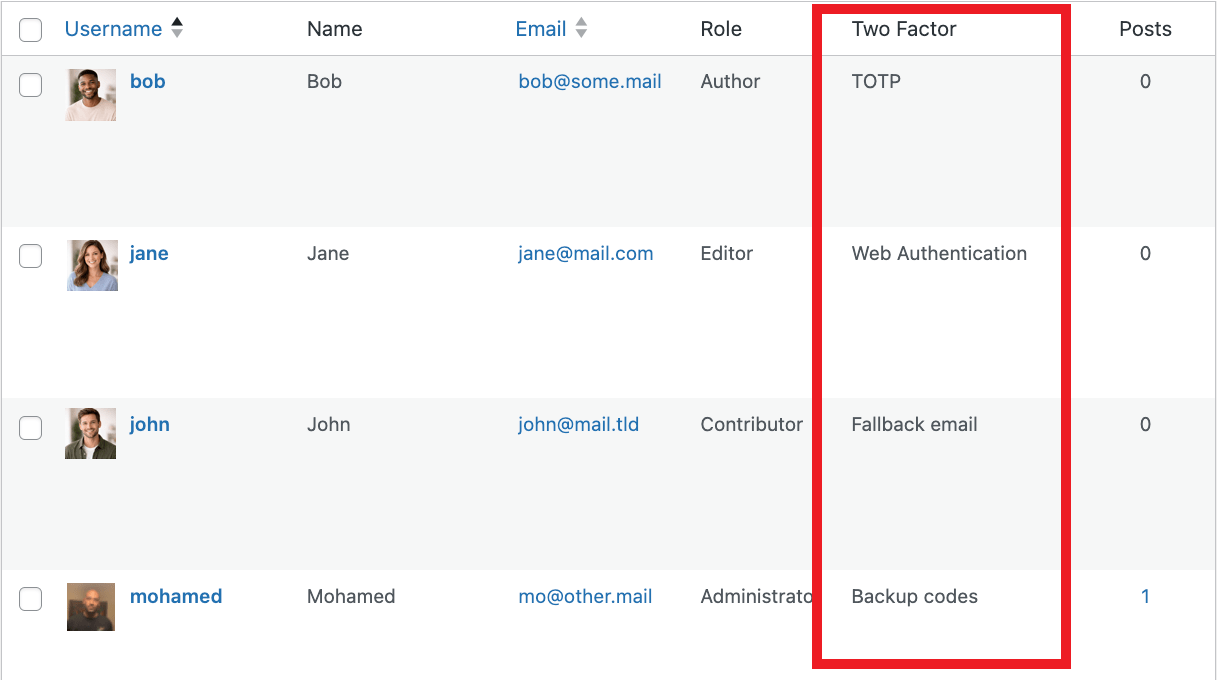
If a user ever needs you to reset two-factor authentication for their account, you can do that by clicking the Reset two factor action link for that user on your Users screen. They will then be able to login and reconfigure it in their profile.
Limit Two-Factor Authentication Login Attempts
If you enabled Login Protection, by default, users will have five attempts to enter the correct two-factor authentication code. On the fifth failed attempt, they will get locked out for 30 minutes before being able to log into the website again.
Note that limiting two-factor authentication login attempts is disabled for users with IP addresses listed in the allowlist and users allowlisted by location.
Disable Limiting Two-Factor Authentication Login Attempts
If you wish to disable limiting the two-factor authentication login attempts, use the code below:
add_filter('wd_2fa_enable_attempts', '__return_false');
This filter and the subsequent filters can be used in your active theme’s functions.php file, or in a mu-plugin uploaded to your site. For more on using mu-plugins, see our Installing Mu-plugins documentation.
Set Attempts Limit
By default, users will get locked out after the fifth failed attempt to enter the correct two-factor authentication code. You can set a custom threshold for triggering the lockout using the code following code. Adjust the number of attempts. In the code below, it is 3:
Set Lockout Duration
By default, users get locked out for 30 minutes. You can set a custom lockout duration using the following code. Replace HOUR_IN_SECONDS with the desired lockout duration in seconds. For example, if you want to set the lockout duration to 2 minutes, replace HOUR_IN_SECONDS with 120.
6.7.3 Two-Factor Auth User Configuration
Link to chapter 7Once Two-Factor Authentication has been enabled, your users will have several authentication options available to them in the Security section of their wp-admin profile page, and they can set any one of them as their default method.
It’s recommended to enable at least 2 authentication methods so you have a fallback method in case the default method you set doesn’t work for you. For example, if you set TOTP as your default, and don’t have access to your mobile device, you’d have at least one other method to use to authenticate your login.
Use the links below to jump to the corresponding sections in this chapter.
If you have enabled Force Authentication for any user role, users with that role will be automatically redirected to their profile page the next time they log in, where they must configure 2FA before they can proceed to do anything else on your site.
They’ll see a notice like the below in the Security section of their profile page.

TOTP Authenticator App
Toggling on this option will prompt the user to download the Time-Based One-Time Password (TOTP) Authenticator App of their choice to their mobile device and scan the QR code with it. Alternatively, they can manually copy/paste the provided setup key into the app.
They would then enter the 6-digit passcode generated by the app in the field provided, and click the Verify button to complete the setup.
From then on, when that user enters their username and password in your site’s login form, they will be prompted to also enter the verification code from their selected TOTP app.
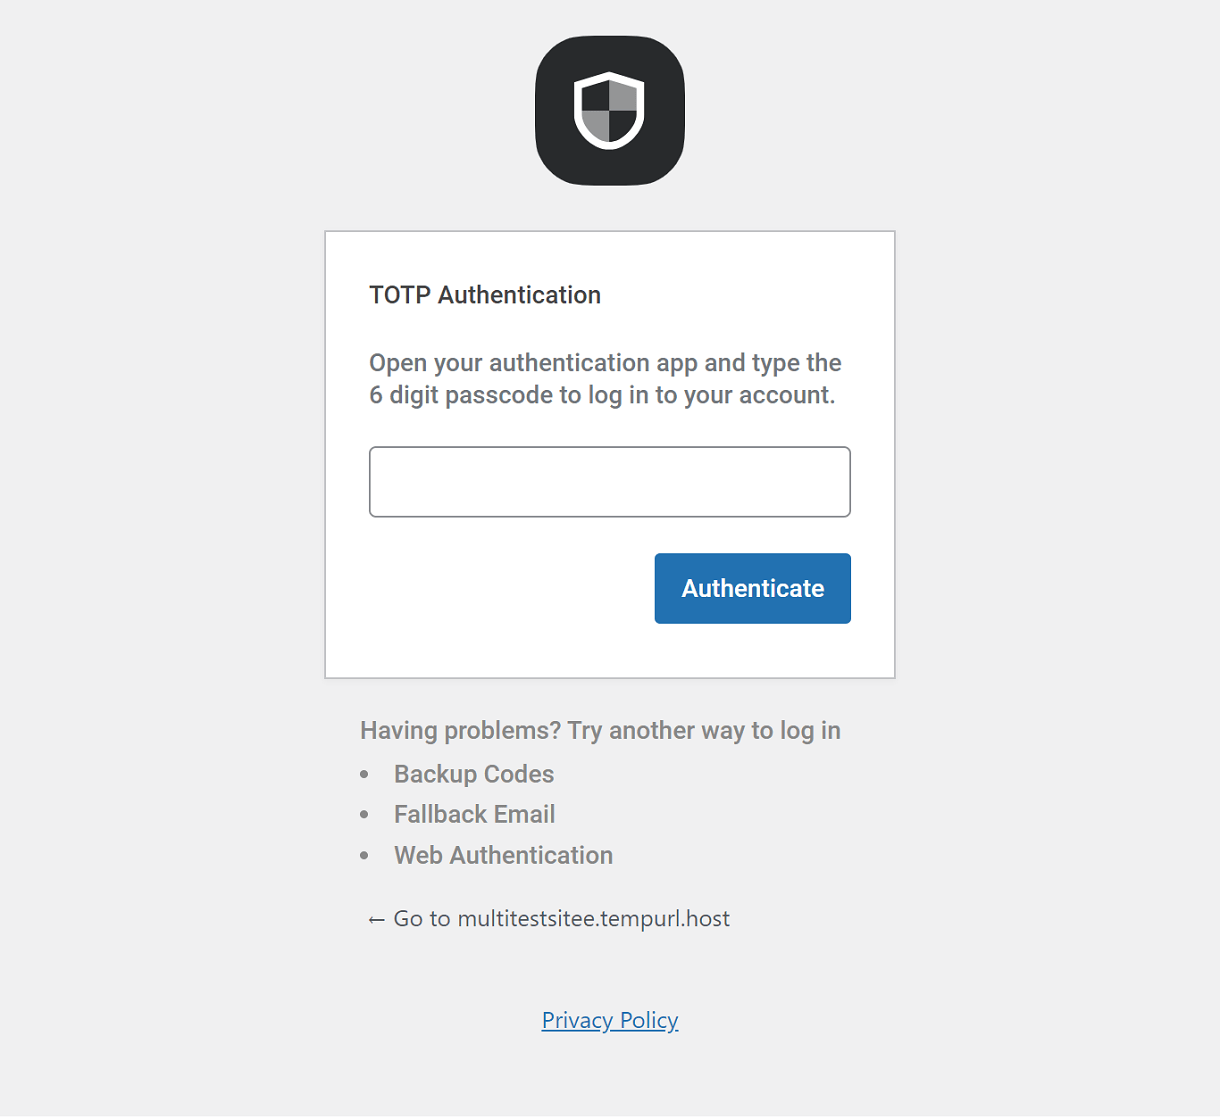
As an example, the Google Authenticator App looks like the image below. The code the user needs is displayed under a heading that includes the App Title you set along with the user’s email address.
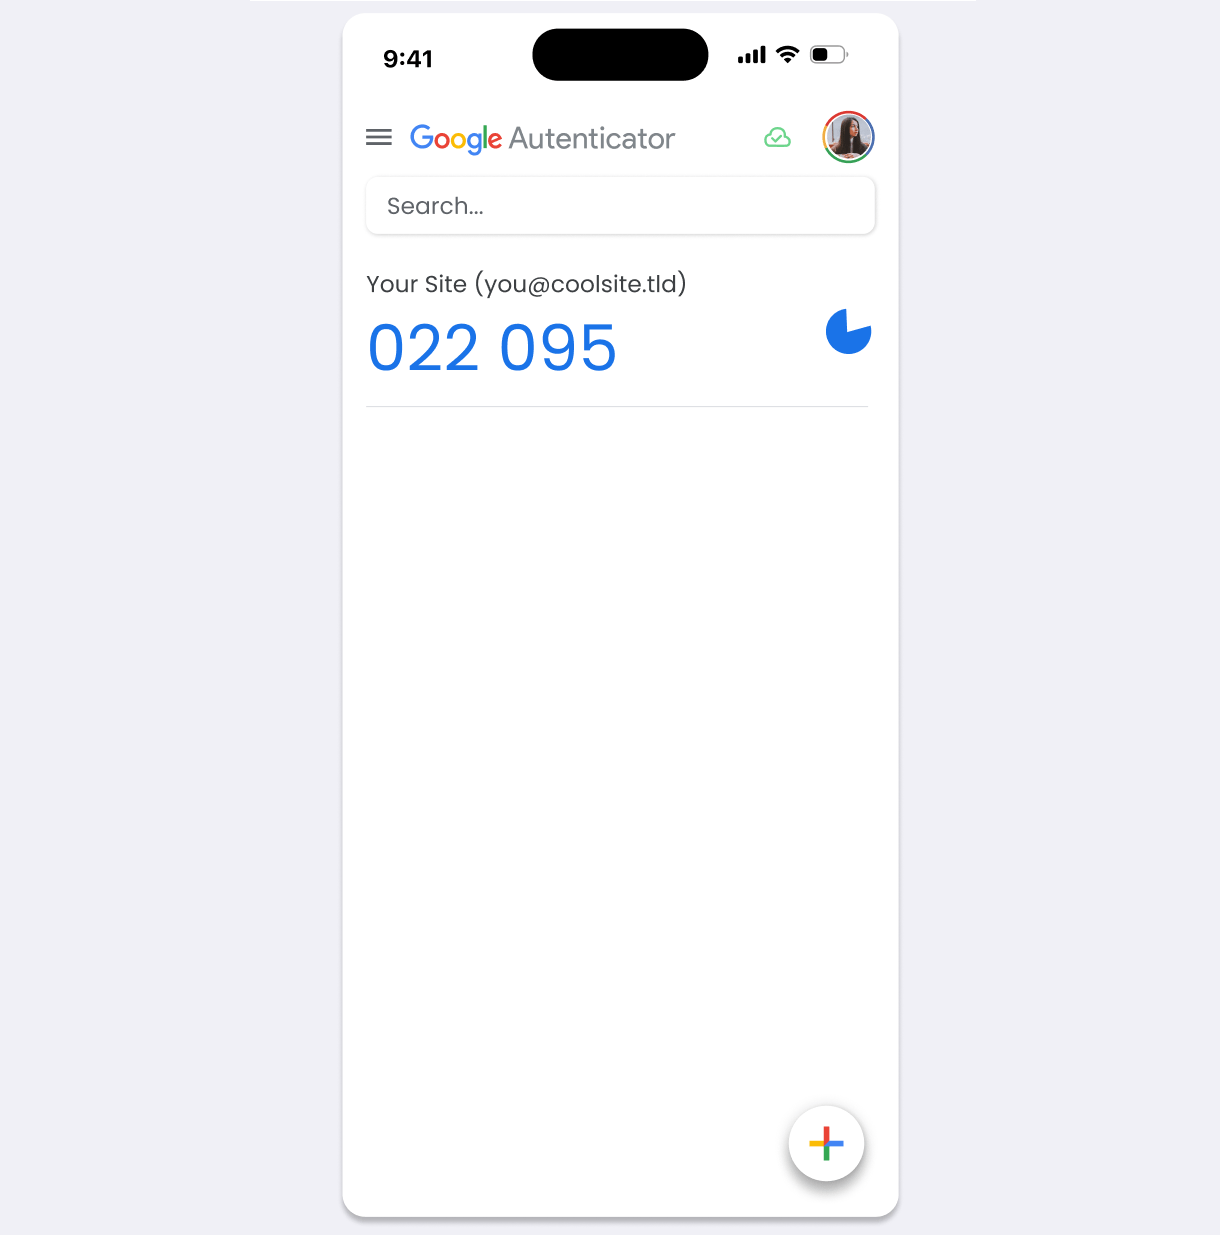
The Google Authenticator app generates a new code every 30 seconds. A different code is generated for each connected site, meaning the code for Site A will not work to authenticate the login for any site except Site A.
Backup Codes
The Backup Codes option enables the user to create a series of downloadable codes, in batches of 5, that can be used to authenticate their login.
The codes do not expire but each code can be used only once and is then invalidated and cannot be used again.
The codes can be generated at any time and are displayed in their profile only once. So it is important to download them as a text file by clicking the Download button, and keeping that file in a safe, yet accessible location.
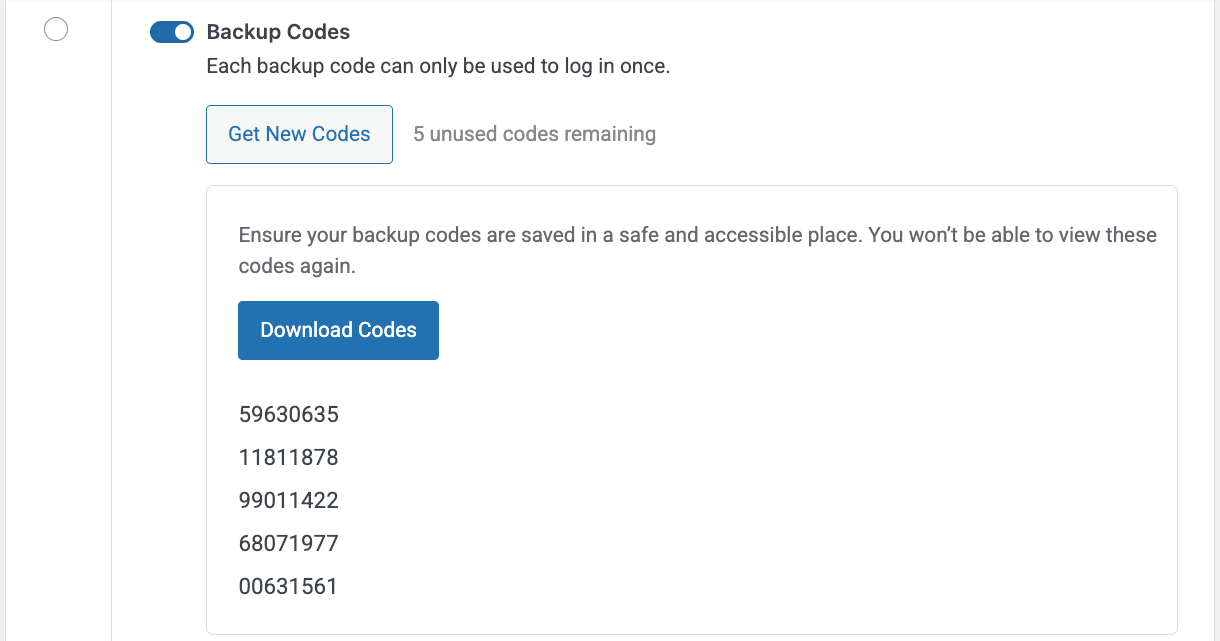
From then on, when that user enters their username and password in your site’s login form, they will be prompted to also enter one of their backup codes.
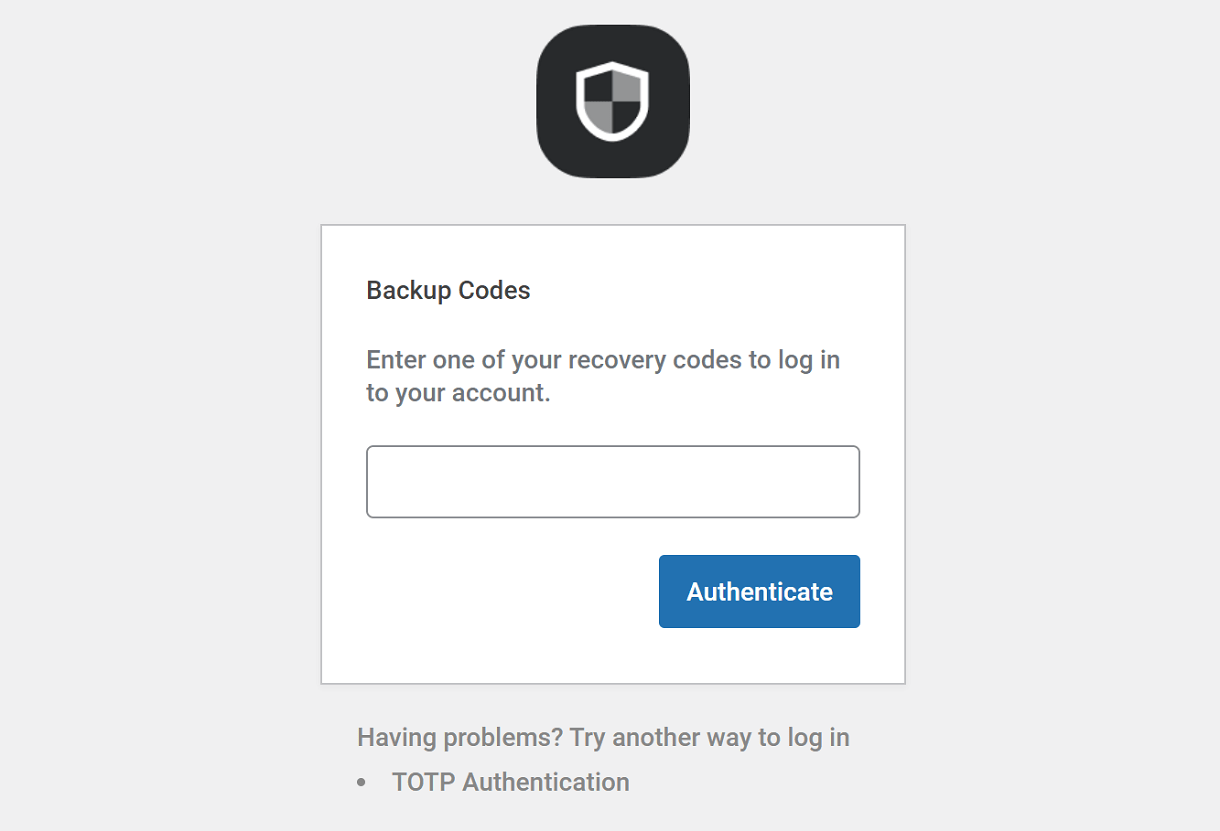
Note that if a user uses all of their available backup codes and has not enabled an alternate method in their profile, they’ll be able to log-in without having to authenticate, but will see a notice at the top of every admin page reminding them to create new ones.

Fallback Email
This option can be handy if the user ever loses their mobile device. When enabled, a one-time passcode can be sent to the email address saved in the provided field.

From then on, when that user enters their username and password in your site’s login form, they will be prompted to also enter the one-time passcode that is automatically sent to the email address they set in this option.
If they don’t receive the code for any reason, they can click the Resend Code link to have it sent again.
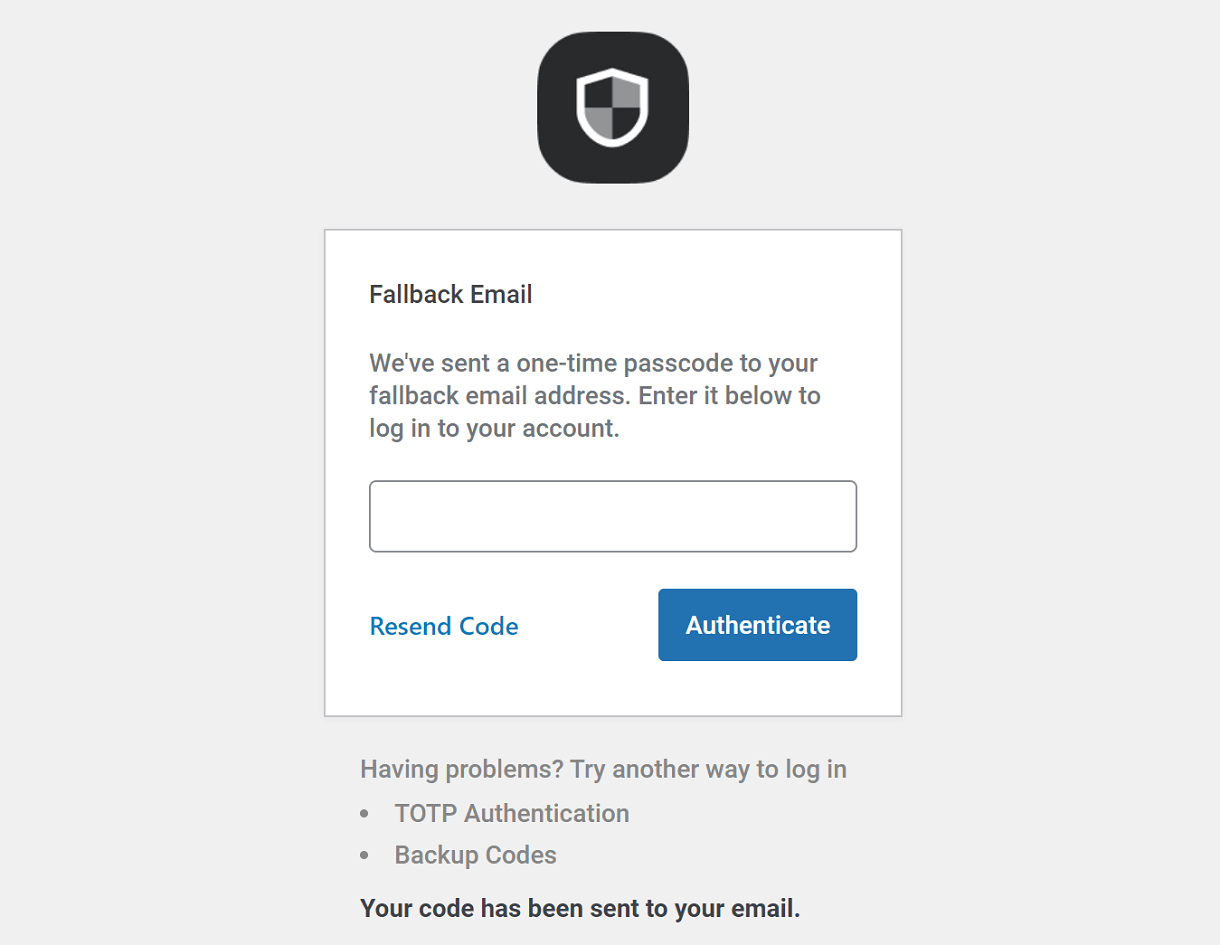
Web Authentication
This option enables you to authenticate your login with any device compatible with FIDO2 standards.
Note that Web Authentication does not replace your traditional WordPress login with username & password. It adds an additional secure layer to your regular login, like the other authentication options above.
Web authentication requires the following PHP extensions to be enabled on your server: mbstring, GMP, and Sodium. These extensions are enabled by default on all sites hosted by WPMU DEV. If you are hosting elsewhere and any of them are not enabled on your server, you’ll see an alert like the example below. Please contact your hosting provider and ask them to enable the extensions for you if you wish to use this feature.

Toggling on this option will reveal a new section where you’ll be prompted to register and authenticate the device(s) you wish to use for your web authentication.
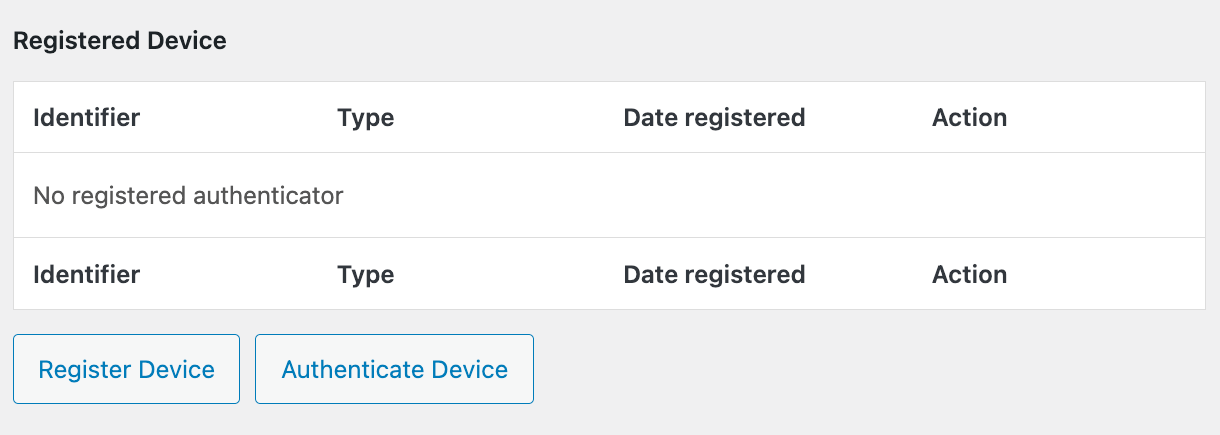
Register Device
Click the Register Device button to pop open the form to register a device you are currently using while logged into your site. You can register multiple devices but they must be each registered individually.
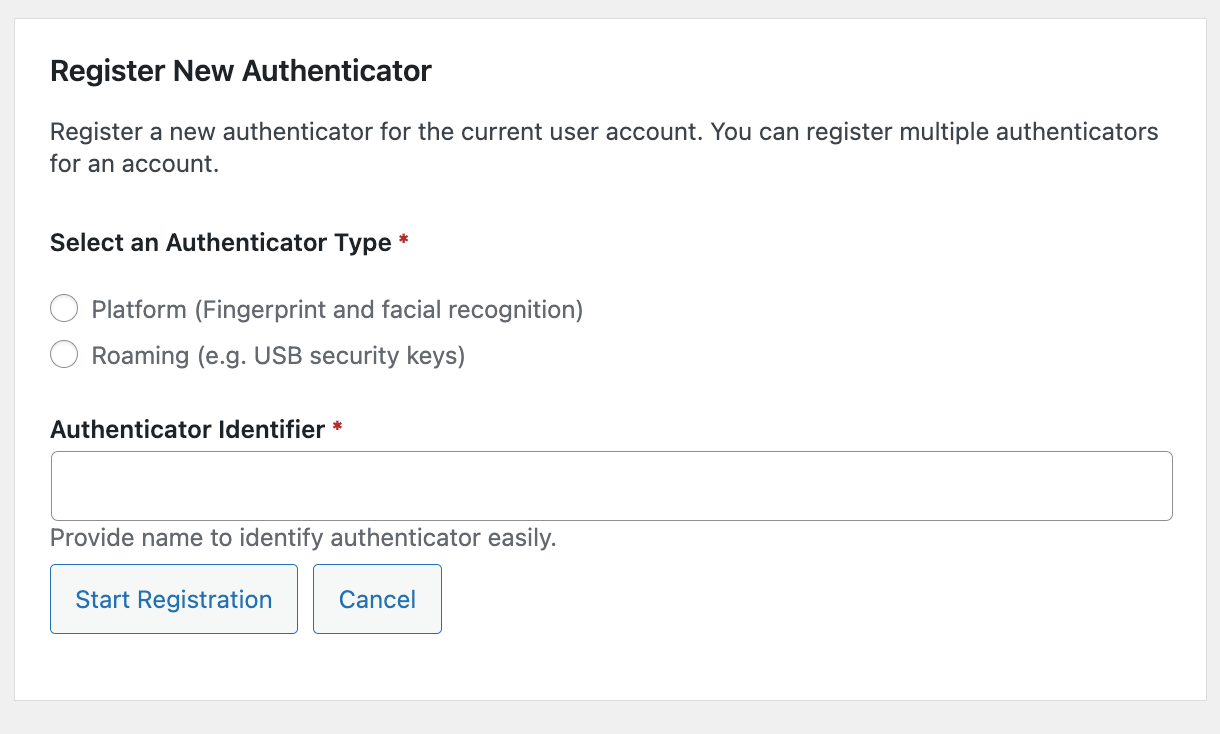
Select an Authenticator Type
Select the type of device you want to register.
- Platform – Select this option if you are registering a desktop, laptop, tablet or mobile device with built-in authentication capabilities like PIN, fingerprint or facial recognition.
- Roaming – Select this if you are registering a portable hardware-based authentication method like a USB security key.
Note that if you have already registered a hardware-based authentication device in your user account, you cannot register that same device again in the same account unless you delete the first one registered. You can of course register multiple different hardware-based authentication methods in the same account.
Authenticator Identifier
Enter any name you like in the Authenticator Identifier field so you can recognize it later, and click the Start Registration button.
Please note that you might not be able to register a device as some browsers and operating systems are not compatible with the WebAuthn protocol that we are using to manage the authentication process. You can check your browser and operating system WebAuthn compatibility here.
The registration process will differ depending on the device you are using.
For example, registering a Windows desktop or laptop device will prompt you to enter your Windows Hello PIN number, or use whichever other authentication method may be enabled on the device.
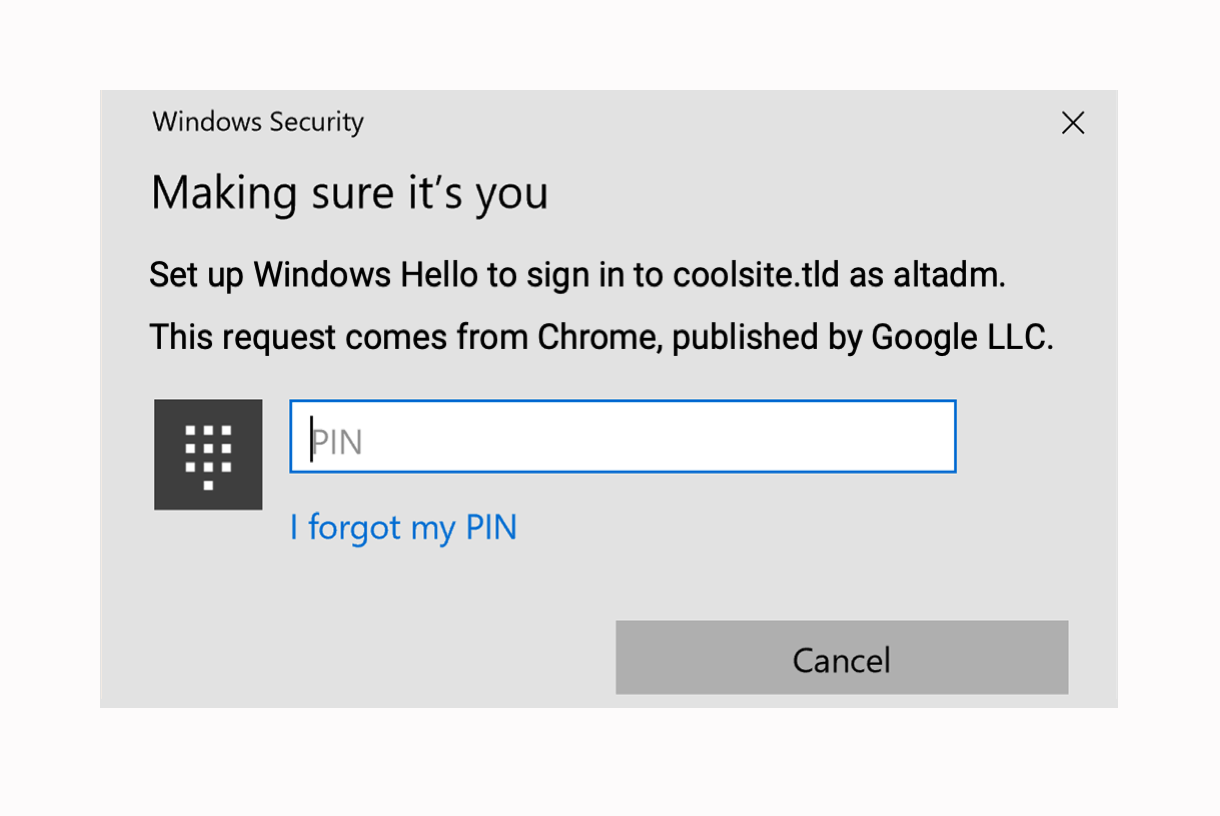
Registering a mobile device will prompt you to touch the fingerprint sensor, or use whichever other authentication method may be enabled on the device.
Registering a hardware-based/USB device will prompt you to touch the fingerprint sensor, or use whichever other authentication method may be enabled on the device.
You’ll then see your device listed in the Registered Device section, and a message will display beneath that confirming that the device has indeed been registered.
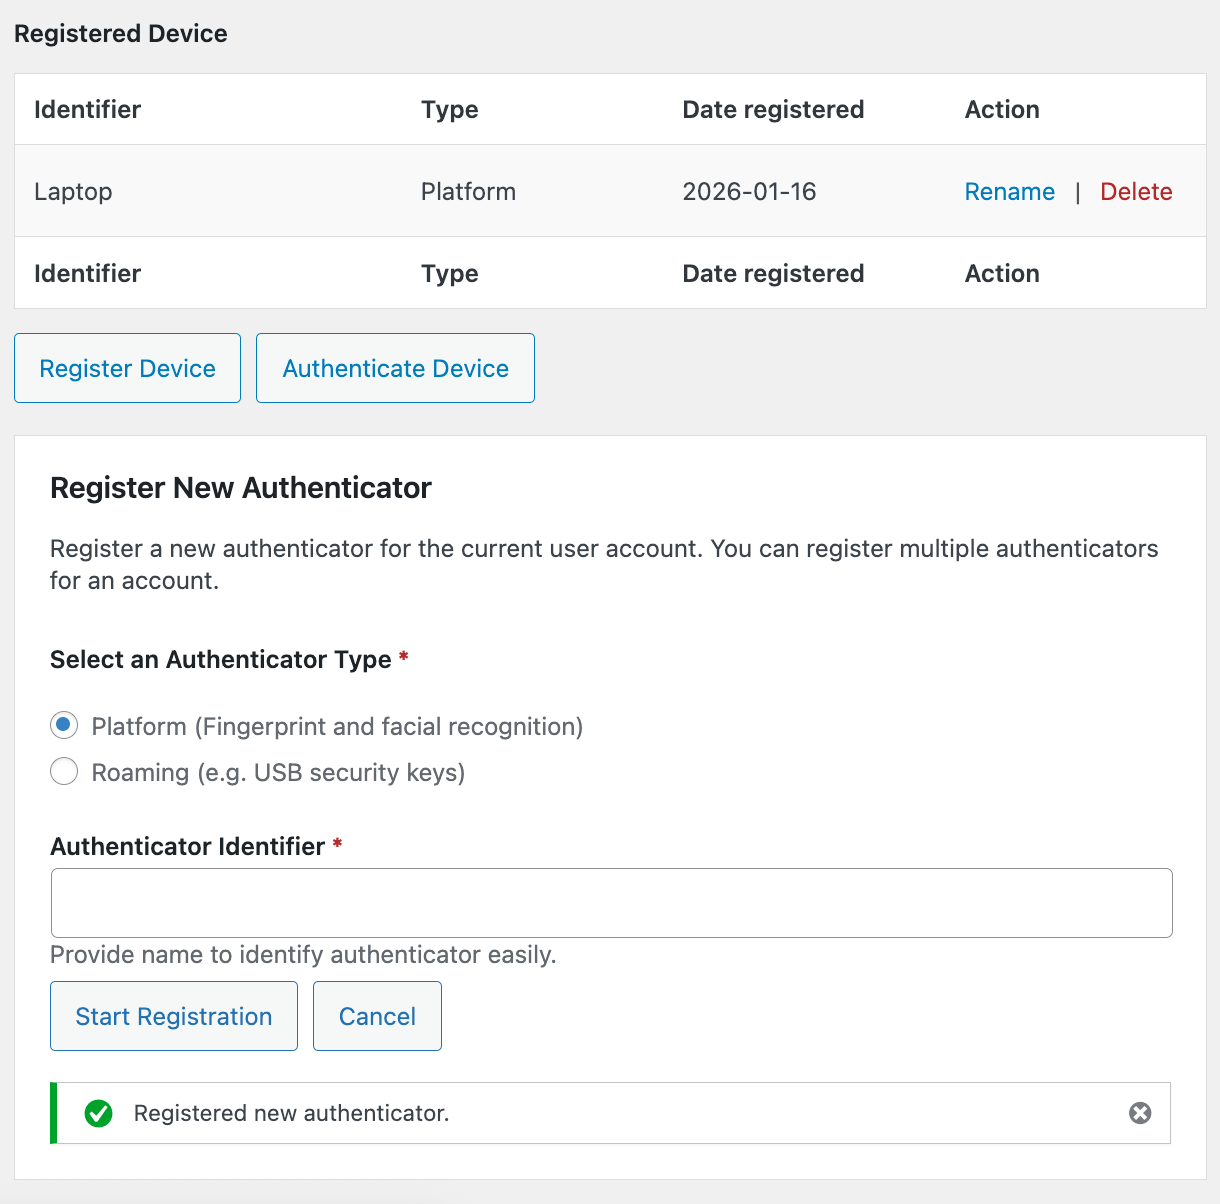
The next step is to authenticate the device you just registered.
Authenticate Device
Once the device has been registered, click the Authenticate Device button. The same authentication method used to register the device will prompt you to confirm the action.
Once done, you’ll see a success message appear and can now use the registered web authentication option as a secure method to authenticate logging into your site.
From then on, when you enter your username and password in your site’s login form, you will be prompted to authenticate your login with one of the Web Authentication methods you have registered.
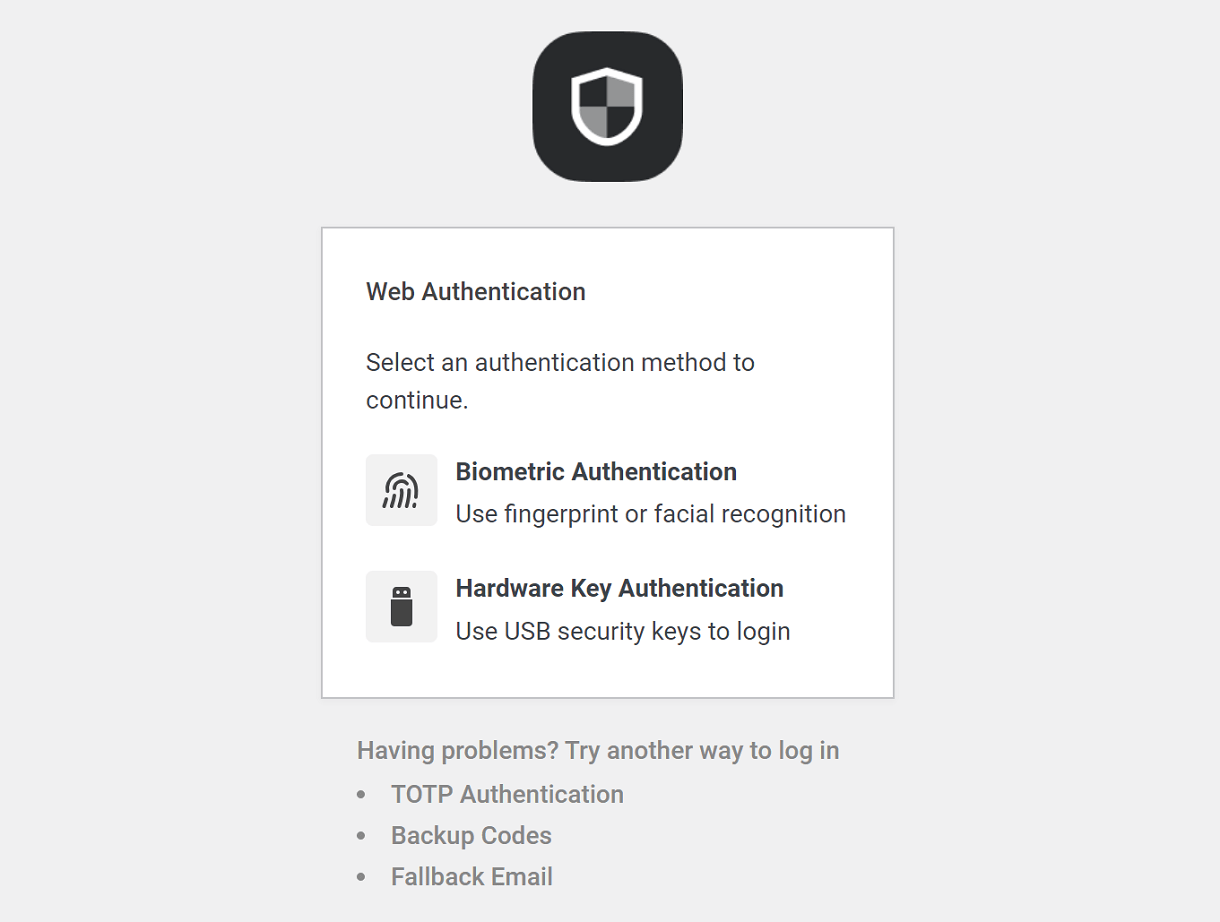
Please note that once a device has been registered and authenticated, and you later deactivate the biometric functionality on the device, the authentication would of course fail after that. You would need to reactivate the functionality on your device and authenticate it again in your profile, or register a new device.
Rename Device
If needed, you can change the authenticated device name by clicking on the Rename action link in its row. Then enter the new name and click Save.
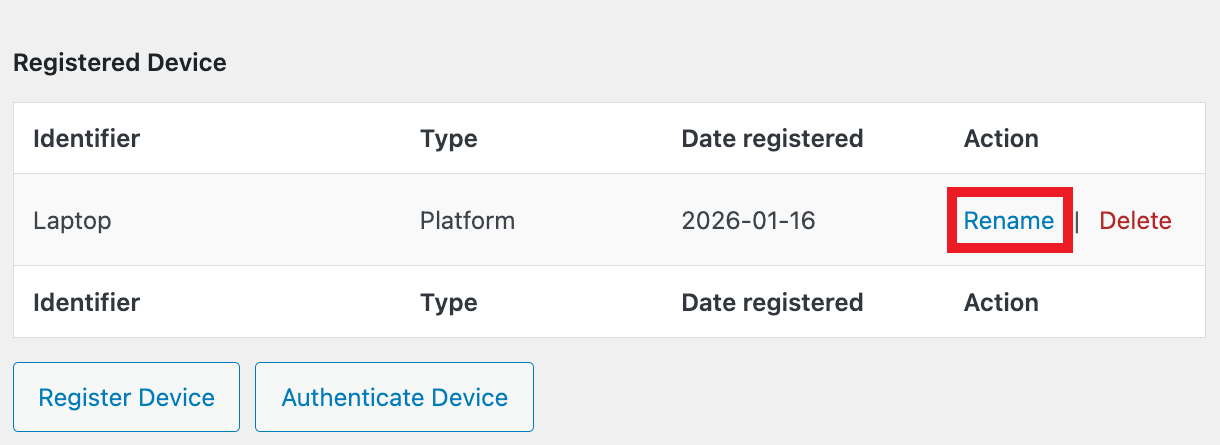
GDPR Compliant
Web authentication with FIDO2 compatible devices is fully GDPR compliant; no personally-identifying information ever leaves your device.
For more information, see the following articles on the FIDO2 website:
How FIDO Works
FIDO Authentication and GDPR
Multiple Methods Enabled
If a user has configured multiple authentication methods in their profile, they will appear as alternate options that display beneath whichever one they have set as their default.
Clicking any available option there would display the selected alternate authentication method as above.
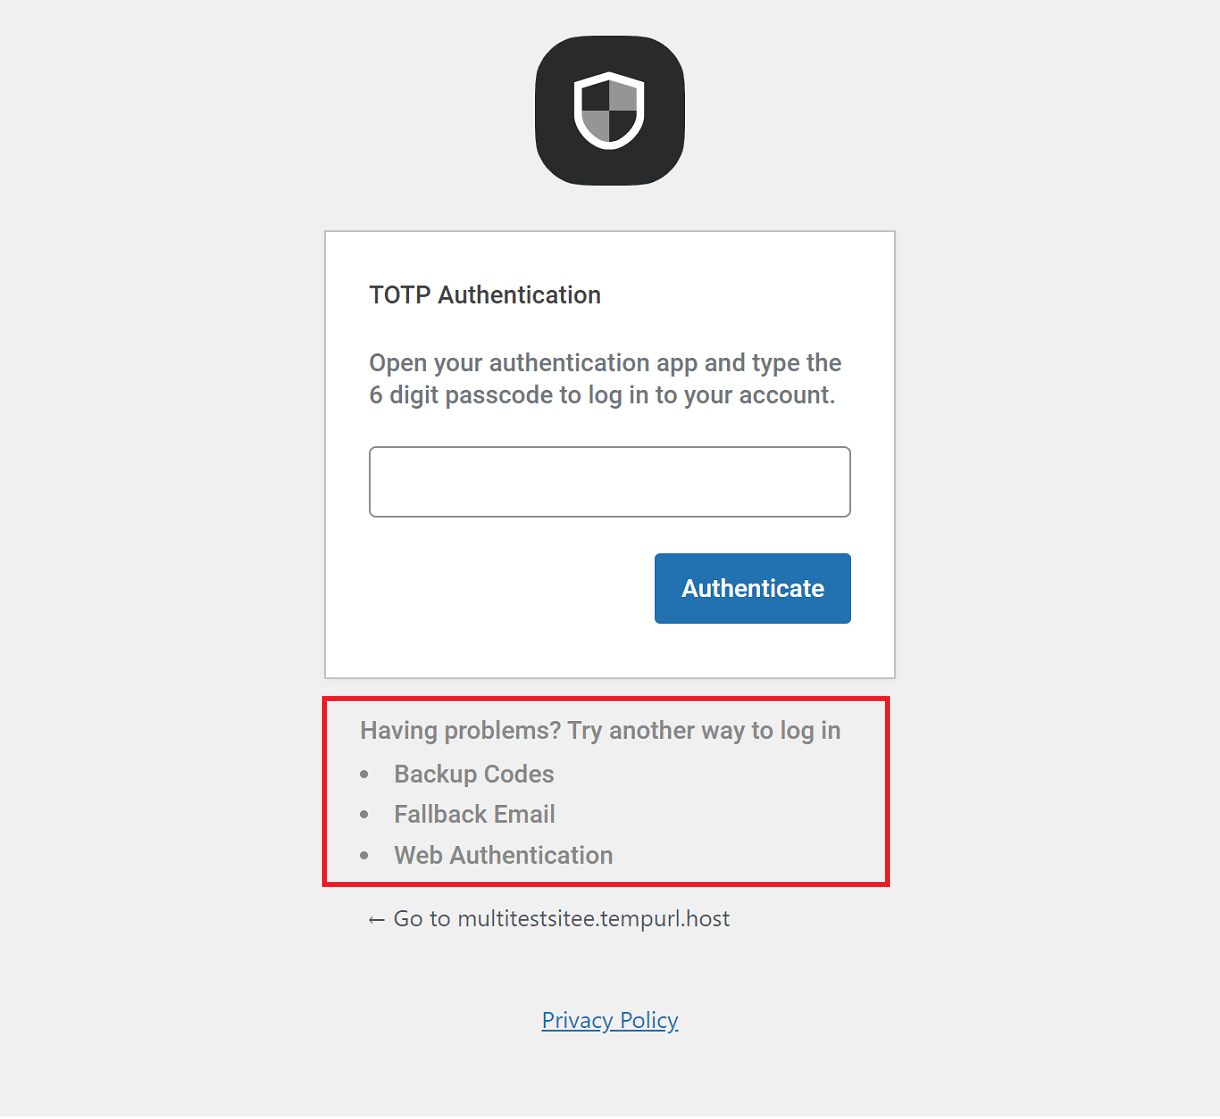
6.7.4 Password Rules
Link to chapter 7The tools in this section enable you to secure your site against compromised passwords, enforce the use of strong passwords, and force users to reset passwords.
Pwned Passwords
When this tool is enabled, passwords entered by your users in default login & registration forms, or when changing their password in their wp-admin profile, are checked against publicly accessible database breach records at haveibeenpwned.com
If a password entered by a user is found in the database breach records, the user will be forced to change their password, and will not be allowed to visit any other pages on your site until that is done.
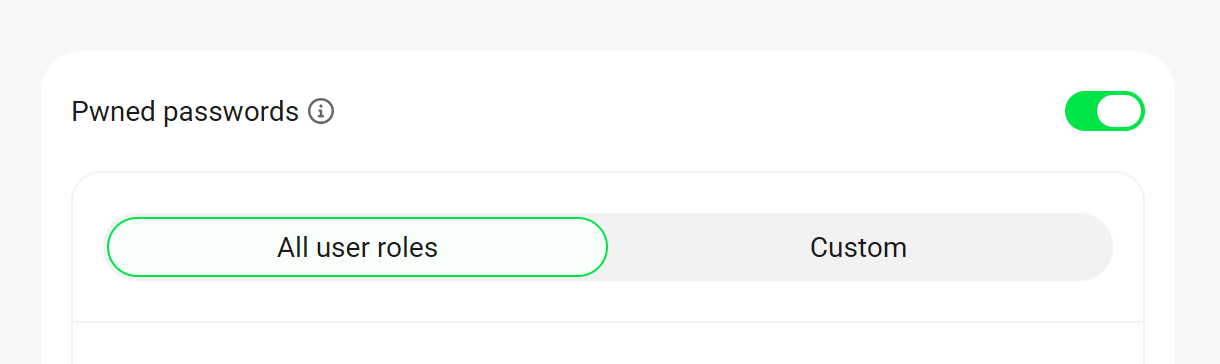
Note that this check is done securely; only a hashed partition of any password is transmitted to haveibeenpwned.com and checked.
Check out our blog post on Pwned Password Protection to find out more about how Defender helps secure your site against compromised passwords.
User Roles
Once activated, select the user roles for which you want to enable password checks by checking the corresponding box. Note that the Administrator role is enabled by default and cannot be disabled.
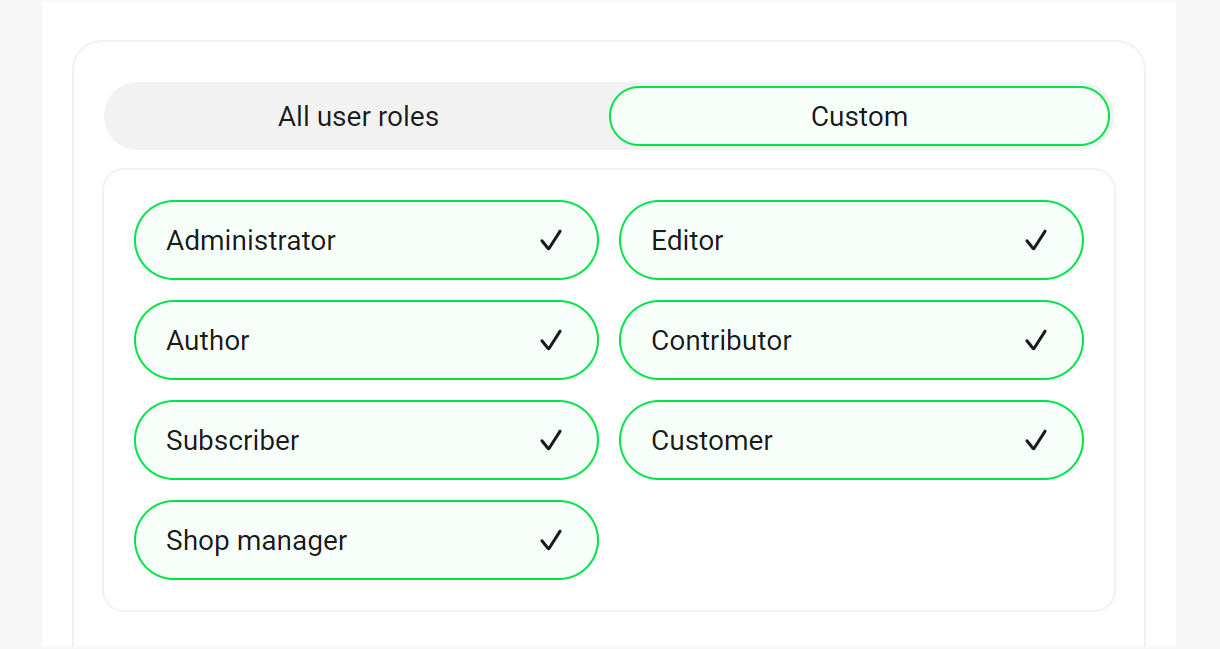
Customize message
You can customize the message that displays on the login and registration forms to any user with any of the above enabled roles who is forced to change a compromised password.
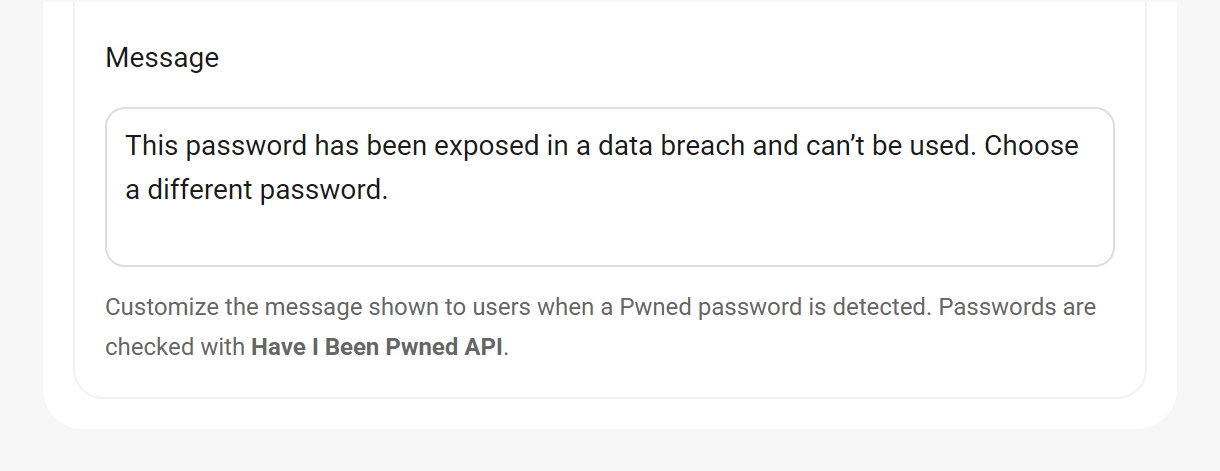
Remember to click the Save Changes button at the bottom of the screen when you’re done.
The next time users with the roles you have selected try to login or register, they will see your custom message, and will be forced to change their password.
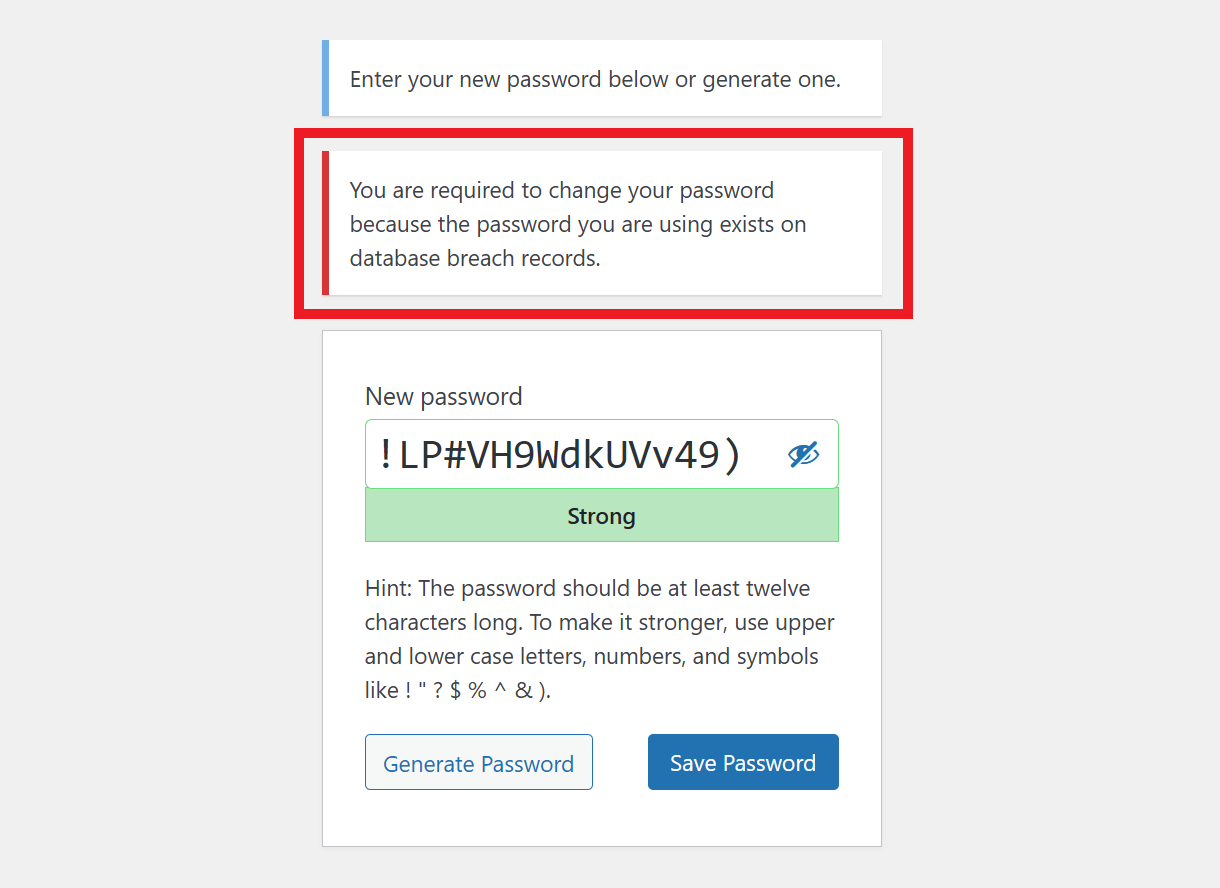
Strong Passwords
When enabled, any users who enter a weak password in default login & registration forms will be required to reset it to a stronger one.
When this option is enabled, all Generate Password buttons will automatically generate strong passwords that respect all criteria.
User Roles
Once activated, select the user roles for which you want to force strong passwords by checking the corresponding box. Note that the Administrator role is enabled by default and cannot be disabled.
Customize message
You can customize the message that displays on the login and registration forms to any user with any of the above enabled roles who is forced to use a strong password.

Remember to click the Save Changes button at the bottom of the screen when you’re done.
By default, WordPress recommends that a password should be at least twelve characters long, use upper and lower case letters, numbers, and symbols like ! ” ? $ % ^ & ).
The next time users with the roles you have selected try to login or register, they will see your custom message, and will be forced to include all of those elements in their passwords.
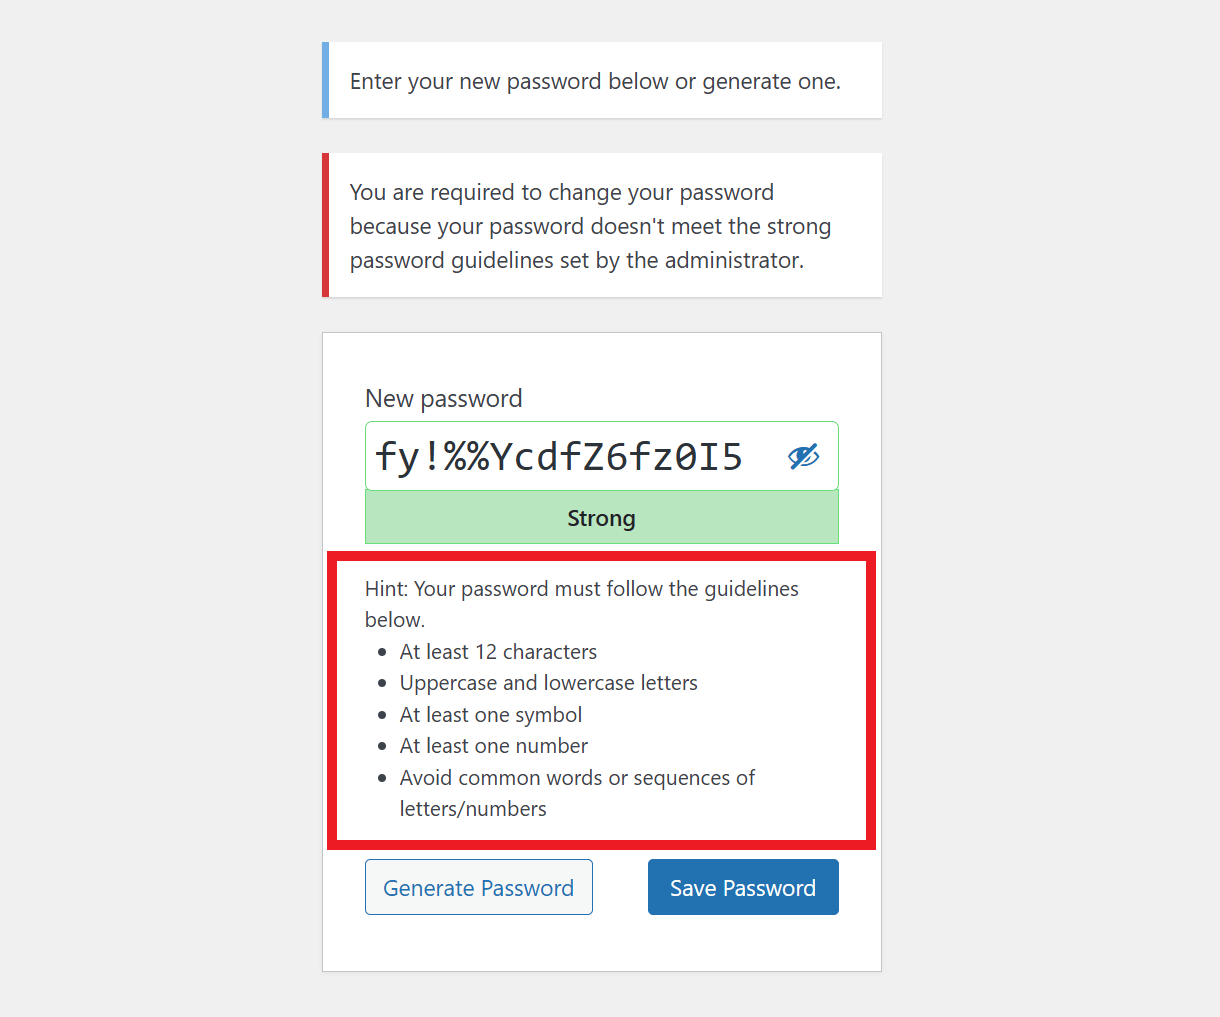
In addition to the default login, registration & password reset forms, this same information appears in your admin as a reminder when you manually create or edit a user, as well as in your own user profile.
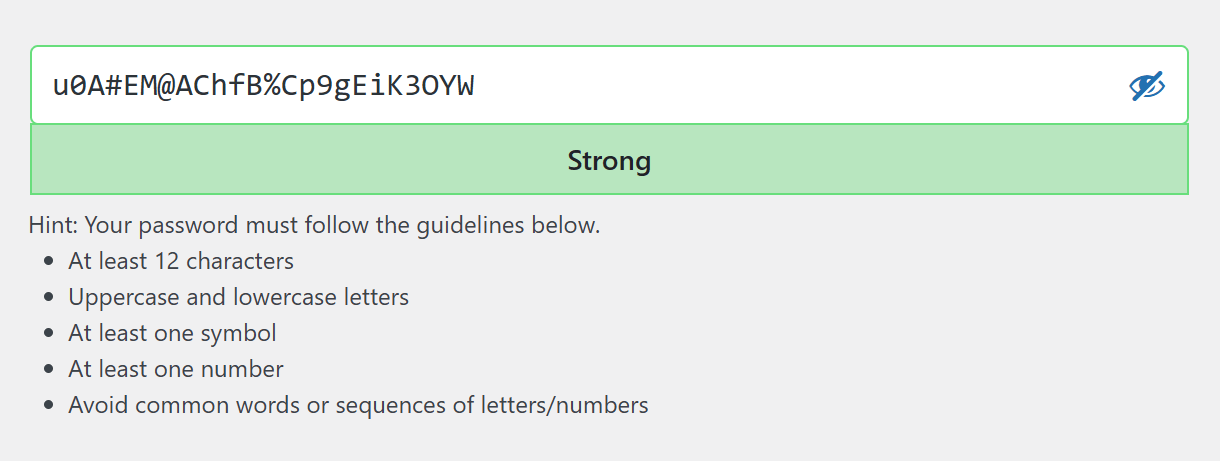
Integrations
Use this option to apply strong password rules to supported third-party plugins. Currently, WooCommerce is supported.
When enabled, you can select which WooCommerce forms should enforce strong passwords:
- Login
- Registration
- Lost Password
- Checkout

Reset Passwords
This tool enables you to force users with selected roles to reset their password anytime you need. This can be very helpful in case you suspect a possible data breach on your site.
Click the Force Reset Password button to enable the feature.

That will pop open a modal window where you can choose All User Roles or only Selected Roles, and customize the message that displays to users with those roles the next time they log in. Click the Reset Passwords button to confirm.

The next time users with the roles you have selected try to login, they will see your custom message, and will be forced to change their password.
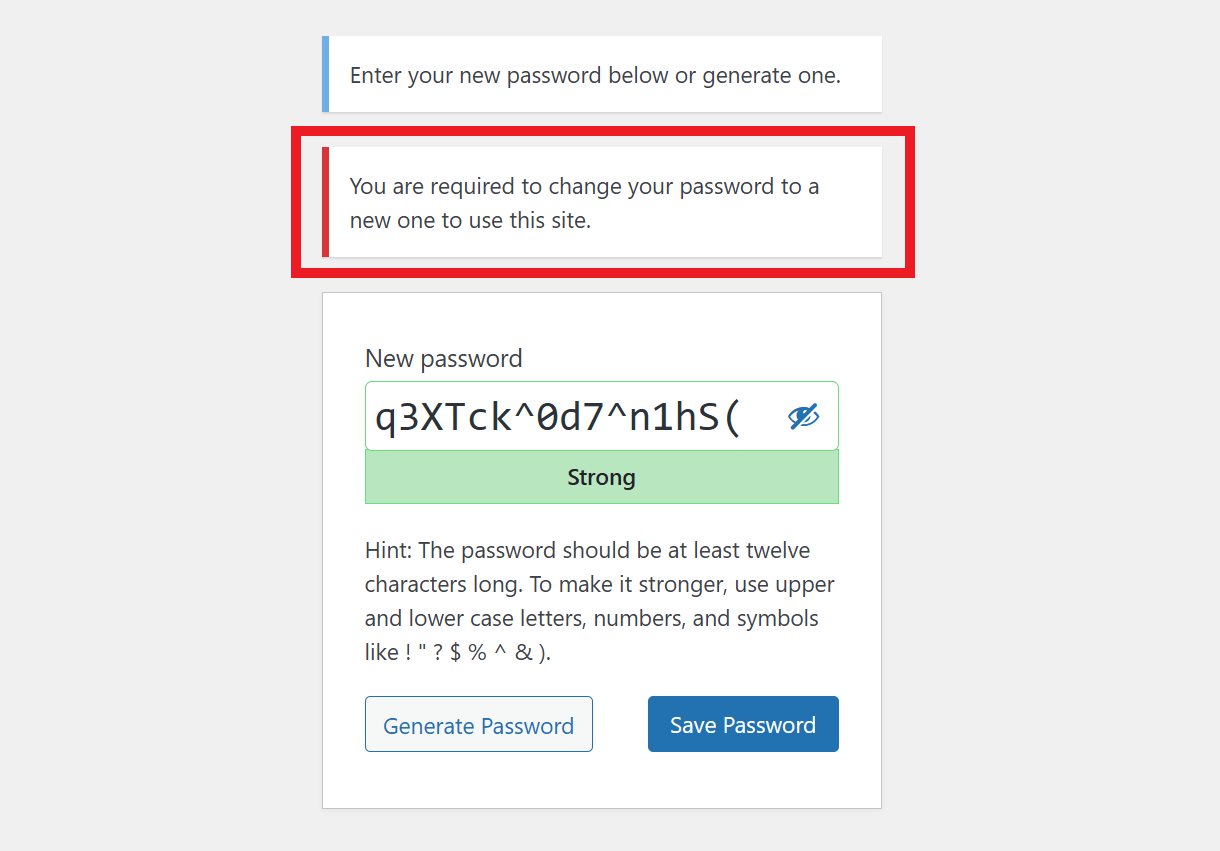
If a user tries to re-use the same password, or any other that they have used before, it will be refused and they will see this message when they click the Save Password button.

6.7.5 Session Security
Link to chapter 7Use these settings to protect your site from session hijacking, where attackers steal session tokens to impersonate users and gain unauthorized access to websites.

In addition to the options here, you may want to also consider adjusting the default WordPress login duration in the Hardening settings.
Idle timeout
Set the time, in hours, after which inactive users will be automatically logged out.
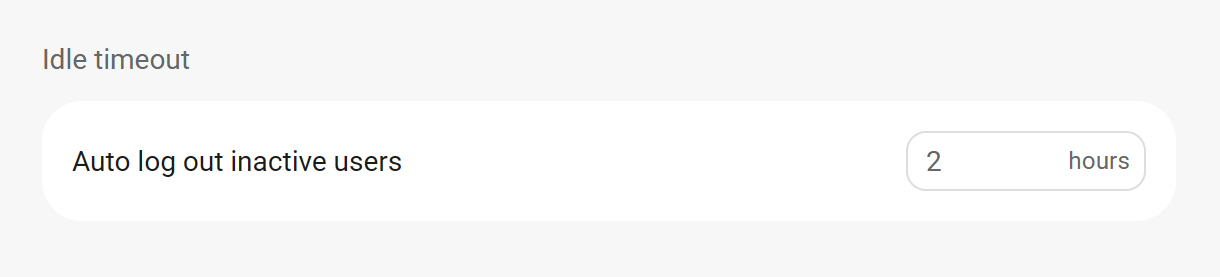
User session lock
Use these options to force users to log in again if any of the selected properties change (browser, hostname or IP address).

Note that this may cause frequent session locks for site users who may be using dynamic IP addresses.
User roles
Select the user roles for which the session protection rules should apply.

6.7.6 Bot Protection
Link to chapter 7Bot Protection adds a human verification system (CAPTCHA) to your website to prevent automated bots from engaging in abusive activities, while allowing legitimate users to interact with your site smoothly.
Defender supports two CAPTCHA providers:Google reCAPTCHA and Cloudflare Turnstile, each offering a different way to verify that users are human. Also see the Common Settings section below for details about options that apply to both captcha types.
Begin by toggling on the feature.
Google reCAPTCHA
reCAPTCHA Type
Defender supports Google reCAPTCHA v2 Checkbox, v2 Invisible, reCAPTCHA v3, and reCAPTCHA Enterprise. To configure reCAPTCHA for your website, first select your preferred reCAPTCHA type.
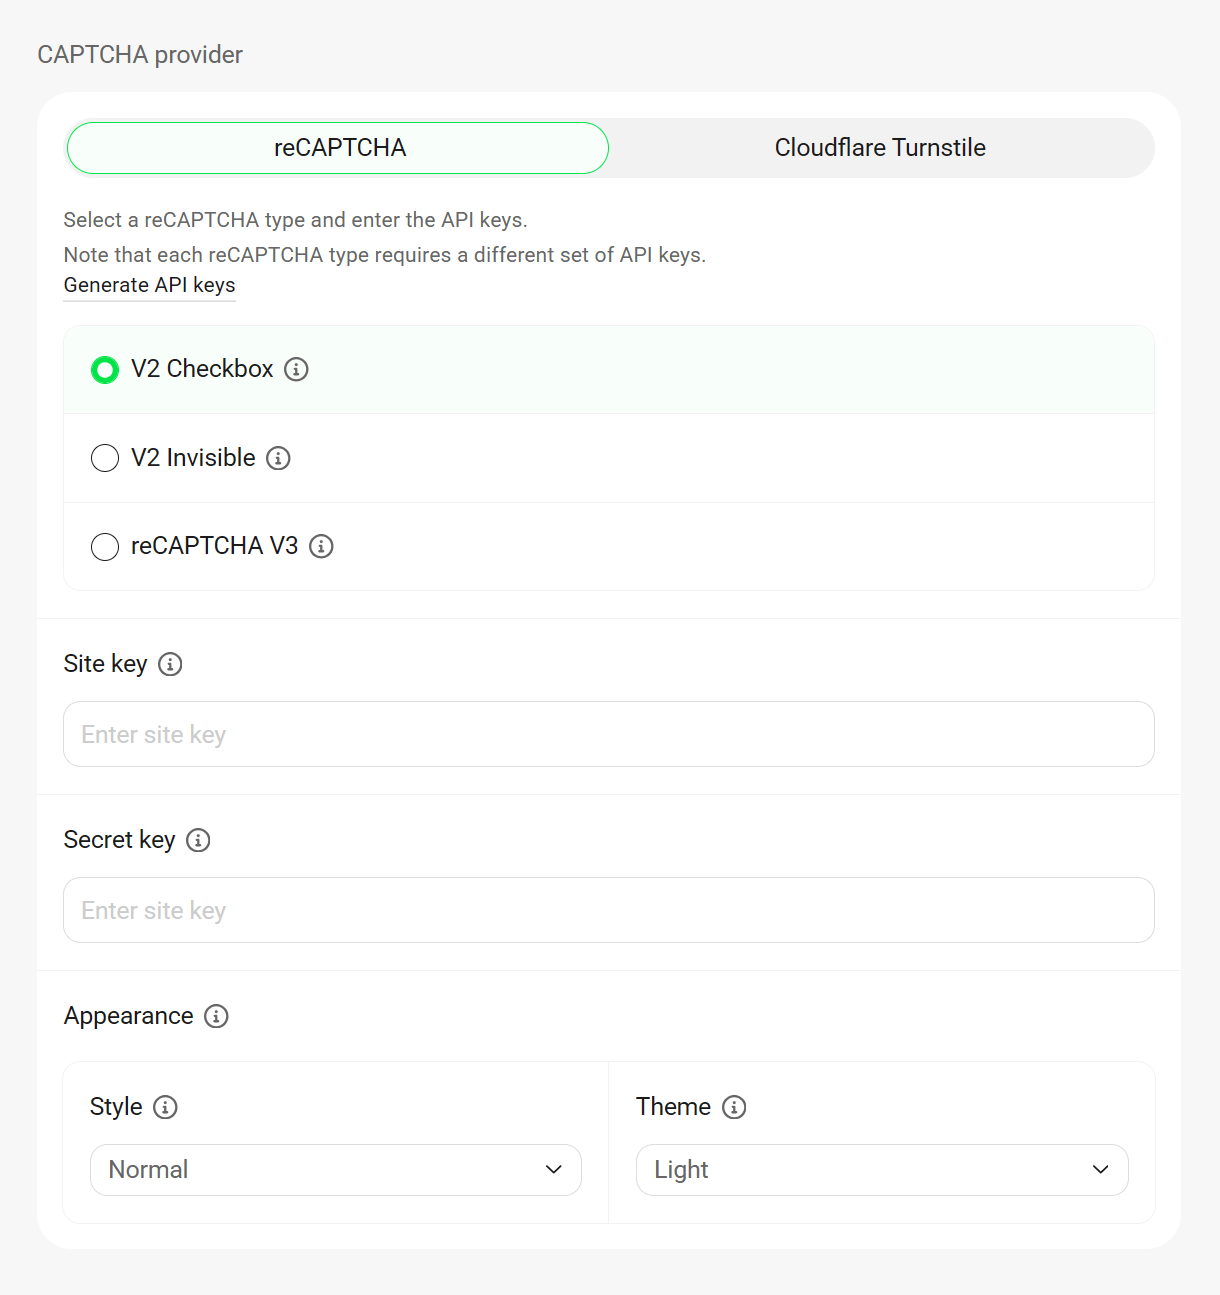
Read Google’s official documentation on how to create enterprise reCAPTCHA keys to understand the process in detail.
Log in to Google Cloud Console and create a new project or select an existing project
Read Google’s official documentation on how to create a new project in Google Cloud Console.
Enable the Enterprise reCAPTCHA API.

Go to the reCAPTCHA admin console.
In the reCAPTCHA keys section, click the + Create key link to create a new reCAPTCHA key.
Enter a display name to identify the keys and choose the Application Type as Web.
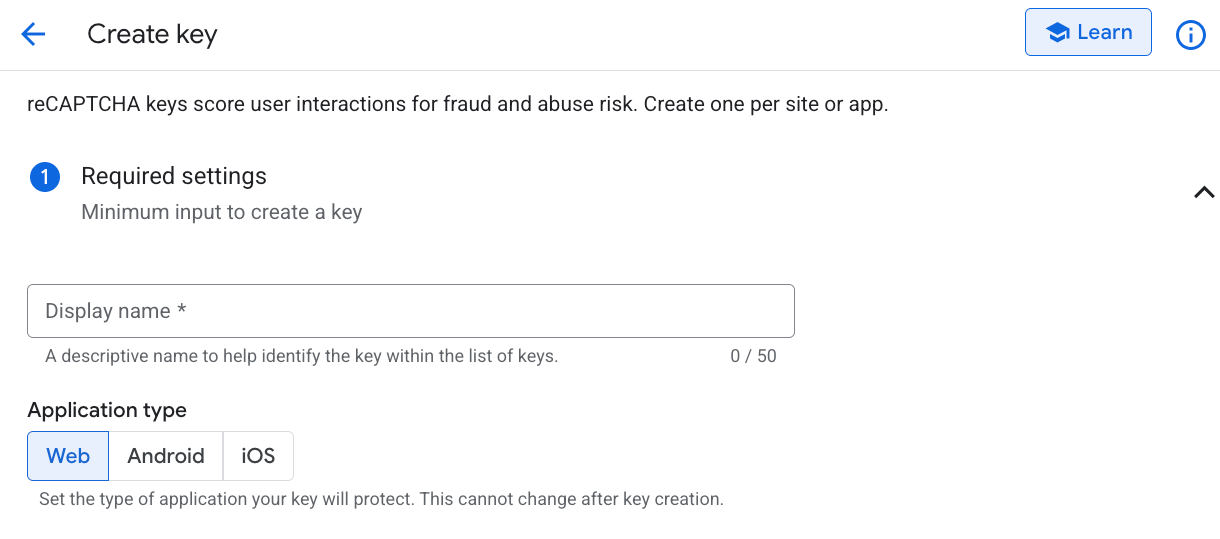
Enter your domain name in the New domain field and click Done to add it to the list. Then click Next step (optional) to continue.
If your multisite install has domain-mapped subsites, and you want the reCAPTCHA to work on them as well, you’ll need to add each of those custom domains to the Domains section, in addition to the main domain of your multisite.
Leave ‘Will you use challenges?’ disabled to create API keys for the score-based (v3) reCAPTCHA type.
To create API keys for the checkbox (v2) reCAPTCHA type, enable ‘Will you use challenges?’, keep Checkbox challenge selected, and set the Challenge difficulty to Easy, Balanced, or Hard.
Click Create key button to create the API key.

Copy the generated API key and paste the same key in both the Site Key and Secret Key fields on your site.
Finally, configure the reCAPTCHA type-specific settings. For V2 Checkbox, select your preferred reCAPTCHA size and color theme. For reCAPTCHA V3, select the score threshold below which reCAPTCHA verification should fail.
For more information about the different types of reCAPTCHA available, click here.
Cloudflare Turnstile
Defender supports Cloudflare Turnstile as a privacy-focused alternative to traditional CAPTCHA options.
To configure Cloudflare Turnstile on your website, you need to enter your Site and Secret keys in the fields below.

To get Cloudflare Turnstile set up, go here and click the Add widget button.
Add a descriptive Widget name, such as Defender widget.
Click the + Add Hostnames button under the Host Management section.
In the side panel that opens, enter your site domain in the Add a custom hostname field, and click the Add button.
Choose how you want the Cloudflare Turnstile widget to behave when users interact with your form. You can select from the following widget modes:
- Managed – Cloudflare automatically decides whether an interactive challenge is needed based on visitor data. If a challenge is shown, it’s a simple checkbox — no images or puzzles.
- Non-interactive – Displays a loading bar instead of an interactive element. Ideal if you want to avoid any user clicks, but still run a browser check in the background.
- Invisible – Completely hidden from users. The challenge runs silently in the background without any user interaction.

Click the Create button to generate the API keys.
In the next step, copy your Site Key and your Secret Key and paste it into the corresponding fields in Defender on your site.
Once done adding your keys , click the Save Settings button. If you have set up Cloudflare Turnstile correctly, you should see the widget preview.
If your API keys are incorrect or verification hasn’t completed, a notice will appear prompting you to check your Cloudflare API keys and try again.
Finally, select the widget size and theme you prefer for your site.
Common Settings
The following settings and options are available for both captcha types. Note that the images below illustrate what you’d see when Google reCPTCHA is enabled, but the functionality is identical when Turnstile is enabled.
Error Message

To customize the message shown to users when a captcha verification fails, enter a custom message in the Error Message field.
General

Language
By default, the captcha will be displayed in your website’s language. To display the captcha in a different language than your website, select a language from the Language dropdown menu.
Disable verification for logged in users
Toggle on this option to prevent captcha verification for logged-in users in comment forms, WooCommerce checkout pages, and BuddyPress group creation forms.
CAPTCHA locations

Enable captcha protection in any or all default WordPress locations: login form, register form, lost password form and/or comments forms.
WooCommerce
If WooCommerce is active on your site, you can toggle on support for that plugin and select the WooCommerce forms where the selected captcha type should be included.
BuddyPress

If BuddyPress is active on your site, you can toggle on support for that plugin and select the BuddyPress forms where the selected captcha type should be included.
6.8 Settings
Copy chapter anchor to clipboardThe Settings area is where you can configure defaults for many security tools, as well as set your preferences for translations, usage tracking and data retention.
6.8.1 Tools
Link to chapter 8Issues scan
Enable the scan types that should be performed when running a scan of your site. Note that all options are enabled by default when you first activate the plugin, or when you reset its settings.
- File change detection – According to the options you select here, Defender will check your WordPress core and plugin files against the official WP repository, and alert you to any modifications or additions to those files it may find.
- Outdated and removed plugins – With this option enabled, Defender will check if any installed plugins have been removed from the WordPress.org repository or have not received updates from their author in the last 2 years. There is no option to modify this time period, but you can override it with a filter if needed. See wpdef_scan_outdated_period in the Defender API Docs for details.
- Known vulnerabilities – With this option enabled, Defender will look for any published vulnerabilities in your installed plugins, themes, and WordPress core.
- Suspicious code – If you think your site may be compromised, enable this option to scan for any suspicious or potentially malicious code. Note that some themes & plugins may use risky code, so we recommend consulting with the plugin or theme developers before deleting any suspicious files found.
- Maximum File Size – If you wish to exclude files from scanning, you can set the maximum file size (in Mb) in the field provided. Defender will not scan files larger than the indicated size.
You can’t save changes to the Malware Scanning settings while a scan is in progress. Wait until the scan is complete before saving any adjustments.
If you enable the Known vulnerabilities option, please be sure to add Defender’s IP addresses to the allowlist in any plugin or server firewall feature you may be using. See our WPMU DEV IP Addresses document for more details.
When you run a Malware Scan with the Known vulnerabilities option enabled, you will also be alerted to any vulnerable plugins or themes directly on the Plugins & Themes screens in your site’s wp-admin.
Plugins with known vulnerabilities will be highlighted as below.
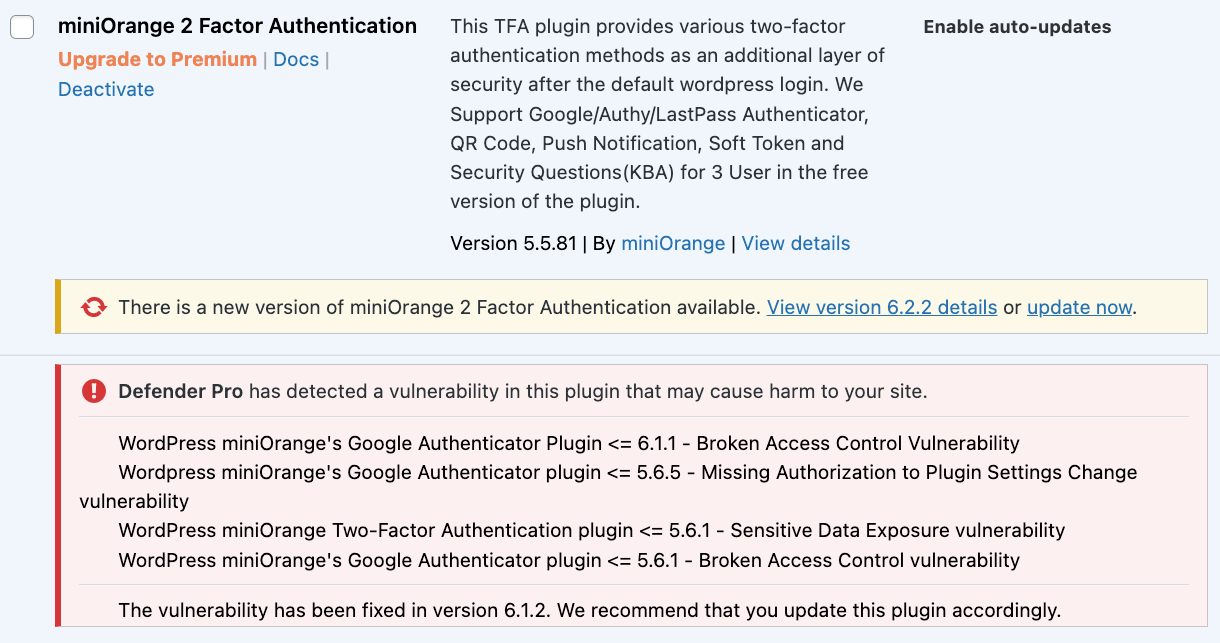
Themes with known vulnerabilities will be highlighted as below.
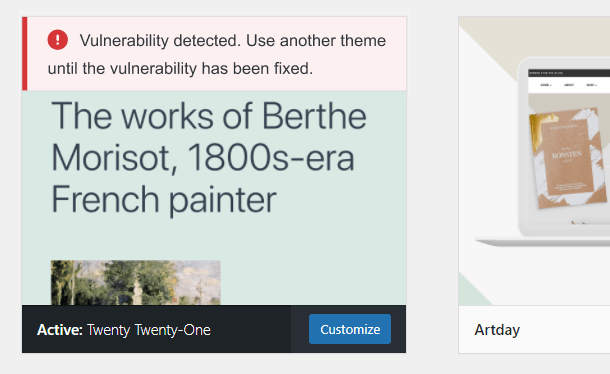
Quarantine
Here you can configure the retention period of quarantined files.
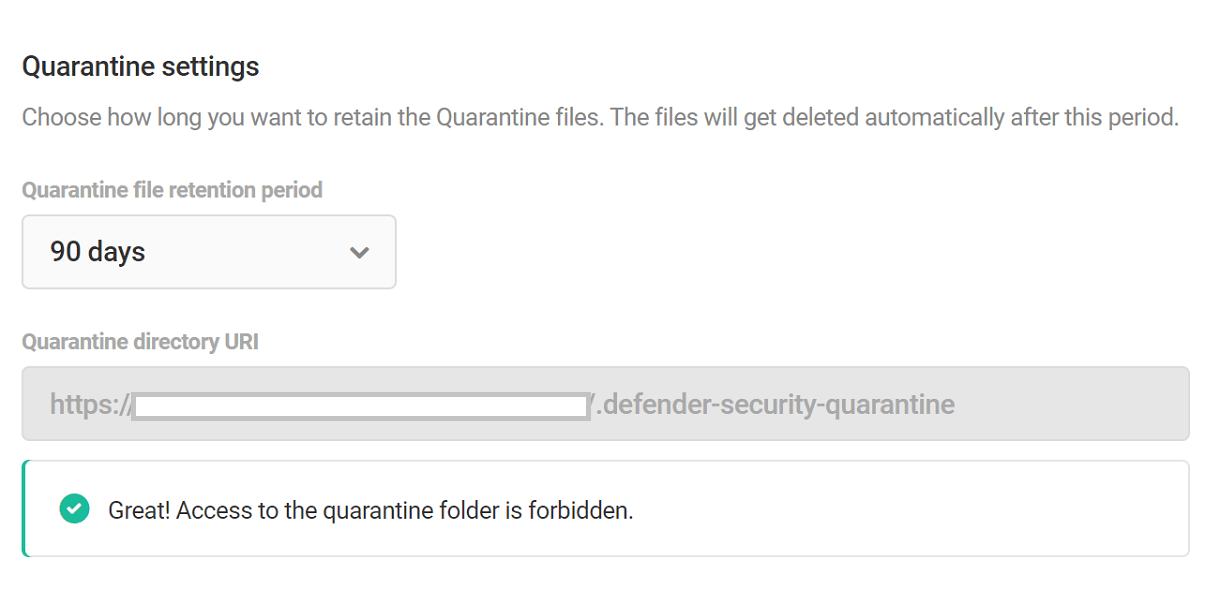
- File retention period – The amount of time you want to retain the quarantined files. Files can be quarantined for a minimum of 30 days and a maximum of 1 year.
- Quarantine directory URL – The path of the directory where the quarantined files will be stored. This path can’t be changed and access to this directory is forbidden by default. However, if you can see files in this directory, make sure your directory permissions are correctly configured, or contact our support heroes for assistance.
Firewall
Select the method you want the plugin to use to detect the IP addresses of your site visitors.
Automatic IP Detection (Recommended)

If this option is selected, Defender will automatically use the most secure method to detect users’ IP addresses. This method is recommended as it helps prevent spoofing and is compatible with a majority of sites.
If you choose this option, you should be able to view your IP in the Detected IP(s) section. If you don’t, then select the Manual IP detection option.
Manual IP Detection

- Use the REMOTE_ADDR built-in PHP function only. It offers a high level of security if it is compatible with your website. This is one of the suggested options if you know for certain that your website does not use a reverse proxy, Cloudflare, CDN, or any other method that proxies traffic to your site. You can also enable this option if you wish to force Defender to use PHP’s
$_SERVER['REMOTE_ADDR']variable. - Enable X-Forwarded-For HTTP header. Use this only if you have a front-end proxy, or else spoofing may occur.This option can be used if you are using Nginx, a load-balancer or a CDN as a front-end proxy and that proxy sends traffic to your server using the X-Forwarded-For HTTP header.It is not recommended to use this option if your site is not set up with a proxy configuration as that would allow users to spoof IP addresses, and Defender would miss logging visits that should be logged.
- Enable X-Real-IP HTTP header. Use this only if you have a front-end proxy, or else spoofing may occur.This option can be used if you are using Nginx, a load-balancer or a CDN as a front-end proxy and that proxy sends traffic to your server using the X-Real-IP HTTP header.
- Use the Cloudflare CF-Connecting-IP HTTP header. Choose this option only if you are routing your domain through Cloudflare.If your Cloudflare setup is configured to send the CF-Connecting-IP HTTP header, select this option to get the real visitor IP address. If you’re not sure if this is set for your site at Cloudflare, please contact their technical support for assistance. More information on Cloudflare request headers can be found here.
If you select either the X-Forwarded-For, X-Real-IP or CF-Connecting-IP options above, you can list the IPs of trusted proxy servers below. IPs should be entered one per line; IP ranges are not supported in this feature. If needed, you can copy the lists of Cloudflare IPV4 IPs and IPV6 IPs and simply paste them in.
If you are using Cloudflare as the proxy server, instead of manually entering the IPs, select Cloudflare from the Trusted IP Presets drop-down, and the IP addresses of Cloudflare’s proxy servers will be automatically fetched and updated.

If you select either the X-Forwarded-For, X-Real-IP or CF-Connecting-IP options above, and that header is missing from the $_SERVER global variable on your site, you’ll see a notice informing you of that so you can change your selection if needed.
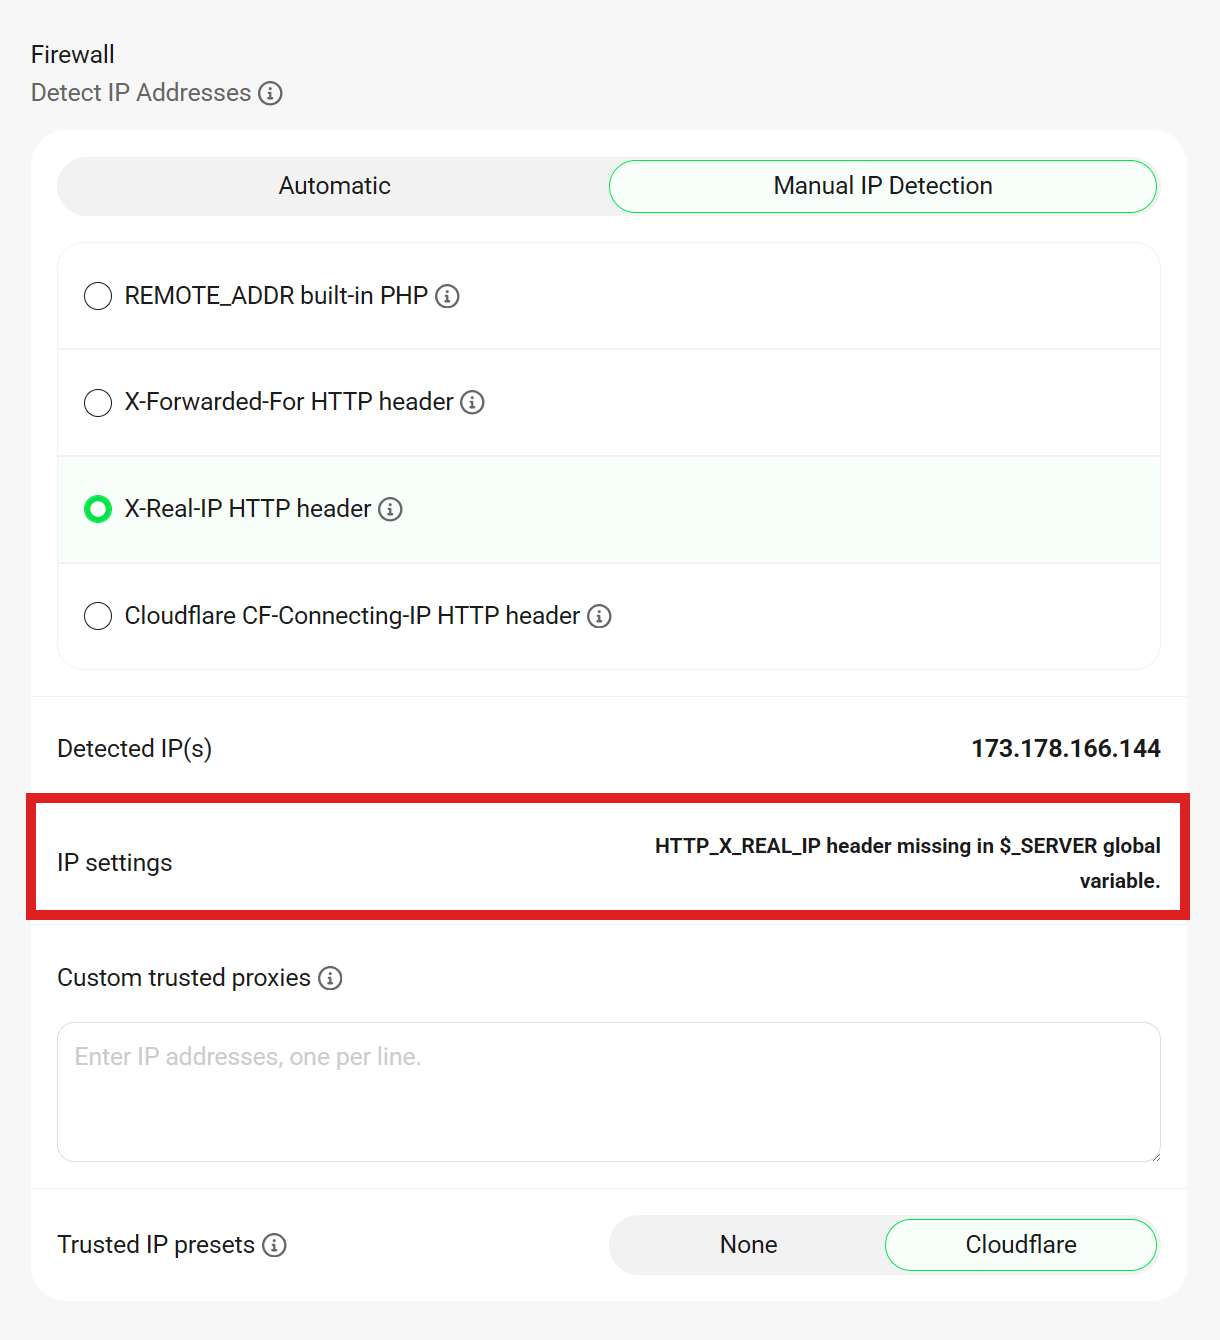 56
56
Clear Temporary IP Block List
By default, the Temporary IP Block List is never automatically cleared. If you’d like to automatically clear the block list on a regular basis, select your preferred clear interval from the dropdown list.

Logs Storage
Logs are cached on your local server to speed up load times. Choose how many days of logs you’d like to keep in local storage.

Delete Logs
Click Delete Logs to permanently delete all lockout logs from local storage.

Delete Lockouts
Click the Delete Lockouts button to permanently delete all the records in the lockouts table. Please note that after deleting the records, all locked-out users will be able to access the site.

Others
Blocklist Monitor
The Blocklist Monitor feature allows Defender to check Google’s blocklist multiple times each day to see if your site has been flagged for any reason.
Click the toggle to enable the Blocklist monitor. This feature has no options or settings, just enable and it will alert you via email if your site ever winds up on Google’s blocklist.
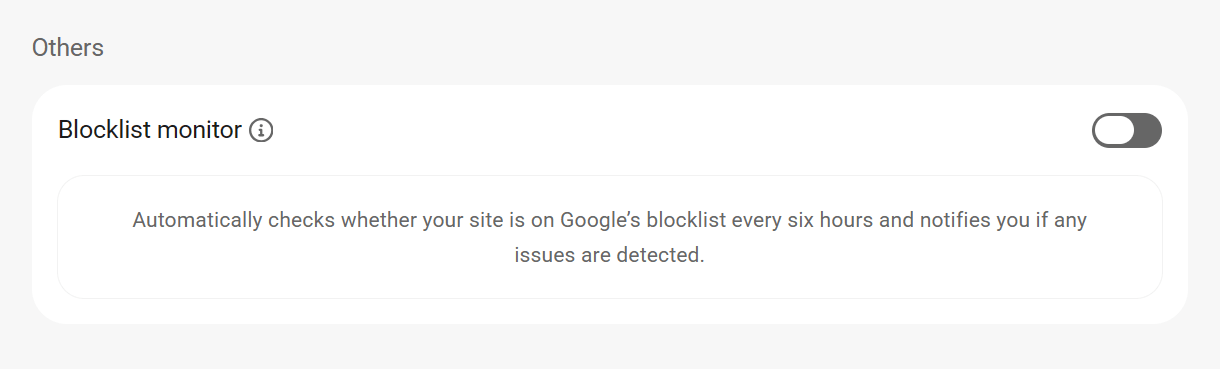
6.8.2 Security Policies
Link to chapter 8Security policy headers protect your site against the most likely types of attacks like XSS, code injection, clickjacking, etc. Defender enables you to follow best practices by enabling the following headers. For more info on security headers, see OWASP Secure Headers Project.
X-Frame-Options
This header tells browsers whether or not your pages can be embedded on other sites in frame, iframe or object tags.
- Sameorigin – This option allows content embedding only on the same site as the source of the content: your site.
- Deny – Select this option to disallow embedding your content anywhere.

For more info on this security header, see X-Frame-Options.
X-XSS-Protection
This header tells browsers how to handle the loading of pages if a cross-site-scripting attack is detected.
- Sanitize – This option will remove any unsafe parts from the page before rendering it in the browser if a cross-site-scripting attack is detected.
- Block – Select this option to prevent the page from rendering at all if an attack is detected.

For more info on this security header, see Cross Site Scripting (XSS).
X-Content-Type-Options
Enabling this security header reduces the opportunities to perform cross-site scripting attacks and compromise the website by preventing any asset from loading on your pages unless its MIME type matches the file type. This can be especially important if you allow users to upload files through a contact form for example as it prevents disguising malicious executable files as images.

For more info on this security header, see Reducing MIME type security risks.
Strict Transport
This header tells browsers your pages can only be loaded over secure HTTPS instead of plain HTTP. If you run an e-commerce site, for example, this is especially important to help prevent sensitive user information from being intercepted.
- HSTS Preload – With this option enabled, you can submit your site to Google to ensure browsers load your site over HTTPS only.
- Include Subdomains – This option only appears on subdomain-based multisites, and enables you to apply the rule to all the subsites as well.
- Browser Caching – This option sets the time for which the HSTS policy should be cached in browsers. The recommended minimum here is 30 days, but note that if you also enable the HSTS Preload option above, Google requires this to be set to at least 1 year.
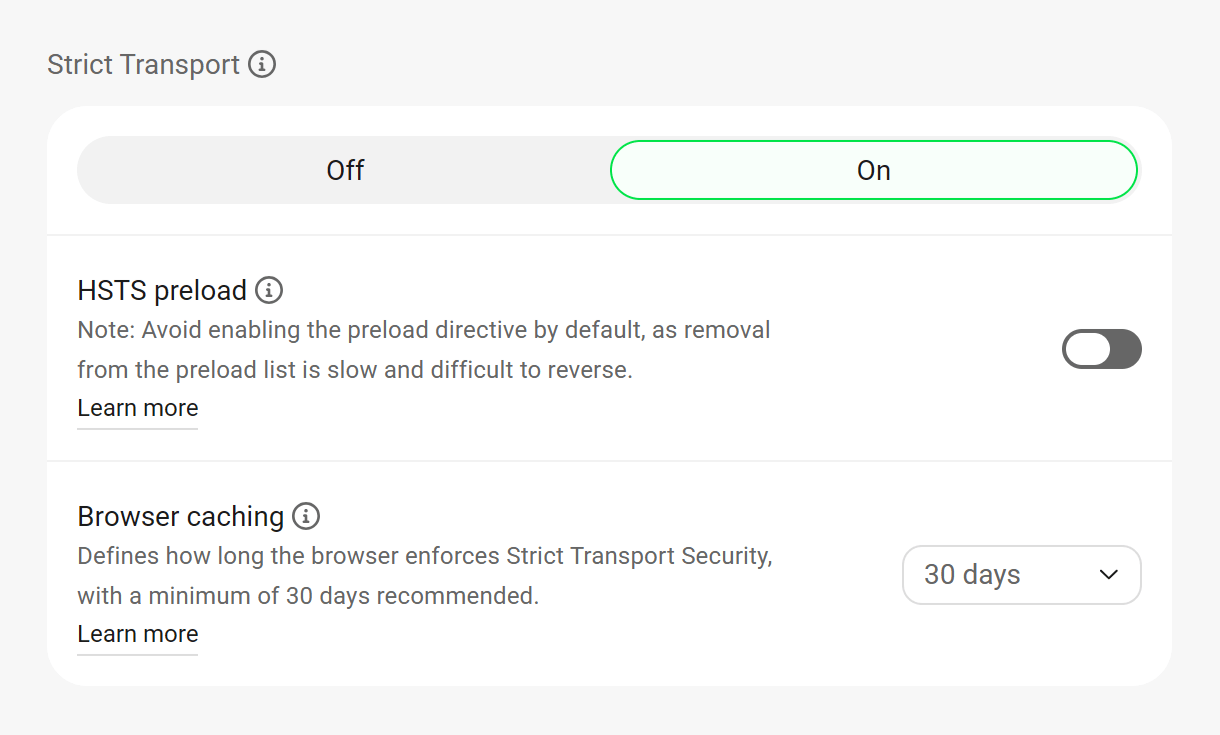
For more info on this security header, see Strict-Transport-Security.
Referrer Policy
Enable this security header and select the desired option to control what information is included in the referrer header when a user clicks a link that leads to another page or website.
- no-referrer – The Referer header will be omitted entirely. No referrer information is sent along with requests.
- no-referrer-when-downgrade – This is the default behavior if no policy is specified, or if the provided value is invalid. The origin, path, and querystring of the URL are sent as a referrer when the protocol security level stays the same (HTTP→HTTP, HTTPS→HTTPS) or improves (HTTP→HTTPS), but isn’t sent to less secure destinations (HTTPS→HTTP).
- origin – Only send the origin of the document as the referrer. For example, a document at https://example.com/page.html will send the referrer https://example.com/.
- origin-when-cross-origin – Send the origin, path, and query string when performing a same-origin request, but only send the origin of the document for other cases.
- same-origin – A referrer will be sent for same-site origins, but cross-origin requests will send no referrer information.
- strict-origin – Only send the origin of the document as the referrer when the protocol security level stays the same (HTTPS→HTTPS), but don’t send it to a less secure destination (HTTPS→HTTP).
- strict-origin-when-cross-origin – Send the origin, path, and querystring when performing a same-origin request, only send the origin when the protocol security level stays the same while performing a cross-origin request (HTTPS→HTTPS), and send no header to any less-secure destinations (HTTPS→HTTP).
- unsafe-url – Send the origin, path, and query string when performing any request, regardless of security. (This policy will leak potentially-private information from HTTPS resource URLs to insecure origins. Carefully consider the impact of this setting.)

For more info on this security header, see Referrer Policy.
Permissions-Policy
This header tells browsers which domains are allowed to use features that the browser supports when your pages are embedded elsewhere. For example, Chrome supports the following features: accelerometer, ambient-light-sensor, autoplay, camera, encrypted-media, fullscreen, geolocation, gyroscope, magnetometer, microphone, midi, payment, picture-in-picture, speaker, usb, vr
- On site & iframe – This option will only allow browsers features to be used on the same domain as the page itself: your site.
- All – This option will allow browser features to be used on any domain.
- Specific Origins – This option allows you to specify on which domains browsers are allowed to use their supported features.
- None – This option disables all browser features on all domains.
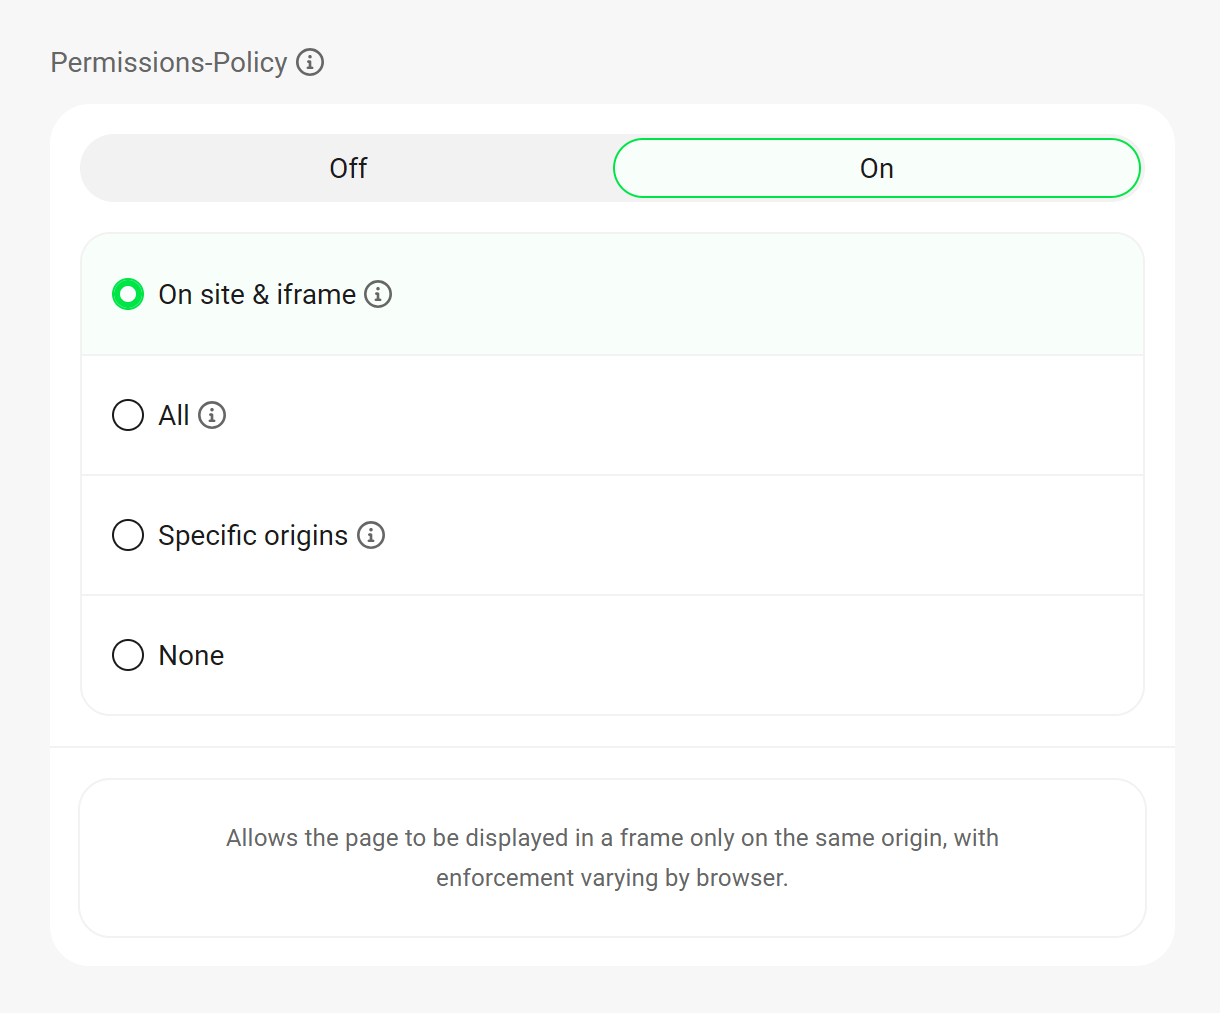
For more info on this security header, see Permissions Policy.
6.8.3 Reports & Alerts
Link to chapter 8This is where you can set up a schedule for regular security scans of your site, and configure the recipients who should receive reports for any scan type you enable and/or alerts if firewall lockouts begin to spike.
Schedule Scan (Pro only)

To configure your scan schedule, click the currently displayed time & date in the Schedule Scan section. In the panel that slides open, first select whether you want to run the scan on a daily, weekly or monthly basis. Then select the day and/or time the scan should run, and click Set schedule.
- Daily – Select the time of day that the scan should run.
- Weekly – Select the day of the week and time of day for the scan to run.
- Monthly – Select the day of the month and time of day for the scan to run.

Next, select which scan types should be run on the schedule you just set up. Click the links below to be directed to the sections in this guide where you’ll find information about each type.
- Issues – This report contains details about any suspicious PHP functions, known issues, or published vulnerabilities that Defender has discovered within a site’s code
- Hardening – This contains a reminder of any security hardening recommendations that have not yet been actioned.
- Firewall – This report contains information about the login, 404 and/or banned user agent lockouts that have occurred since the last scheduled scan.
- Audit Log – This report contains a summary of events that have been logged since the last scheduled scan
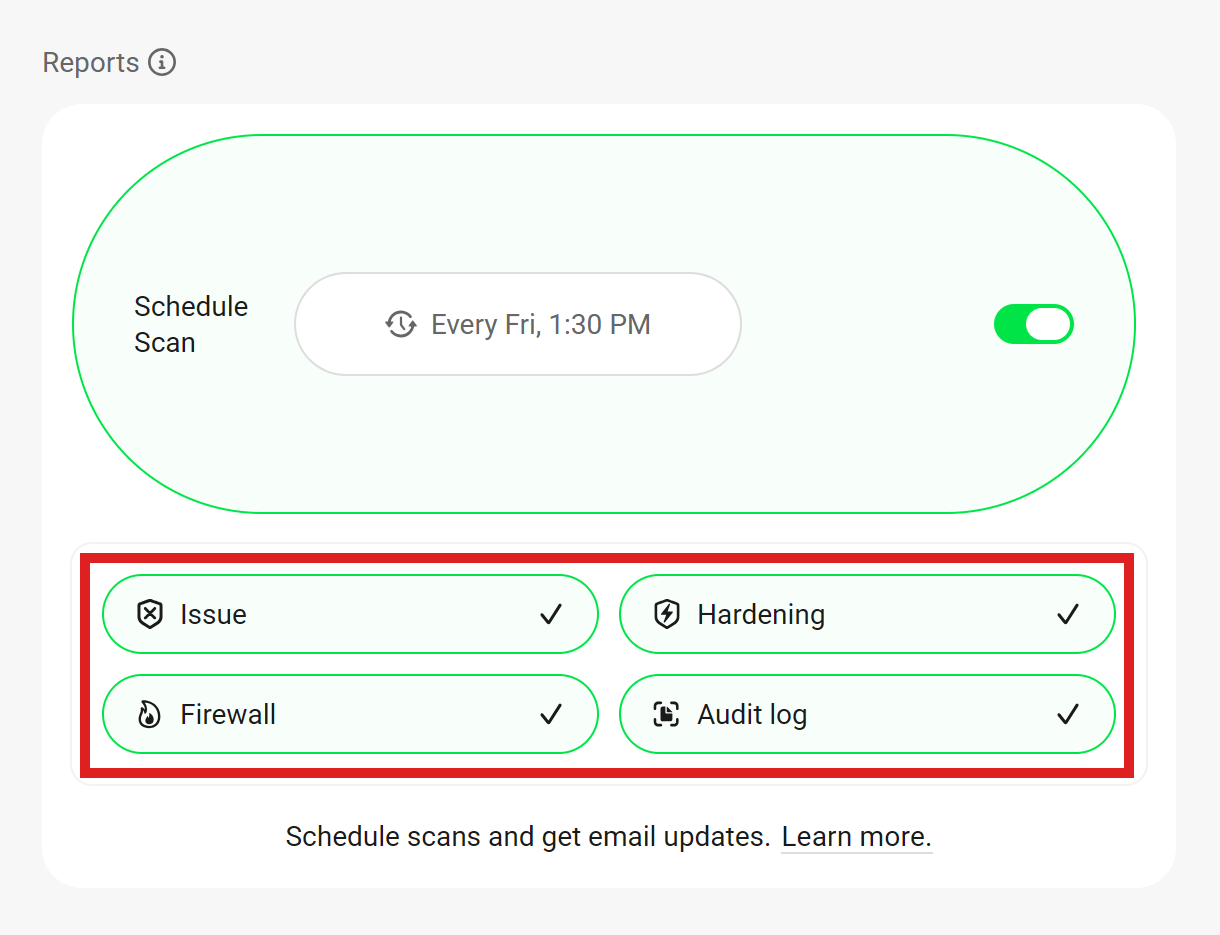
Firewall Alert
Enable the Firewall Alert option to receive an alert if lockouts begin to spike.
If you’re getting too many emails about repeated lockouts for the same IP addresses, you can disable those emails for a defined period of time.
- Threshold – Choose how many lockouts should occur before emails are disabled.
- Cooldown period – Choose for how long emails should be disabled.

Recipients
This is where you can manage the users who will receive reports according to the schedule you set above. For each recipient, you can enable any or all report types to be sent.
You can add existing users or invite new users by email. Any user you add must confirm their subscription by clicking the confirmation link in a subscription email that will be sent to them after being added as a recipient. Once their subscription has been confirmed, they’ll receive the emails.
Subscribed users can unsubscribe at any time by clicking on the Unsubscribe link in any email they receive.

To add a new recipient, click the New recipient button. In the panel that slides open, first select whether you want to invite a new user by email, or if you want to add an existing user of your site.

Invite by email
To add a recipient by email, fill in the First name, Last name and Email fields. When you’re done, click Send verification email.
Search WordPress user
To add an existing user from your site, start typing the name, username or email address of the user you want to add in the search bar and click the + Add button in their row to add them. By default, the site administrator is already added as a subscribed user.

Edit recipients
If you need to adjust the reports & alerts a specific user receives, click the gear icon in their row and select Edit recipient.
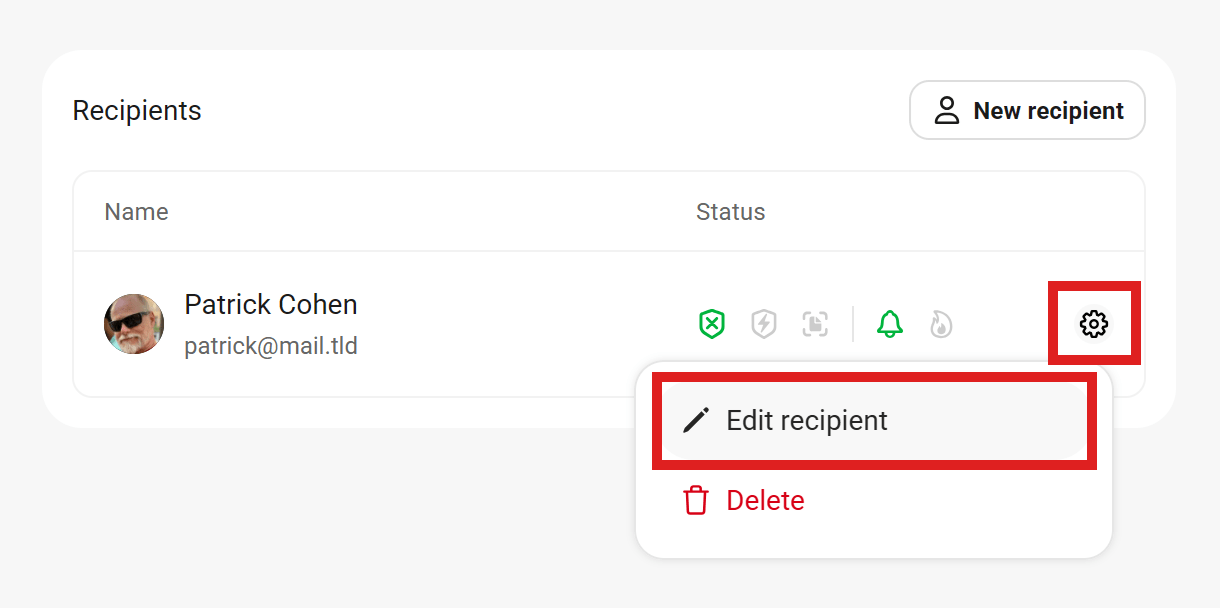
In the panel that slides open, you can enable or disable sending of any reports & alerts under the Subscription tab, as well as edit their first & last names under the Profile tab.

6.8.4 Configs
Link to chapter 8The configs module allows you to save your Defender configurations to reapply them to your other sites in just a few clicks.
You’ll see a Default Security Config available, which is the same one that can be applied directly in your Hub. Also, when you first install the plugin, a Basic Config is created from your current site configuration.
Save a Configuration
To save your current configuration, click Save New.

Then type in the name and optional description you want to use to identify your configuration and click Save or click Cancel to exit without saving.
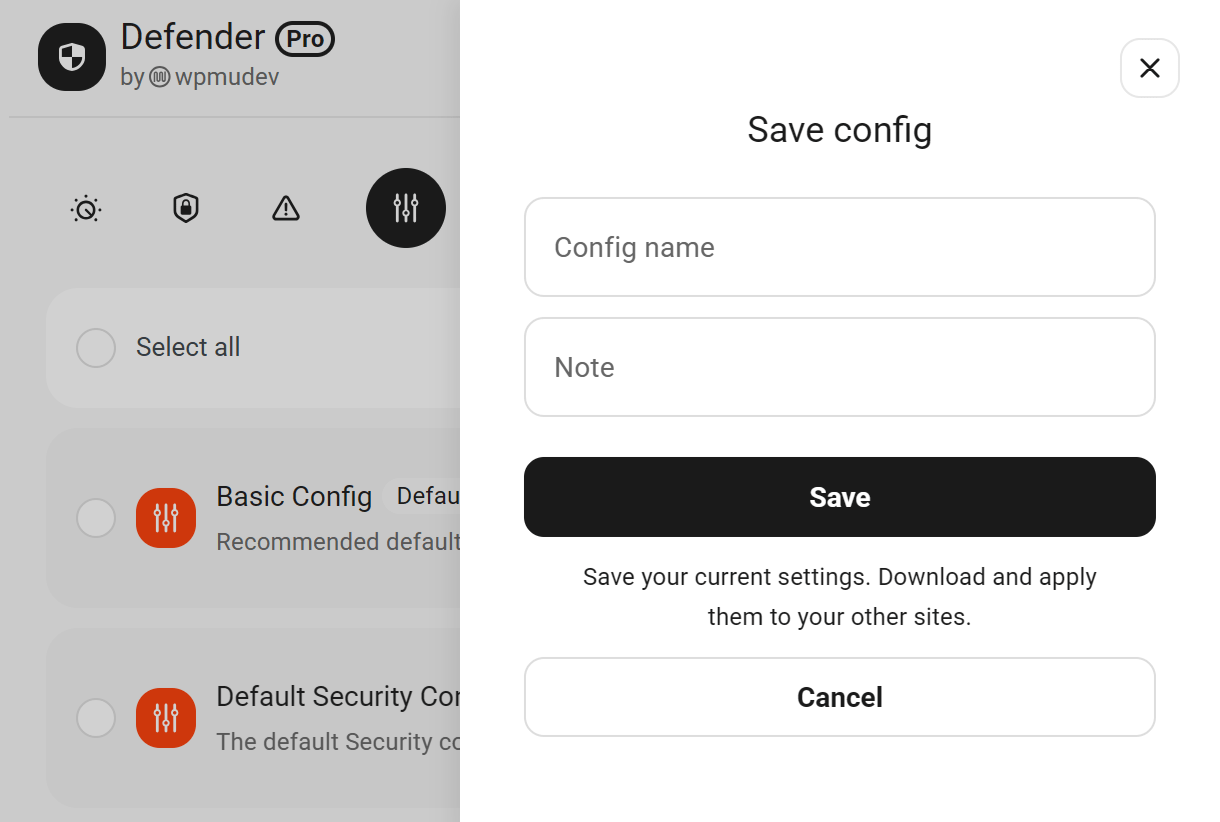
You can save an unlimited number of configurations so there is no need to be frugal with how many configurations you save for your sites. All configurations will be listed alphabetically according to the names you set.
If you want to view more information about your saved configuration, simply click on it to reveal a list showing you which modules are active for that configuration.
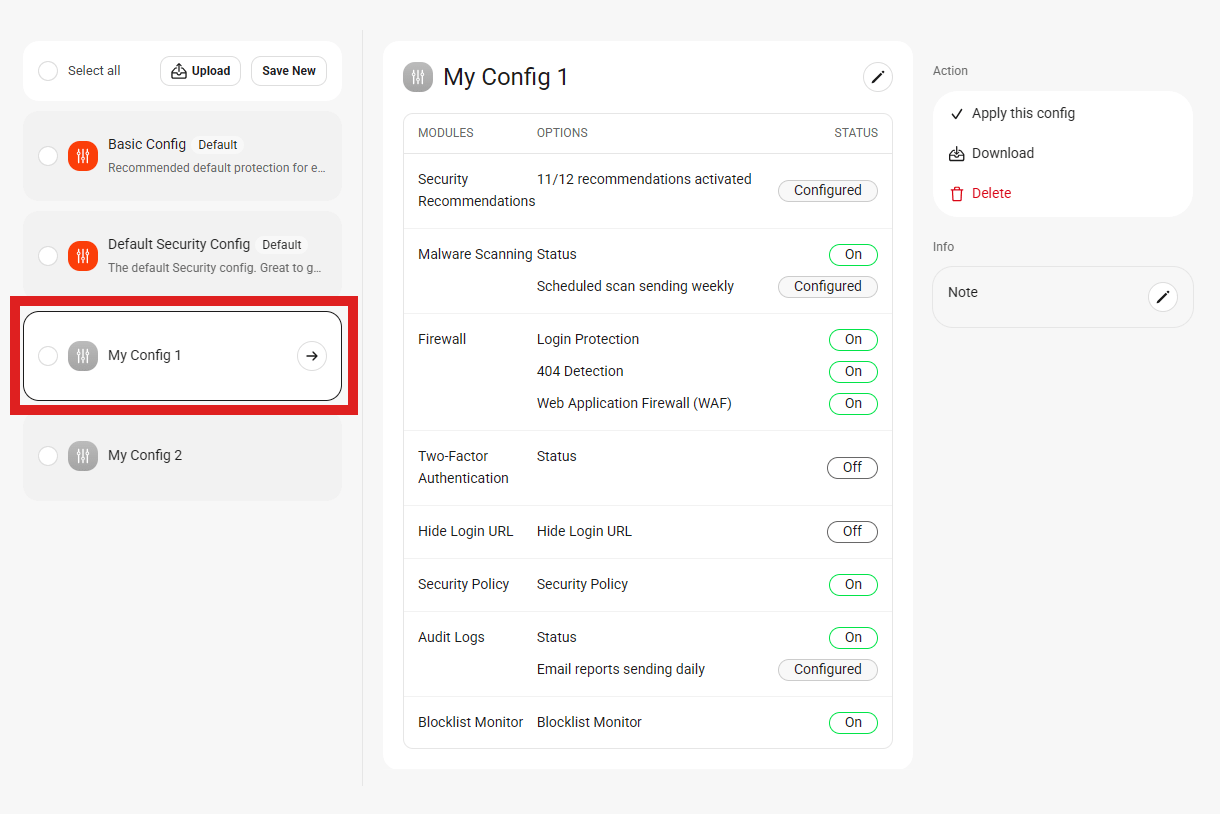
Edit a Configuration
Click the pencil icon next to the config’s name or note to edit that specific information.

Please note that you can’t change the name or the description of the Basic and Default configs.
Upload a Configuration
If you have downloaded a configuration from another site and you want to apply it to your current one, click the Upload button at the top of the Configs screen, and select the relevant .json file from your computer. Defender will import your settings and add the imported config to your list of Preset Configs.

Apply a Configuration
You can apply any config to your site by clicking Apply this config from the Actions options.
Exceptions
It’s important to note that the following settings & options cannot be exported or imported from one site to another with a custom config as they must be configured individually on each site.
Two-Factor Authentication
This must be enabled and configured manually on each site.
Security recommendations
- Update WordPress to the latest version – A WordPress update needs to be a manual action made by a user. Defender can’t update WP when applying the config.
- Change default admin user account – Requires a manual action from a user to assign a new username.
- Update PHP to the latest version – This is an action that a plugin cannot do. PHP version needs to be configured on the server itself.
- Prevent Information Disclosure – Defender does not know in advance on which server a site is running, or where this config setting needs to be applied. So this would need to be enabled manually per site even if included in an exported config.
- Prevent PHP Execution – Same as above.
- Hide error reporting – This depends on the server type and settings. Some hosts do not allow plugins to make changes to the wp-config.php file. Applying these recommendations would trigger errors.
- Disable file editor – Same as above.
Settings and Options Stored in Configs
In the lists below, you’ll find a breakdown of all settings and their available options included in the config file:
Security Recommendations
- Security Recommendations – Recommendations: List of default security recommendations (Multiple values are stored)
- Security Recommendations – Actioned: User-defined list of actioned security recommendations (Multiple values are stored)
- Security Recommendations – Ignored: User-defined list of ignored security recommendations (Multiple values are stored)
- Security Recommendations – Notification: Active | Inactive
- Security Recommendations – Notification reminder: Daily | Weekly | Monthly (Single value is stored)
- Security Recommendations – Notification recipients: User-defined list of recipients (Multiple values can be stored)
Malware Scanning
- File change detection: Active | Inactive
- Scan core files: Active | Inactive
- Scan plugin files: Active | Inactive
- Known vulnerabilities check: Active | Inactive
- Suspicious code check: Active | Inactive
- Outdated & removed plugins: Active | Inactive
- Maximum file size: User-defined size in MB (Single value is stored)
- Malware scanning report: Active | Inactive
- Malware scanning report – Recipients: Active | Inactive
- Malware scanning report – Recipients: User-defined list of recipients (Multiple values can be stored)
- Malware scanning notification: Active | Inactive
- Malware scanning notification – Send notifications when no issues are detected: Active | Inactive
- Malware scanning notification – Send notifications when Defender fails to scan the files: Active | Inactive
- Malware scanning notification – Recipients: User-defined list of recipients (Multiple values can be stored)
- Malware scanning notification – Subject line when an issue is found: User-defined subject line (Single value is stored)
- Malware scanning notification – Subject line when no issues are found: User-defined subject line (Single value is stored)
- Malware scanning notification – Subject line when scan fails: User-defined subject line (Single value is stored)
- Malware scanning notification – Email body when an issue is found: User-defined email body (Single value is stored)
- Malware scanning notification – Email body when no issues are found: User-defined email body (Single value is stored)
- Malware scanning notification – Email body when scan fails: User-defined email body (Single value is stored)
- Malware scanning settings – Schedule scanning: Active | Inactive
- Malware scanning settings – Frequency: Daily | Weekly | Monthly (Single value is stored)
- Malware scanning settings – Day of the week: User-defined day of the week (Single value is stored)
- Malware scanning settings – Day of the month: User-defined day of the month (Single value is stored)
- Malware scanning settings – Time of the day: User-defined time of the day (Single value is stored)
Firewall
- Login protection: Active | Inactive
- Login protection – Failed login attempts: User-defined number of attempts to trigger a lockout (Single value is stored)
- Login protection – Failed login lockout timeframe: User-defined time period in seconds to monitor failed attempts (Single value is stored)
- Login protection – Lockout duration type: Timeframe | Permanent (Single value is stored)
- Login protection – Lockout duration: User-defined lockout duration (Single value is stored)
- Login protection – Lockout duration unit: Seconds | Minutes | Hours (Single value is stored)
- Login protection – Lockout message: User-defined lockout message (Single value is stored)
- Login protection – Banned usernames: User-defined list of banned usernames (Multiple values can be stored)
- 404 Detection: Active | Inactive
- 404 Detection – 404 hits: User-defined number of 404 errors to trigger a lockout (Single value is stored)
- 404 Detection – Timeframe: User-defined time period in seconds to monitor 404 hits (Single value is stored)
- 404 Detection – Lockout duration type: Timeframe | Permanent (Single value is stored)
- 404 Detection – Lockout duration: User-defined lockout duration (Single value is stored)
- 404 Detection – Lockout duration unit: Seconds | Minutes | Hours (Single value is stored)
- 404 Detection – Lockout message: User-defined lockout message (Single value is stored)
- 404 Detection – Files, folders, and file types allowlist: User-defined allowlist (Multiple values can be stored)
- 404 Detection – Files, folders, and file types blocklist: User-defined blocklist (Multiple values can be stored)
- 404 Detection – Exclusions: Active | Inactive
- Local blocklist – Blocklist: User-defined blocked IPs (Multiple values can be stored)
- Local blocklist – Allowlist: User-defined allowed IPs (Multiple values can be stored)
- Local blocklist – Location blocklist: User-defined list of nations to block (Multiple values can be stored)
- Local blocklist – Location allowlist: User-defined list of nations to allow (Multiple values can be stored)
- Local blocklist – Location license key: Maxmind licence key (Single value is stored)
- Local blocklist – Lockout message: User-defined lockout message (Single value is stored)
- Firewall notification: Active | Inactive
- Firewall notification – Login protection lockout: Active | Inactive
- Firewall notification – 404 detection lockout: Active | Inactive
- Firewall notification – Recipients: User-defined list of recipients (Multiple values can be stored)
- Firewall notification – Limit email notifications for repeated lockouts: Active | Inactive
- Firewall notification – Lockout threshold for email suppression: User-defined number of lockouts before notifications are suppressed (Single value is stored)
- Firewall notification – Cool off period for email suppression: User-defined duration to pause notifications (Single value is stored)
- Firewall report: Active | Inactive
- Firewall report – Recipients: User-defined list of recipients (Multiple values can be stored)
- Firewall report – Frequency: Daily | Weekly | Monthly (Single value is stored)
- Firewall report – Day of the week: User-defined day of the week (Single value is stored)
- Firewall report – Day of the month: User-defined day of the month (Single value is stored)
- Firewall report – Time of the day: User-defined time of the day (Single value is stored)
- Firewall settings – Logs storage: User-defined number of days to keep event logs locally (Single value is stored)
- Path to MaxMind archive on site: File path to the locally stored MaxMind GeoLite2 archive (Single value is stored)
- Firewall settings – Clear temporary IP block list: Never | Daily | Weekly | Monthly (Single value is stored)
- User agent banning: Active | Inactive
- User agent banning lockout message: User-defined lockout message (Single value is stored)
- User agent blocklist: User-defined blocklist (Multiple values can be stored)
- User agent allowlist: User-defined allowlist (Multiple values can be stored)
- AntiBot global firewall: Active | Inactive
- User agent – Empty headers: Active | Inactive
- Local blocklist – Sync with the custom IPs block/allow list: Active | Inactive
Two Factor Authentication
- Two factor authentication: Active | Inactive
- Fallback email: Active | Inactive
- User roles: User-defined list of roles with two-factor authentication enabled (Multiple values can be stored)
- Force authentication: Active | Inactive
- Force authentication custom warning message: User-defined warning message (Single value is stored)
- Force authentication – User roles: User-defined list of roles required to use two-factor authentication (Multiple values can be stored)
- Custom graphic above login fields: Active | Inactive
- Custom graphic type: Upload | Link (Single value is stored)
- Custom graphic link: User-defined link (Single value is stored)
- Uploaded custom graphic URL: URL of the custom graphic uploaded by the user (Single value is stored)
- Email subject: User-defined email subject line (Single value is stored)
- Email body: User-defined email body (Single value is stored)
- Email sender: User-defined sender (Single value is stored)
- App title: User-defined title that appears in the Authenticator app (Single value is stored)
Mask Login Area
- Mask login area: Active | Inactive
- Masking URL slug: User defined custom URL slug used to replace the default WordPress login URL (Single value is stored)
- Redirect traffic: Off | Choose redirect page | Custom URL (Single value is stored)
- Custom URL: User-defined URL (Single value is stored)
- Redirect page: User defined redirect page (Single value is stored)
Security Headers
- X-Frame-Options: Active | Inactive
- X-Frame-Options mode: Sameorigin | Deny (Single value is stored)
- X-XSS-Protection: Active | Inactive
- X-XSS-Protection mode: Sanitize | Block (Single value is stored)
- X-Content-Type-Options: Active | Inactive
- X-Content-Type-Options mode: nosniff (Single value is stored)
- Strict Transport: Active | Inactive
- Strict Transport – HSTS Preload: Active | Inactive
- Strict Transport – Include subdomains: Active | Inactive
- Strict Transport – Browser caching: User-defined duration for which browsers should cache and enforce the Strict Transport Security policy (Single value is stored)
- Referrer policy: Active | Inactive
- Referrer information: No Referrer | No Referrer When Downgrade | Origin | Origin When Cross-Origin | Same-Origin | Strict-Origin | Strict-Origin When Cross-Origin (Single value is stored)
- Permissions policy: Active | Inactive
- Permissions policy mode: On site & iframe | All | Specific Origins | None (Single value is stored)
- Permissions policy – Specific origins URLS: User-defined list of allowed origin URLs (Multiple values can be stored)
Settings
- Uninstallation – Settings: Preserve | Reset (Single value is stored)
- Uninstallation – Data: Keep | Remove (Single value is stored)
- Translation: User-defined language (Single value is stored)
- Usage tracking: Active | Inactive
- High contrast mode: Active | Inactive
Pwned Passwords
- Pwned passwords: Active | Inactive
- User roles: User-defined list of roles that require pwned password checks (Multiple values can be stored)
- Custom message: User-defined custom message (Single value is stored)
Strong Passwords
- Strong passwords: Active | Inactive
- Strong passwords – User roles: User-defined list of roles that require setting a strong password (Multiple values can be stored)
- Custom message: User-defined custom message (Single value is stored)
Audit logging
- Audit logging: Active | Inactive
- Storage: User-defined retention period for storing event logs before automatic removal (Single value is stored)
- Audit logging report: Active | Inactive
- Audit logging report – Recipients: Active | Inactive
- Audit logging report – Recipients: User-defined list of recipients (Multiple values can be stored)
- Audit logging report – Frequency: Daily | Weekly | Monthly (Single value is stored)
- Audit logging report – Day of the week: User-defined day of the week (Single value is stored)
- Audit logging report – Day of the month: User-defined day of the month (Single value is stored)
- Audit logging report – Time of the day: User-defined time of the day (Single value is stored)
Blocklist Monitor
- Blocklist Monitor: Active | Inactive
Session Protection
- Session protection: Active | Inactive
- Idle session timeout: User-defined period of inactivity before automatically logging out a session (Single value is stored)
- User roles: User-defined list of roles to which idle timeout and session lock apply (Multiple values can be stored)
- User session lock: Browser | Hostname | IP Address (Multiple values can be stored)
6.8.5 Other Settings
Link to chapter 8Here you can enable accessibility mode, and configure how your Defender settings and other data should be handled if you uninstall the plugin.
Accessibility

In the accessibility section, you can enable High Contrast mode. After enabling this option, the plugin will increase the visibility and accessibility of elements and components to meet WCAG AAA requirements.
Data & Settings
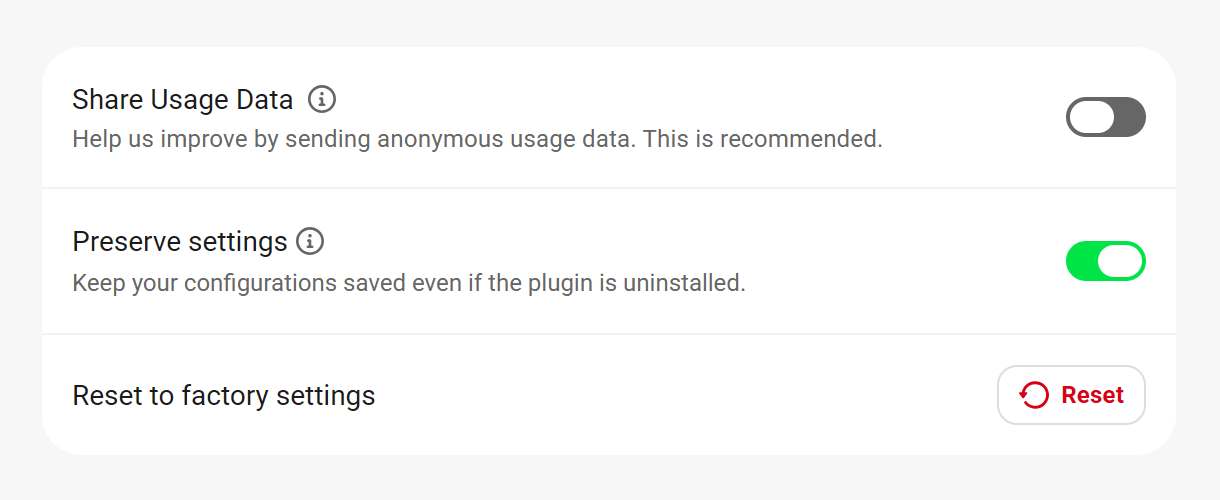
Share Usage Data
To enable usage tracking, toggle on Share Usage Data. Usage tracking is incredibly useful for our designers and enables us to learn more about what features you use and don’t use. It is a completely anonymous feature and helps us deliver more relevant features in the future. See our Privacy documentation for more information about the data we collect.
[wpmudev_ note title=”Usage Tracking when White Label is enabled”]When White Label is activated in the WPMU DEV Dashboard, only users with permission to access the WPMU DEV Dashboard will be able to see the usage tracking option.[/wpmudev_note]
Preserve settings
If you ever wish to uninstall Defender from your site, it’s a good idea to toggle on the Preserve option to save your current configuration in case you want to reinstall the plugin at a later time. This option ensures the following is saved:
- Settings – This includes every module’s configuration options.
- Data – This includes stored information, such as logs, statistics and other bits of information stored over time..
- Quarantine Data – This includes any quarantined files and their respective SQL table data.
Reset to factory settings
If you wish to reset everything in Defender to its default state like when you first installed it, click the Reset button.
